Azure AD
How to Register an Application in Azure AD?
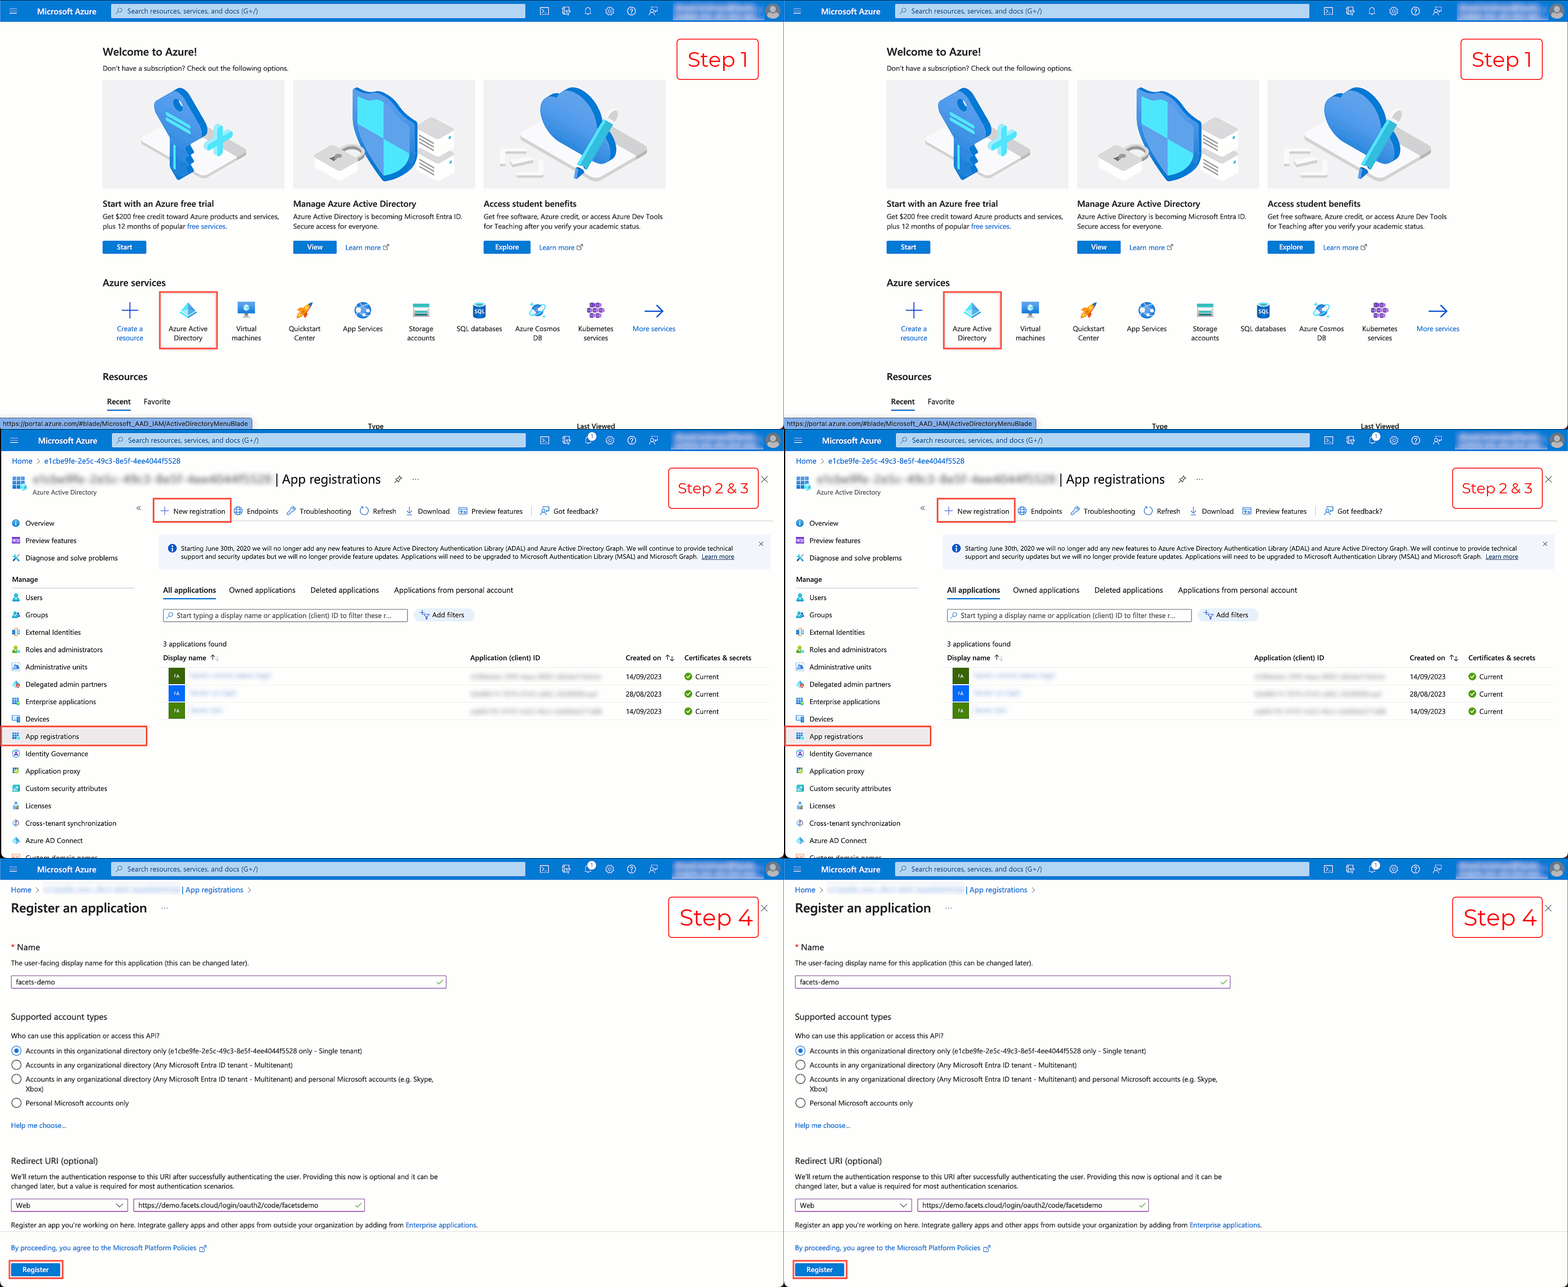
- Login to your Azure portal and under Azure Services, select Azure Active Directory.
- Under Manage, select App Registrations from the left pane.
- Click New Registration.
- In the Register an application page, do the following:
- Mention the Name and select the Supported account types.
- In Redirect URI, under Select a platform, select Web and mention the URI in the below format.
https://<control-plane-url>/login/oauth2/code/<registration-ID>
For example:https://demo.facets.cloud/login/oauth2/code/facetsdemo - Click Register.
- Replace
<control-plane-url>in the above link with your organization's Control Plane URL.- The value of
<registration-ID>provided in the URL needs to be used in the Control Plane. Please make a note of it. Additionally, please ensure that the<registration-ID>does not contain any spaces or special characters.
You have successfully registered your application in Azure AD.
Click on the image to expand
How to Add Integration for Azure AD in Facets?
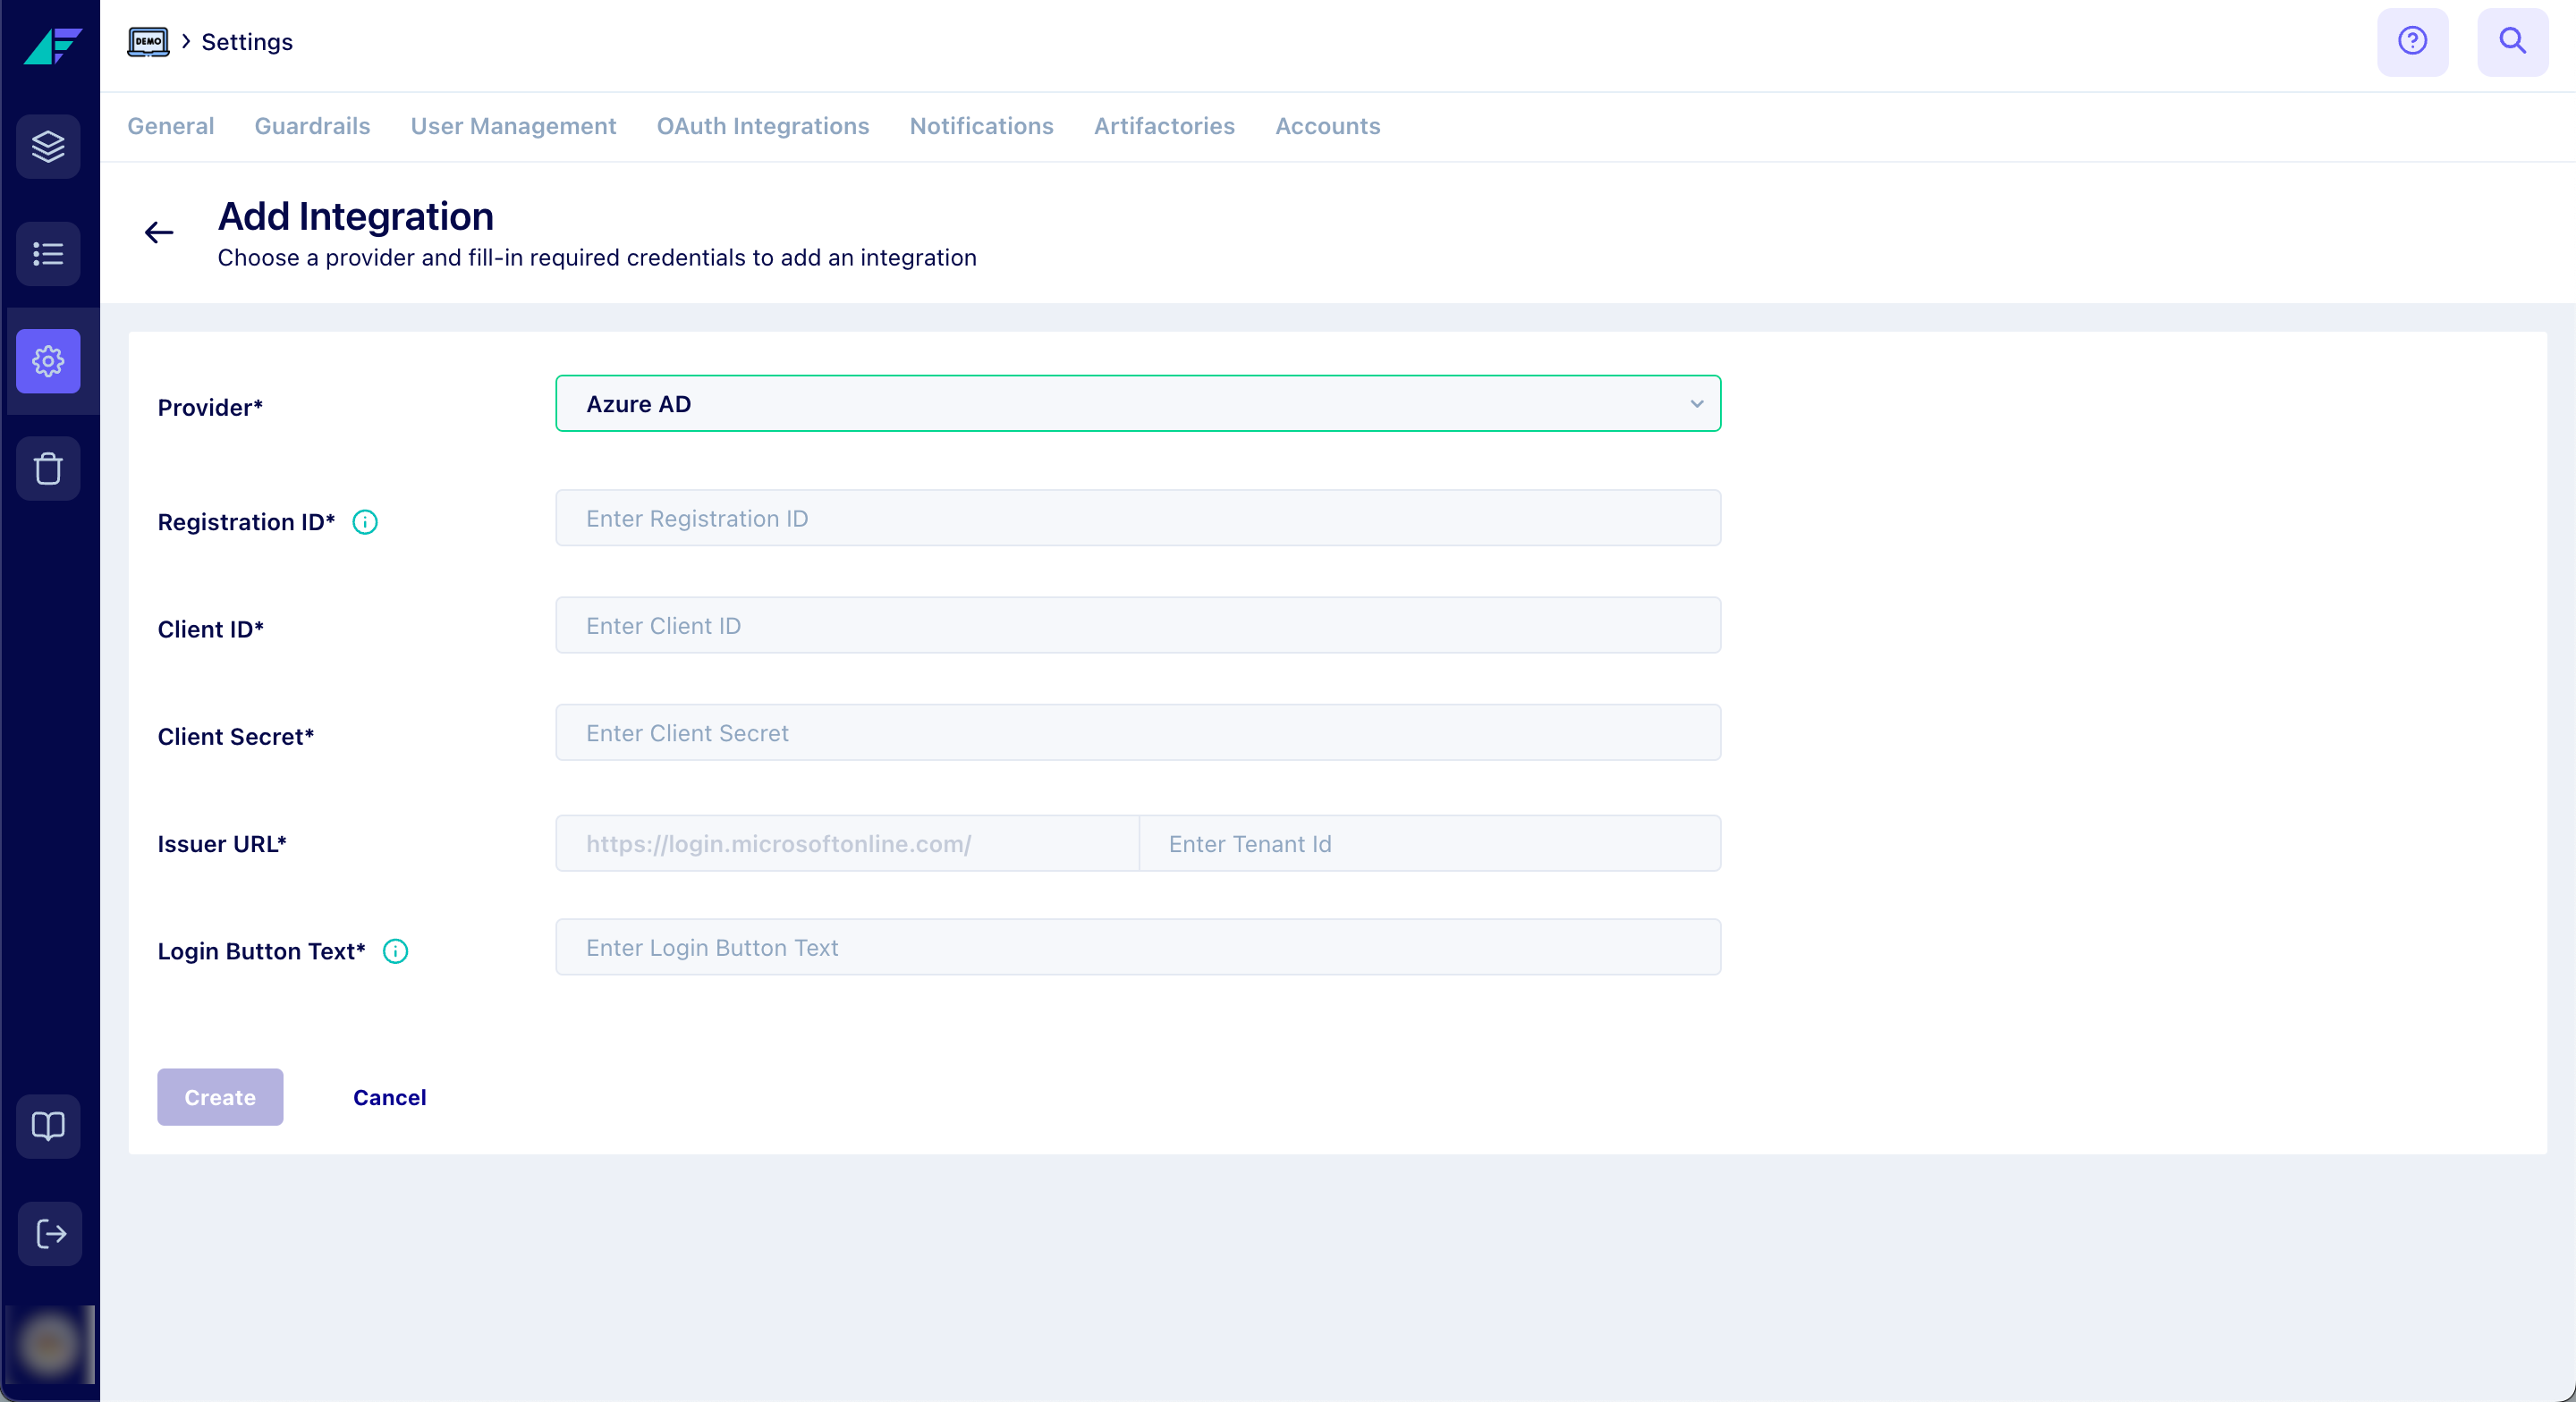
- Navigate to Setting > OAuth Integrations from the left pane.
This page displays all the configured OAuth Integrations in Facets. - Click Add Integrations and select Azure AD as the Provider.
- Fill in the following information:
- Registration ID
- Client ID
- Client Secret
- Issuer URL: Mention the Tenant ID.
- Login Button Text: Choose the text that will appear in the Control Plane Login screen. Facets recommends using "AD Login".
- Click Create.
Click on the image to expand
You have successfully set up Azure AD integration in Facets.
How to Get Client ID and Tenant ID?
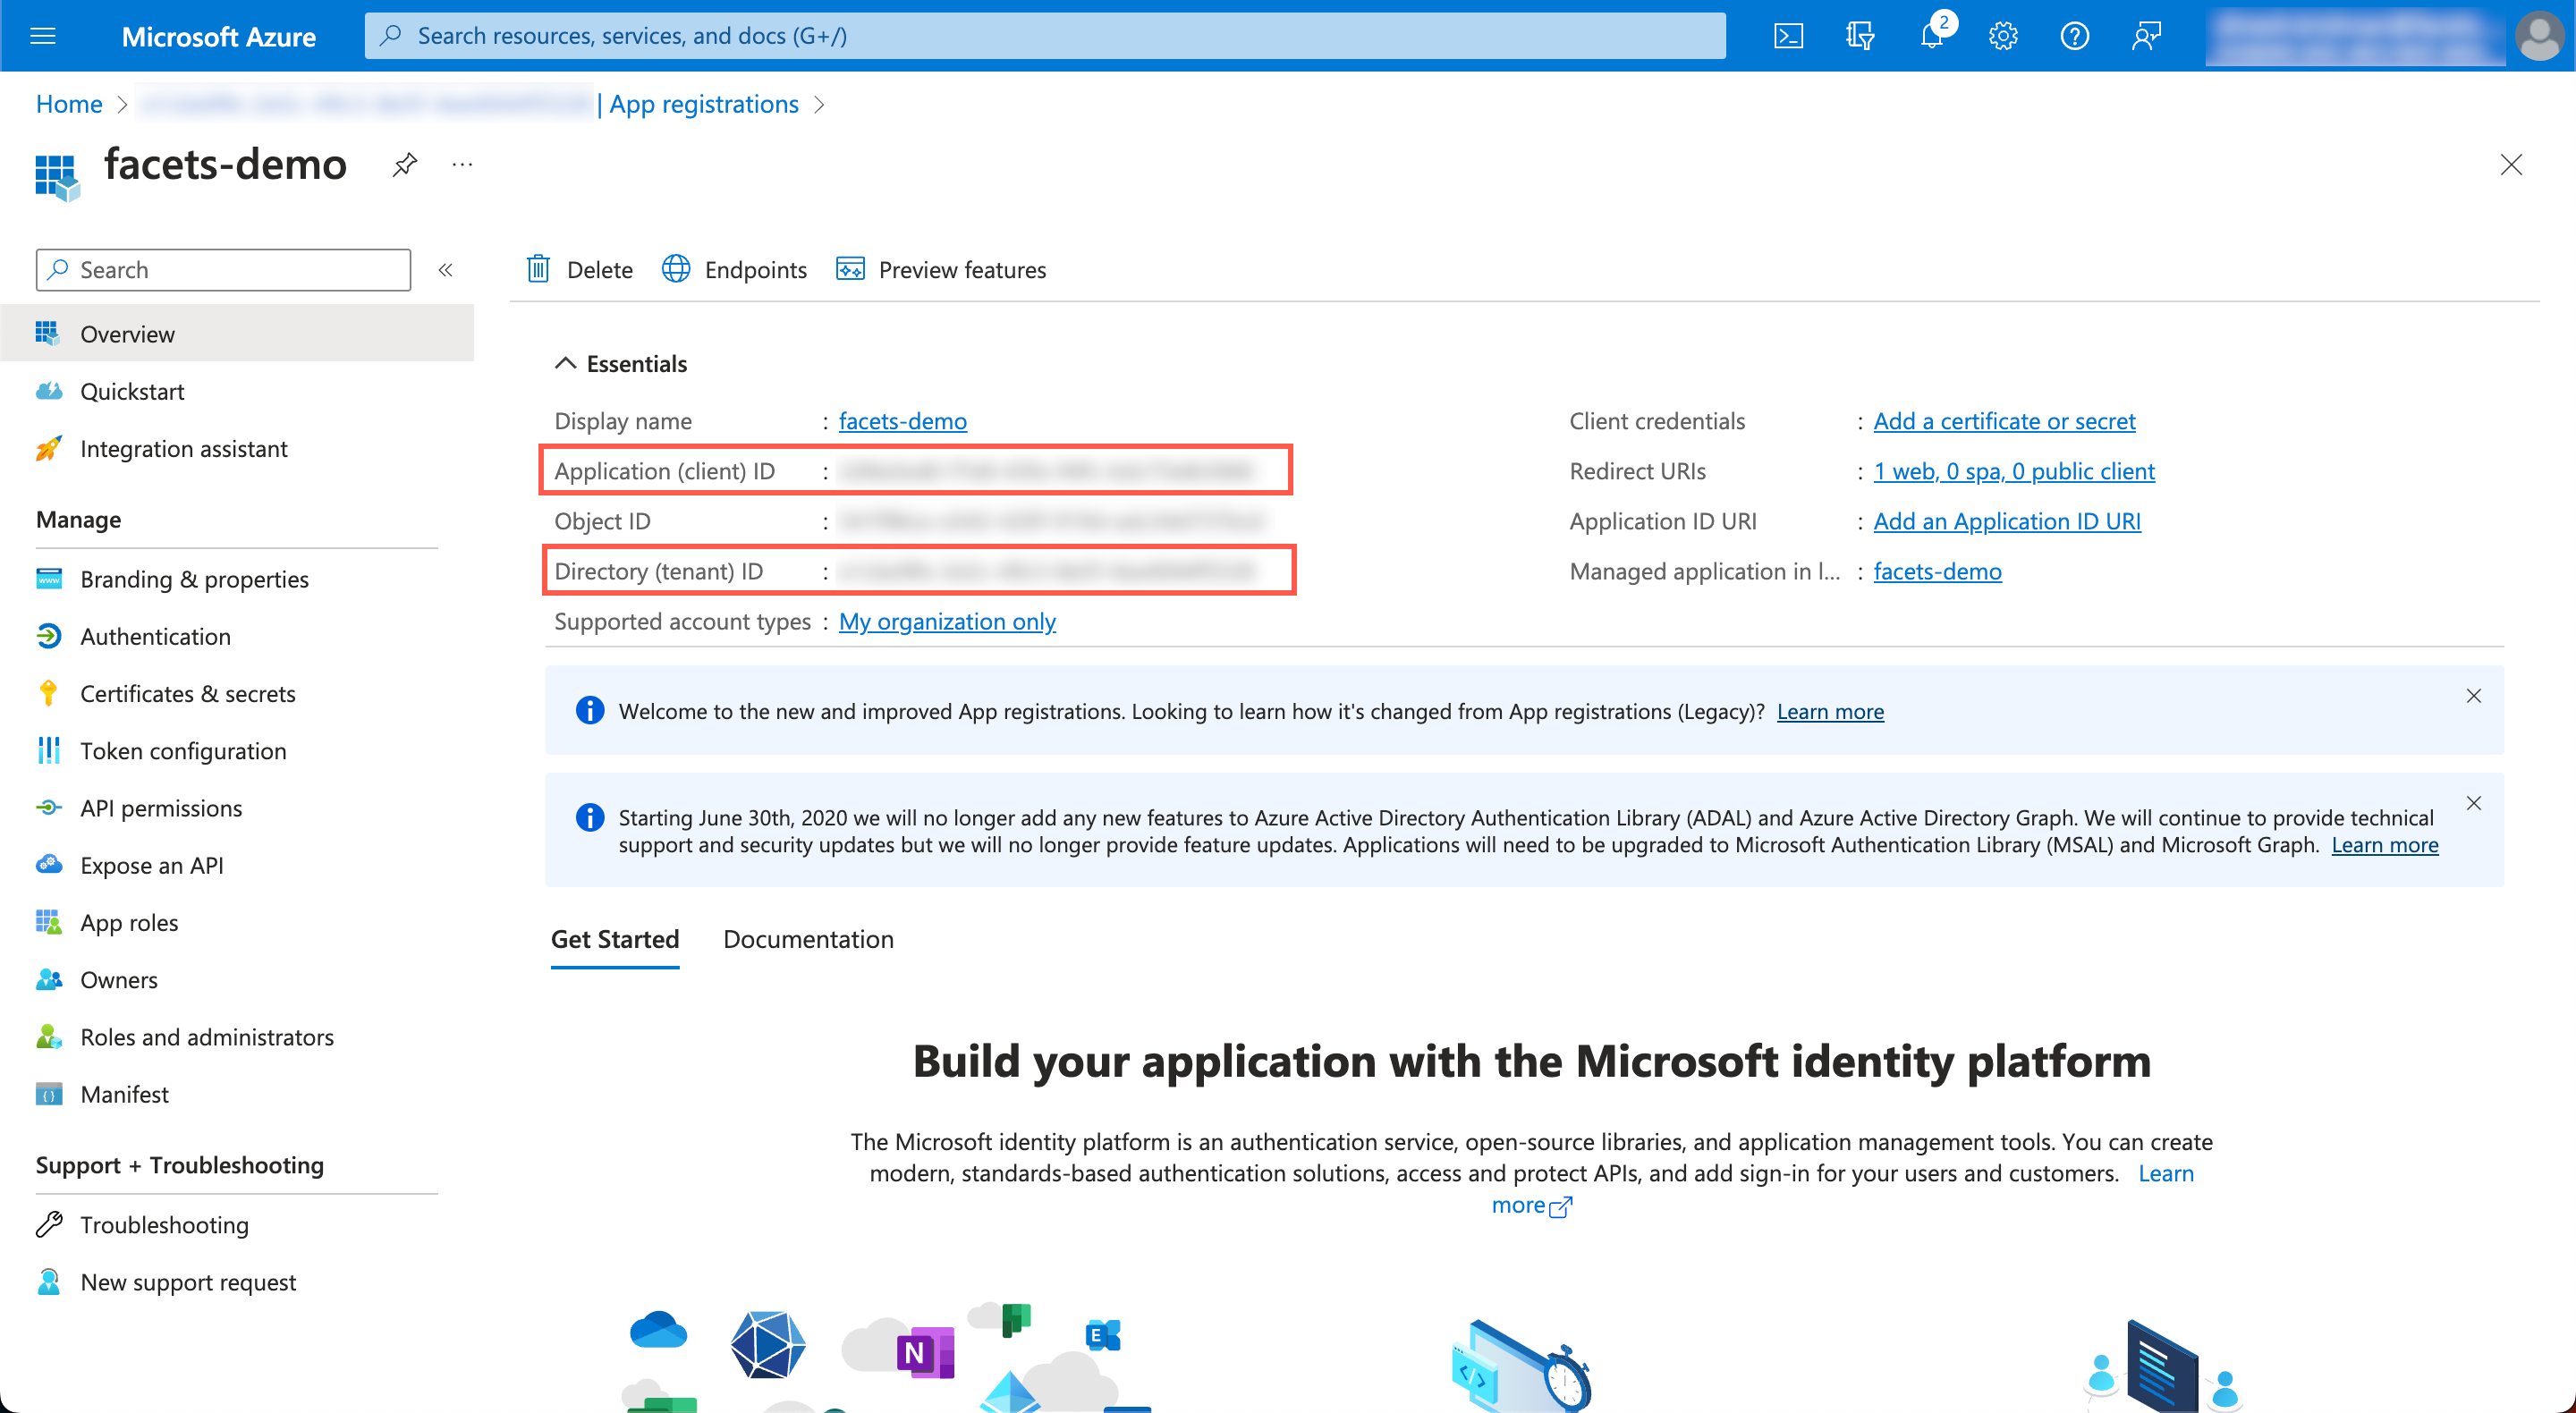
- Log in to the Azure Portal and navigate to the registered application.
- In the application Overview, you will find the Application (client) ID and the Directory (tenant) ID.
Click on the image to expand
How to Get Client Secret?
- Log in to the Azure Portal and navigate to the registered application.
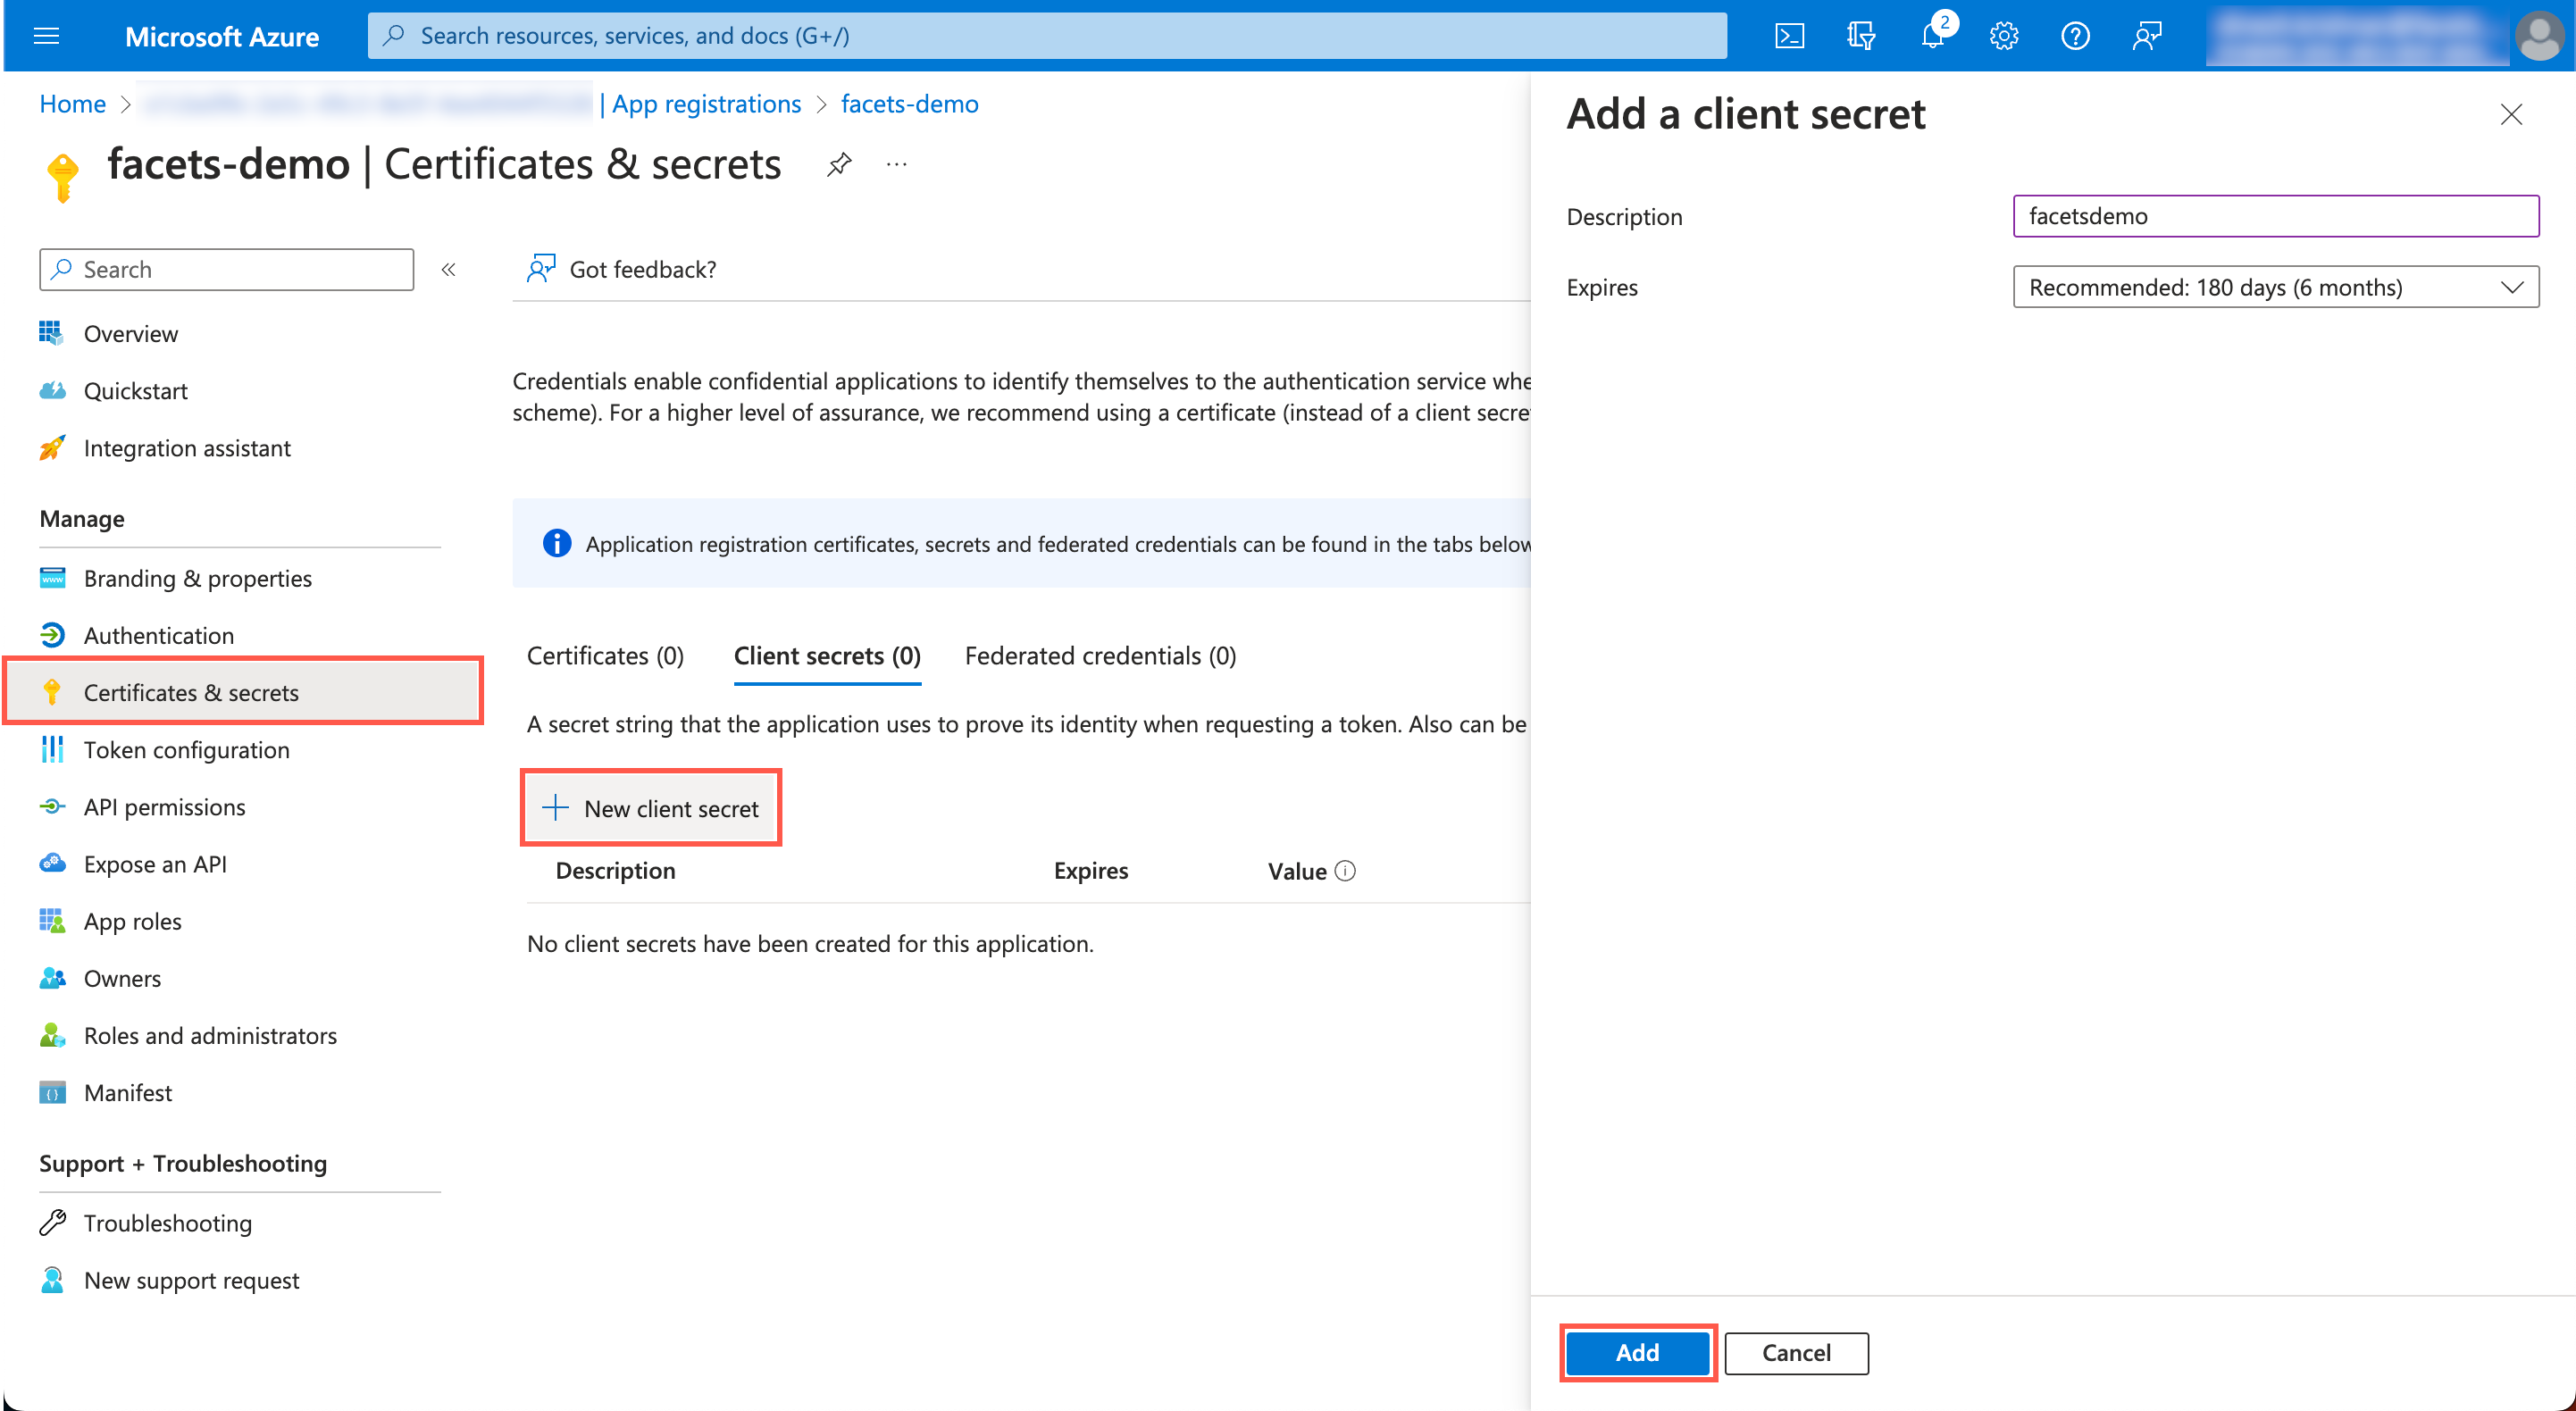
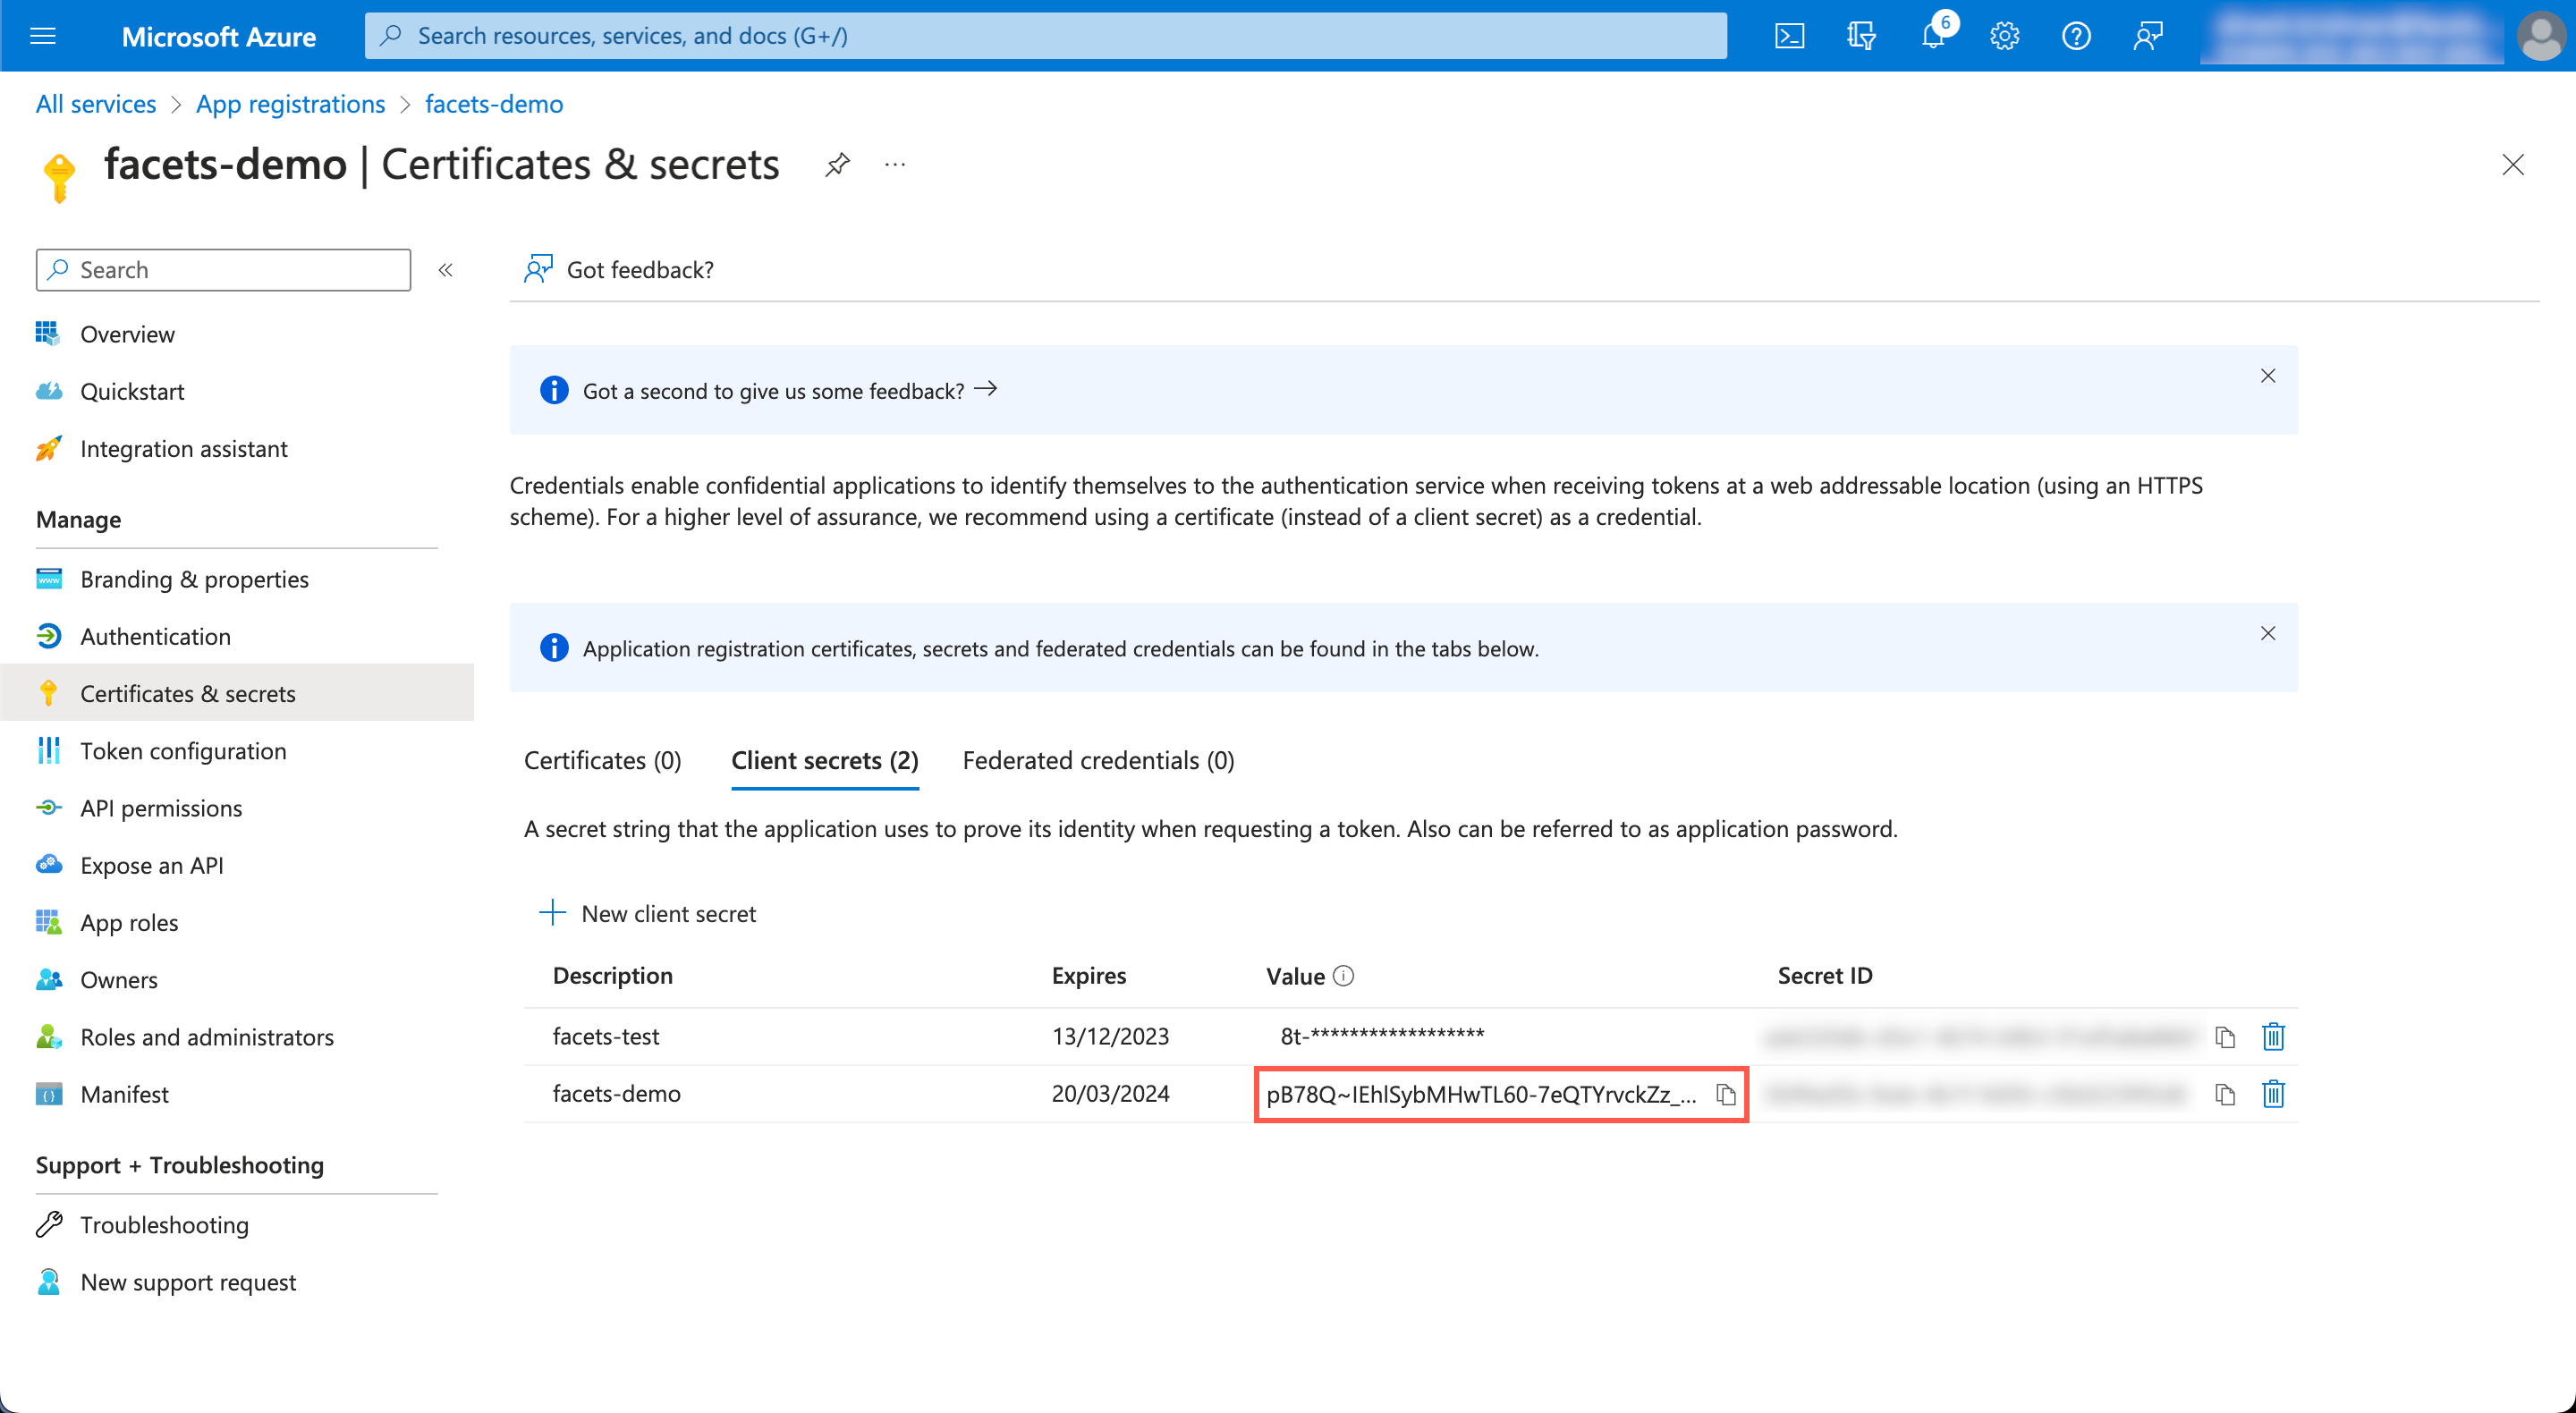
- In the application, select Certificates and Secrets from the left pane.
- In the Client Secrets tab, click New client secret.
- Mention the Description and the Expiry.
- Click Add.
Click on the image to expand
- Now, copy and use the value from the Value column of the added client secret.
Click on the image to expand
Please note that this Value will be visible for only a few minutes; therefore, we recommend copying and saving it for your reference.
You have successfully created a new Client Secret.
Updated 12 months ago