Attach Image in a Service
Attach container images to your services using Facets' flexible image management system. Choose from three deployment strategies based on your workflow needs: project-level CI/CD integration, service-specific CI/CD configuration, or manual image selection.
Prerequisites
- You have created an Environment
- You have configured a Container Registry
- You have created a Service resource in a Blueprint
Understanding Registration Types
ENVIRONMENT Registration
With ENVIRONMENT registration, artifacts route directly to physical Kubernetes clusters. Each artifact is assigned to a specific environment (dev cluster, staging cluster, production cluster) based on the routing rules you define.
Use ENVIRONMENT registration when:
- You have dedicated clusters for each stage (dev, qa, staging, production)
- You want artifacts to map directly to infrastructure
- You deploy to Kubernetes environments
RELEASE_STREAM Registration
With RELEASE_STREAM registration, artifacts route to named channels (release streams) rather than physical environments. Release streams are logical promotion paths like "stable," "canary," or "beta" that decouple artifact routing from your infrastructure topology.
Use RELEASE_STREAM registration when:
- You manage multiple release channels independently
- You need flexible routing that isn't tied to specific clusters
- You deploy the same artifact to multiple environments through different streams
Warning: Registration type cannot be changed after initial setup without resetting your CI/CD configuration, which deletes your default routing rule and promotion workflow.
How to Attach an Image to a Service
When configuring a service resource, the image field uses an artifact reference template. Facets auto-generates this template in the format ${blueprint.self.artifacts.<ciName>} where the CI name follows the pattern <project>-<resource>-<8-char-id>.
To configure image attachment:
- Navigate to Projects → Blueprint → select your service resource
- In the service configuration form, locate the artifact reference field. Click the Images button next to the artifact reference OR directly go to the Images tab in the Service Resource.
- The Resource Images page opens in a drawer, displaying three strategy options
Select the strategy that matches your deployment workflow.
Three Image Attachment Strategies
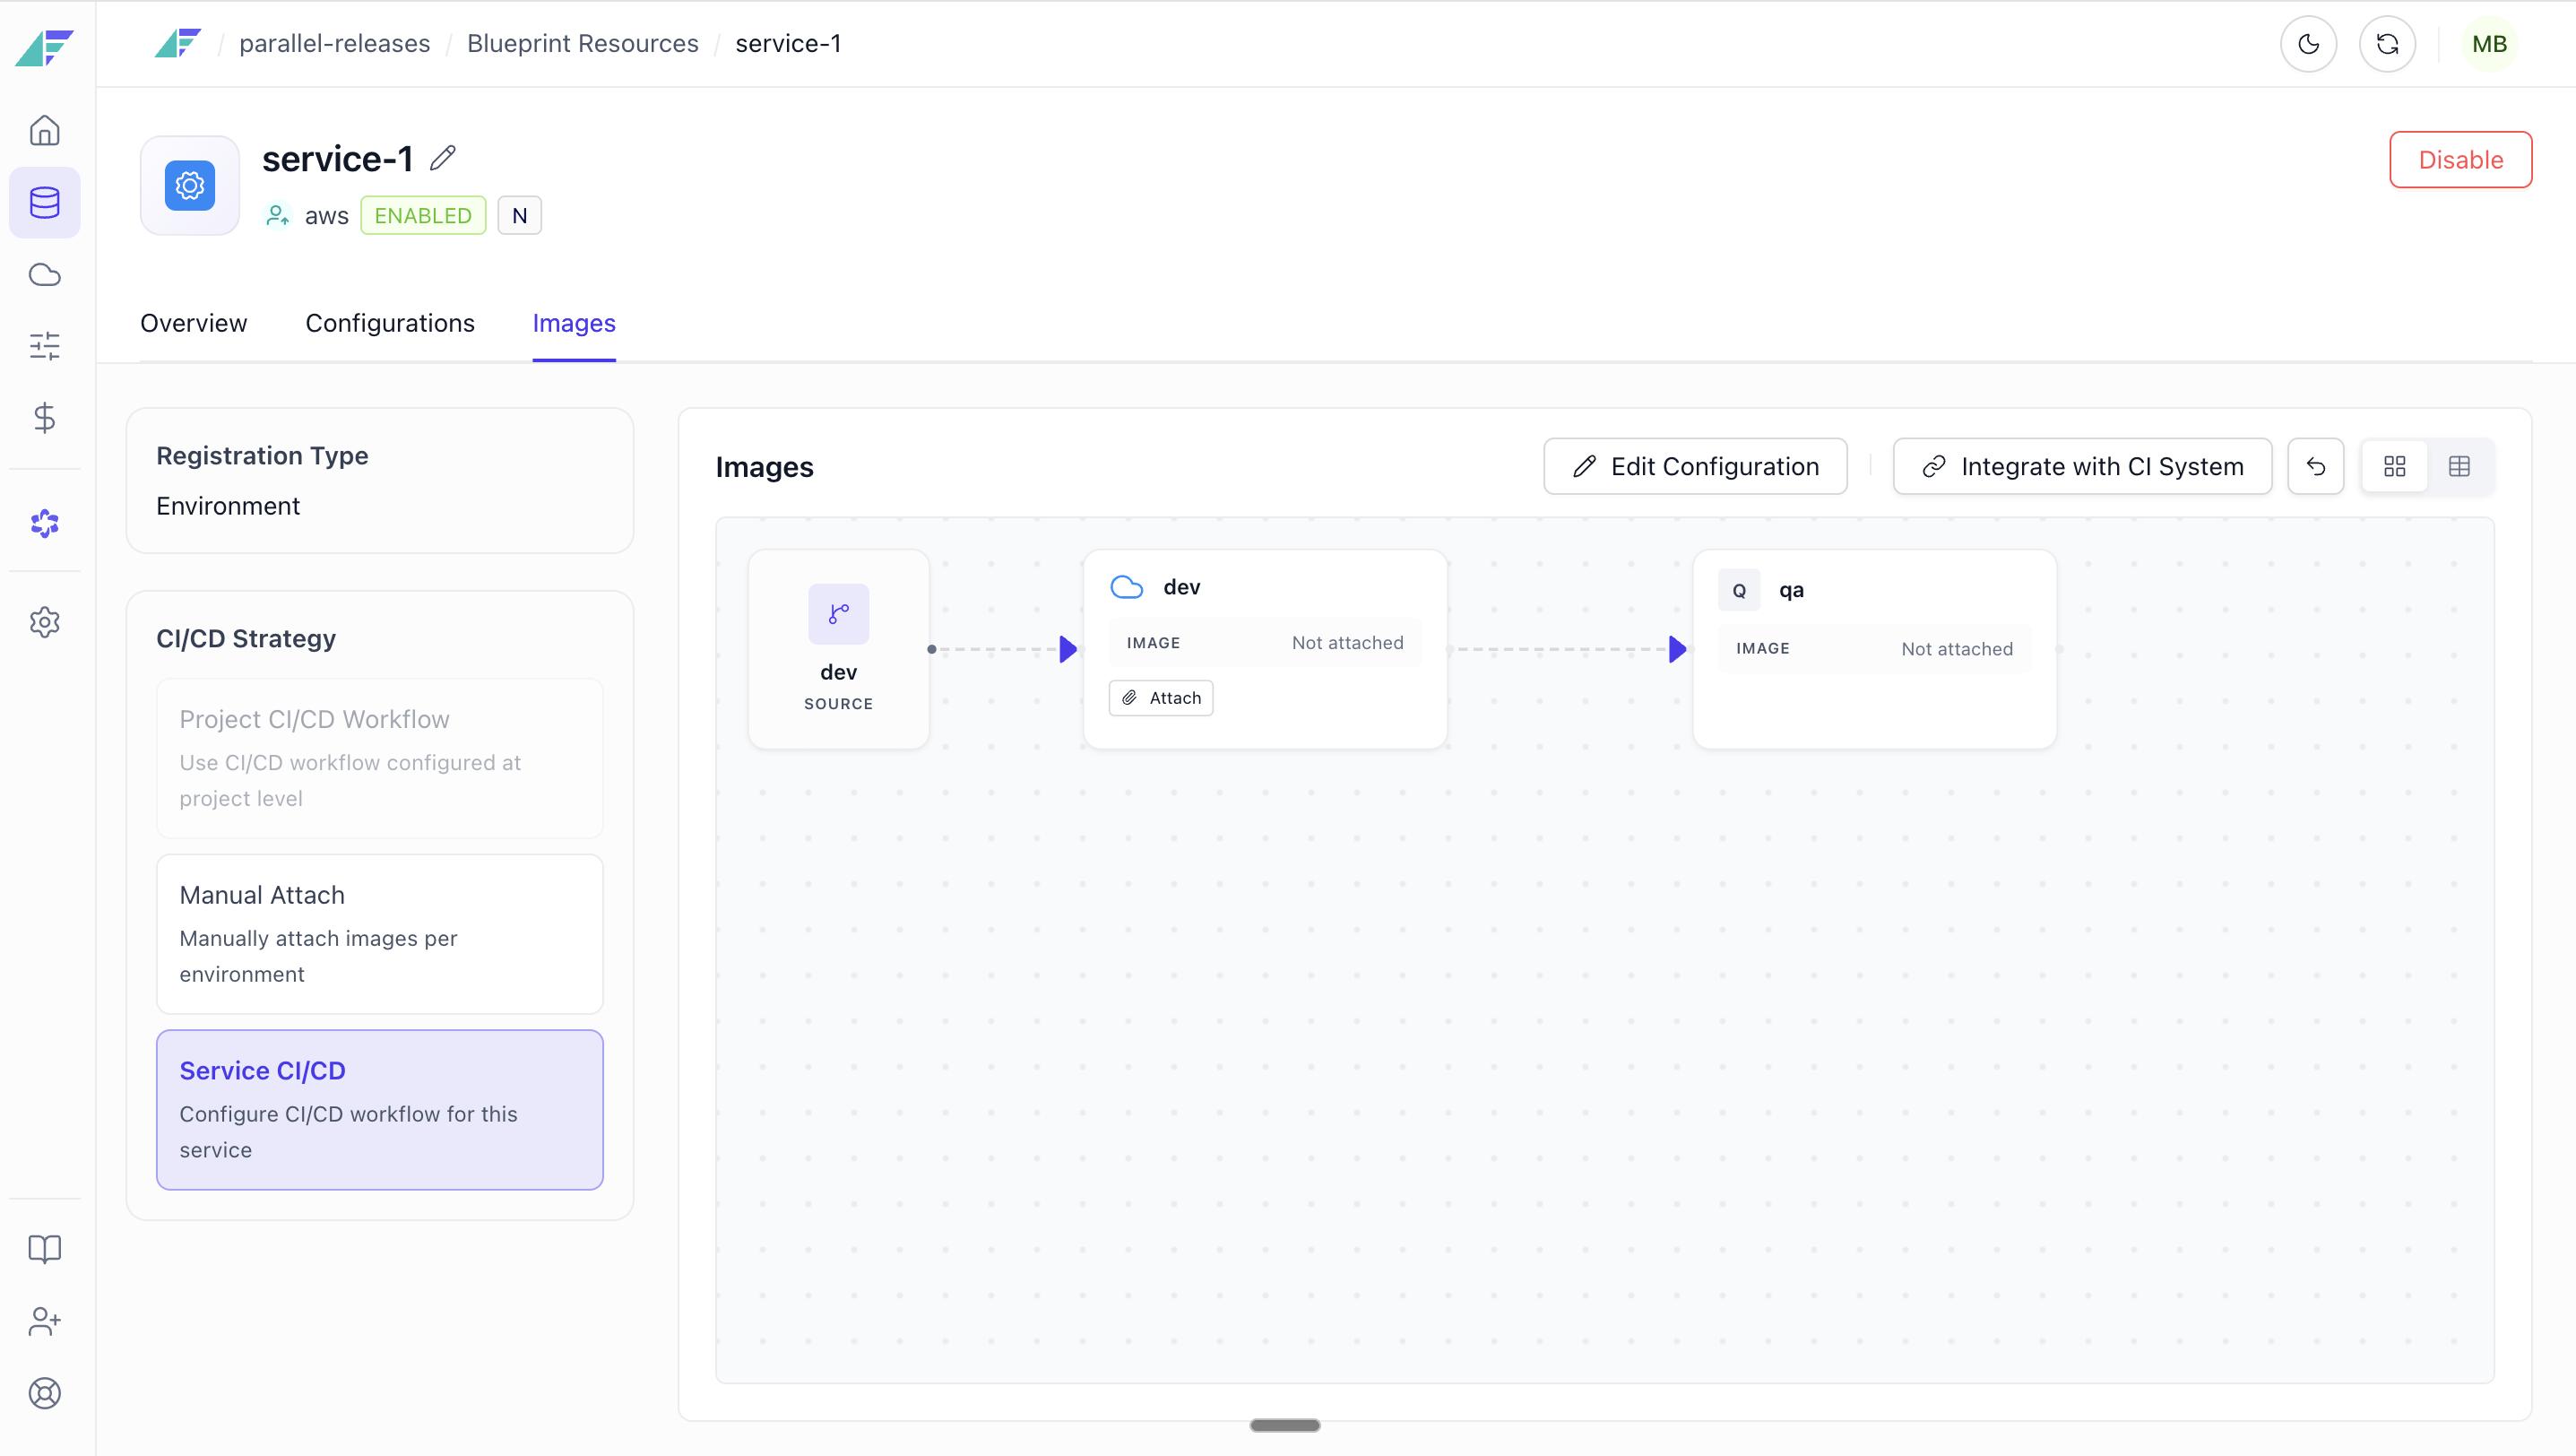
Project CI/CD Workflow
Uses the CI/CD configuration defined at the project level. Images flow automatically through configured branch rules and promotion workflows.
When you select this option, the service inherits:
- Branch-to-environment routing rules
- Artifact promotion hierarchies
- Image version policies from the project configuration
Note: Changes to the project-level CI/CD workflow apply to all services using this strategy.
Manual Attach
Manually attach specific images to each environment. This strategy provides full control over which image version runs in each environment.
To attach an image manually:
- Select Manual Attach from the strategy options
- Choose the target environment
- Click Attach Image
- In the Attach Image modal, choose one of two input methods:
- Option A: Select from dropdowns
- Registry: Select the container registry (ECR, GCR, JFrog Artifactory, Docker Hub, etc.)
- Repository: Choose the repository name within the registry
- Tag: Select the specific image tag or version
- Option B: Enter full image URL
- Provide the complete artifact URI (e.g.,
gcr.io/my-project/my-service:v1.2.3)
- Provide the complete artifact URI (e.g.,
- Option A: Select from dropdowns
- Click Attach to apply the image to the selected environment
The modal supports both docker_image and freestyle artifact types. You can update an already-attached image by repeating this process.
Note: The registry selection list automatically filters out internal registries like facets-config-auto.
Warning: Attaching an image to one environment does not affect other environments. Each environment maintains its own image configuration.
Service CI/CD
Configure a service-specific CI/CD workflow that operates independently of the project-level configuration.
To configure service-level CI/CD:
- Select Service CI/CD from the strategy options
- Define Branch Rules that map Git branches to environments
- Set the Promotion Hierarchy to control how images move between environments
- Choose the Registration Type:
- ENVIRONMENT: Register artifacts per environment
- RELEASE_STREAM: Register artifacts per release stream
- Select the CI Strategy:
- SIMPLE: Basic CI configuration
- ADVANCED: Complex workflows with custom routing logic
- Save the configuration
Service-level CI/CD configuration overrides project-level settings for this specific service.
Artifact Reference Template
When you first interact with the artifact reference field in a service configuration, Facets automatically generates a CI name and populates the artifact reference template.
The template format is:
${blueprint.self.artifacts.<ciName>}Where <ciName> follows the pattern <project>-<resource>-<8-random-chars>.
This reference is resolved at deployment time to the actual image URI based on your selected strategy and environment-specific configuration.
How It Works
Facets uses two distinct mechanisms for image attachment:
Attach as Override (Manual Strategy) When you manually attach an image to a specific environment, Facets creates an environment-specific override containing the image metadata. The override includes the full image URI under spec.release.image and registry details under metadata.labels. This approach pins a specific image version to that environment without affecting other environments. Changes trigger an immediate cluster resource sync to propagate to the live environment.
Attach via Register (CI Integration) When using project-level or service-level CI/CD strategies, Facets registers the artifact globally and associates it with the CI configuration. Registered artifacts flow through promotion workflows and branch-based routing rules defined in your CI/CD setup. The system looks up the CI name from the resource's blueprint and routes artifacts according to the registration type (ENVIRONMENT or RELEASE_STREAM).
How to Register and Push images using CLI?
Facets allows you to register and push images to the container registries using FacetsCTL.
- Open the Projects tab and select the required project.
- In the Blueprint tab, select the required service resource and choose Overview from the dropdown.
- Select the Images tab.
- Under Use CLI, select the desired Container Registry where the updated image must be registered or pushed.
- If not already installed, execute the command in Step: 1 to Install FacetsCTL.
- Execute the command in Step: 2 to Integrate the Image. Update the values such as
DOCKER_IMAGE_URLandTOKEN. - Toggle off Push Image to only register the image, or leave it on to register and push the image to the container registry.
FAQ
1. Why do I need to add my container image to a container registry?
Adding your image to a container registry is essential because it allows the image to be stored in a central, accessible location. This ensures that the image can be pulled and used during the deployment of your application.
2. What happens if I turn off the "Push Image" toggle?
If you turn off the "Push Image" toggle, the image will only be registered in the container registry but not pushed. This means the image data won't be uploaded, and the deployment process will not be able to pull the image, causing your deployment to fail.
3. Can I deploy my application if I only register the image and do not push it?
No, you cannot deploy your application if the image is only registered but not pushed.
Related Guides
Updated 10 days ago