OneLogin
How to Create an Application in OneLogin?
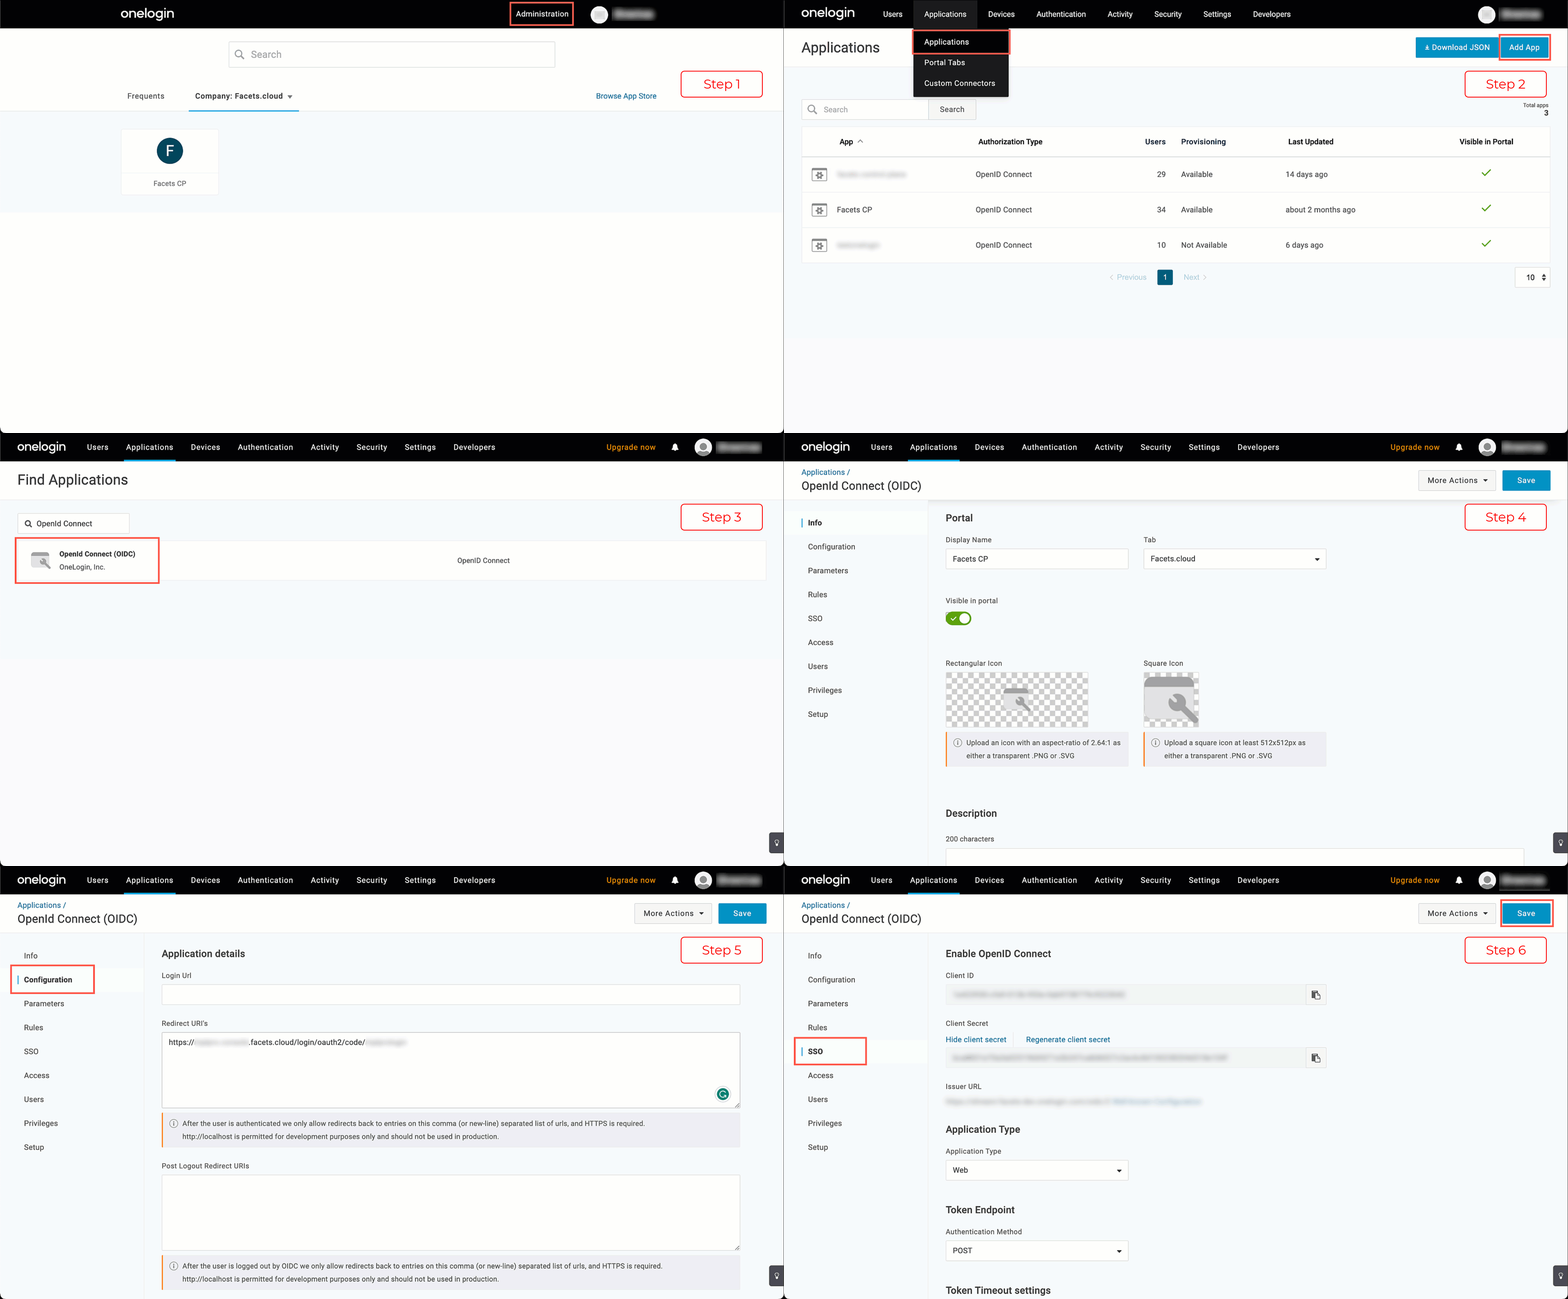
- Log in to your OneLogin console and open the admin portal.
- Navigate to Applications > Applications from the top pane and click Add App.
- Search for OpenId Connect (OIDC) in the OneLogin app catalog and select it.
- Now, mention the Display Name, Description(optional).
- In the Configuration tab, mention the Redirect URI.
Eg:https://<control-plane-url>/login/oauth2/code/<registration-ID>- Replace
<control-plane-url>in the above link with your organization's Control Plane URL. - Note down the
<registration-ID>, as the same value needs to be entered in your Control Plane.
- Replace
- In the SSO tab, under Token Endpoint, select the Authentication Method as POST.
- In the Users tab, assign the app to relevant users or groups by selecting them and adding the app to their assigned applications.
- Click Save.

Click on the image to expand
You have successfully created an application in OneLogin.
How to Add Integration for OneLogin SSO in Facets?
-
Log in to your Control Plane and navigate to Setting > OAuth Integrations from the left pane.
This page displays all the configured OAuth Integrations in Facets. -
Click Add Integrations.
-
Select OneLogin as the provider.
-
Fill in the following information:
-
Registration ID
-
Client ID
-
Client Secret
-
Issuer URL
- Log in to the OneLogin console and open the application.
- Under the SSO tab, you will find the Client Id, Client Secret, and the Issuer URL.
-
Login Button Text: Choose the text that will appear in the Control Plane Login screen. Facets recommends using your organization's name.
-
-
Click Create.
You have successfully set up OneLogin integration in Facets.
Updated 8 months ago