Google Oauth
How to Create an OAuth Client ID in your Google Console?
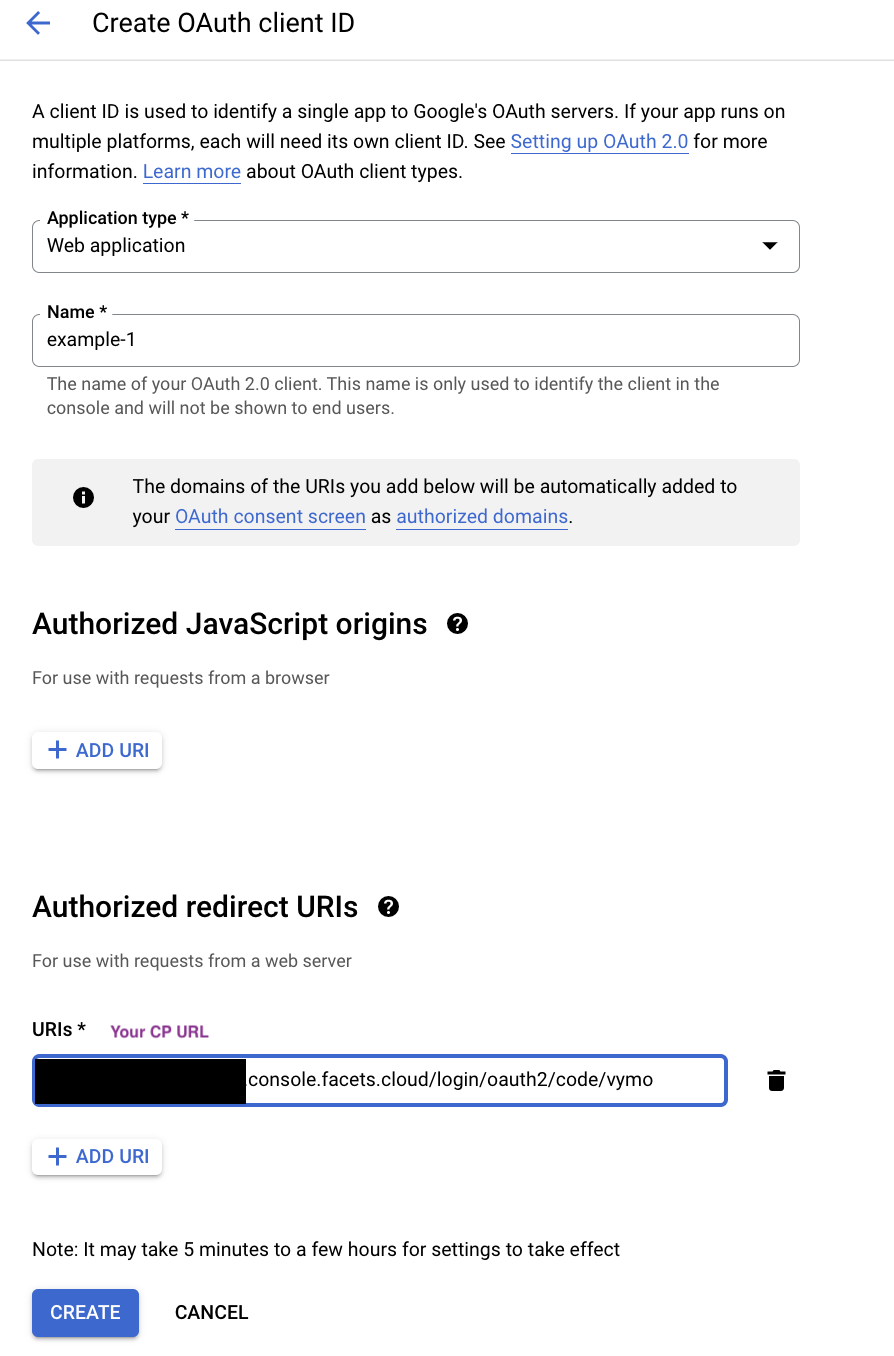
- Go to the Google Console and follow the steps in the Setting up OAuth 2.0 guide.
- Set up an Authorized Redirect URI using the following format:
<YOUR_CP_URL>/login/oauth2/code/<unique-registrationID>. - Make note of the unique Registration ID provided by Google.
- Replace
<YOUR_CP_URL>in the table above with the unique URL for your organization's Control Plane. - We recommend using a single word, all in lower-case, as the
<unique-registrationID>. This will be used later in the Facets UI when adding the OAuth integration to your Control Plane.
- Replace
How to Add Integration for Google OAuth in Facets?
-
Navigate to Setting > OAuth Integrations from the left pane.
This page displays all the configured OAuth Integrations in Facets. -
Click Add Integrations and select Google as the Provider.
-
Fill in the following information:
- Registration Id: Use the
<unique-registrationID>from the Authorized Redirect URI in Step 1. - Client Id: Use the Client Id from your Google Console.
- Client Secret: Use the Client Secret from your Google Console.
- Login Button Text: Choose the text that will appear in the Control Plane Login screen. For example, you can use your organization's name.
- Registration Id: Use the
-
Click Create.
That's it! You have successfully set up Google OAuth integration in Facets.
Updated about 2 months ago