GitOps for Overrides
The GitOps feature in Facets allows you to manage resource overrides directly through your Git repositories. You can make overrides through both the UI and the Git repository, and they will automatically sync with each other. In this guide, you will learn how to enable and use the GitOps feature.
Note: Once the GitOps for Overrides feature is enabled, it cannot be disabled or reverted.
How to configure GitOps for Overrides?
-
Open Projects and select the project where you want to configure GitOps.
-
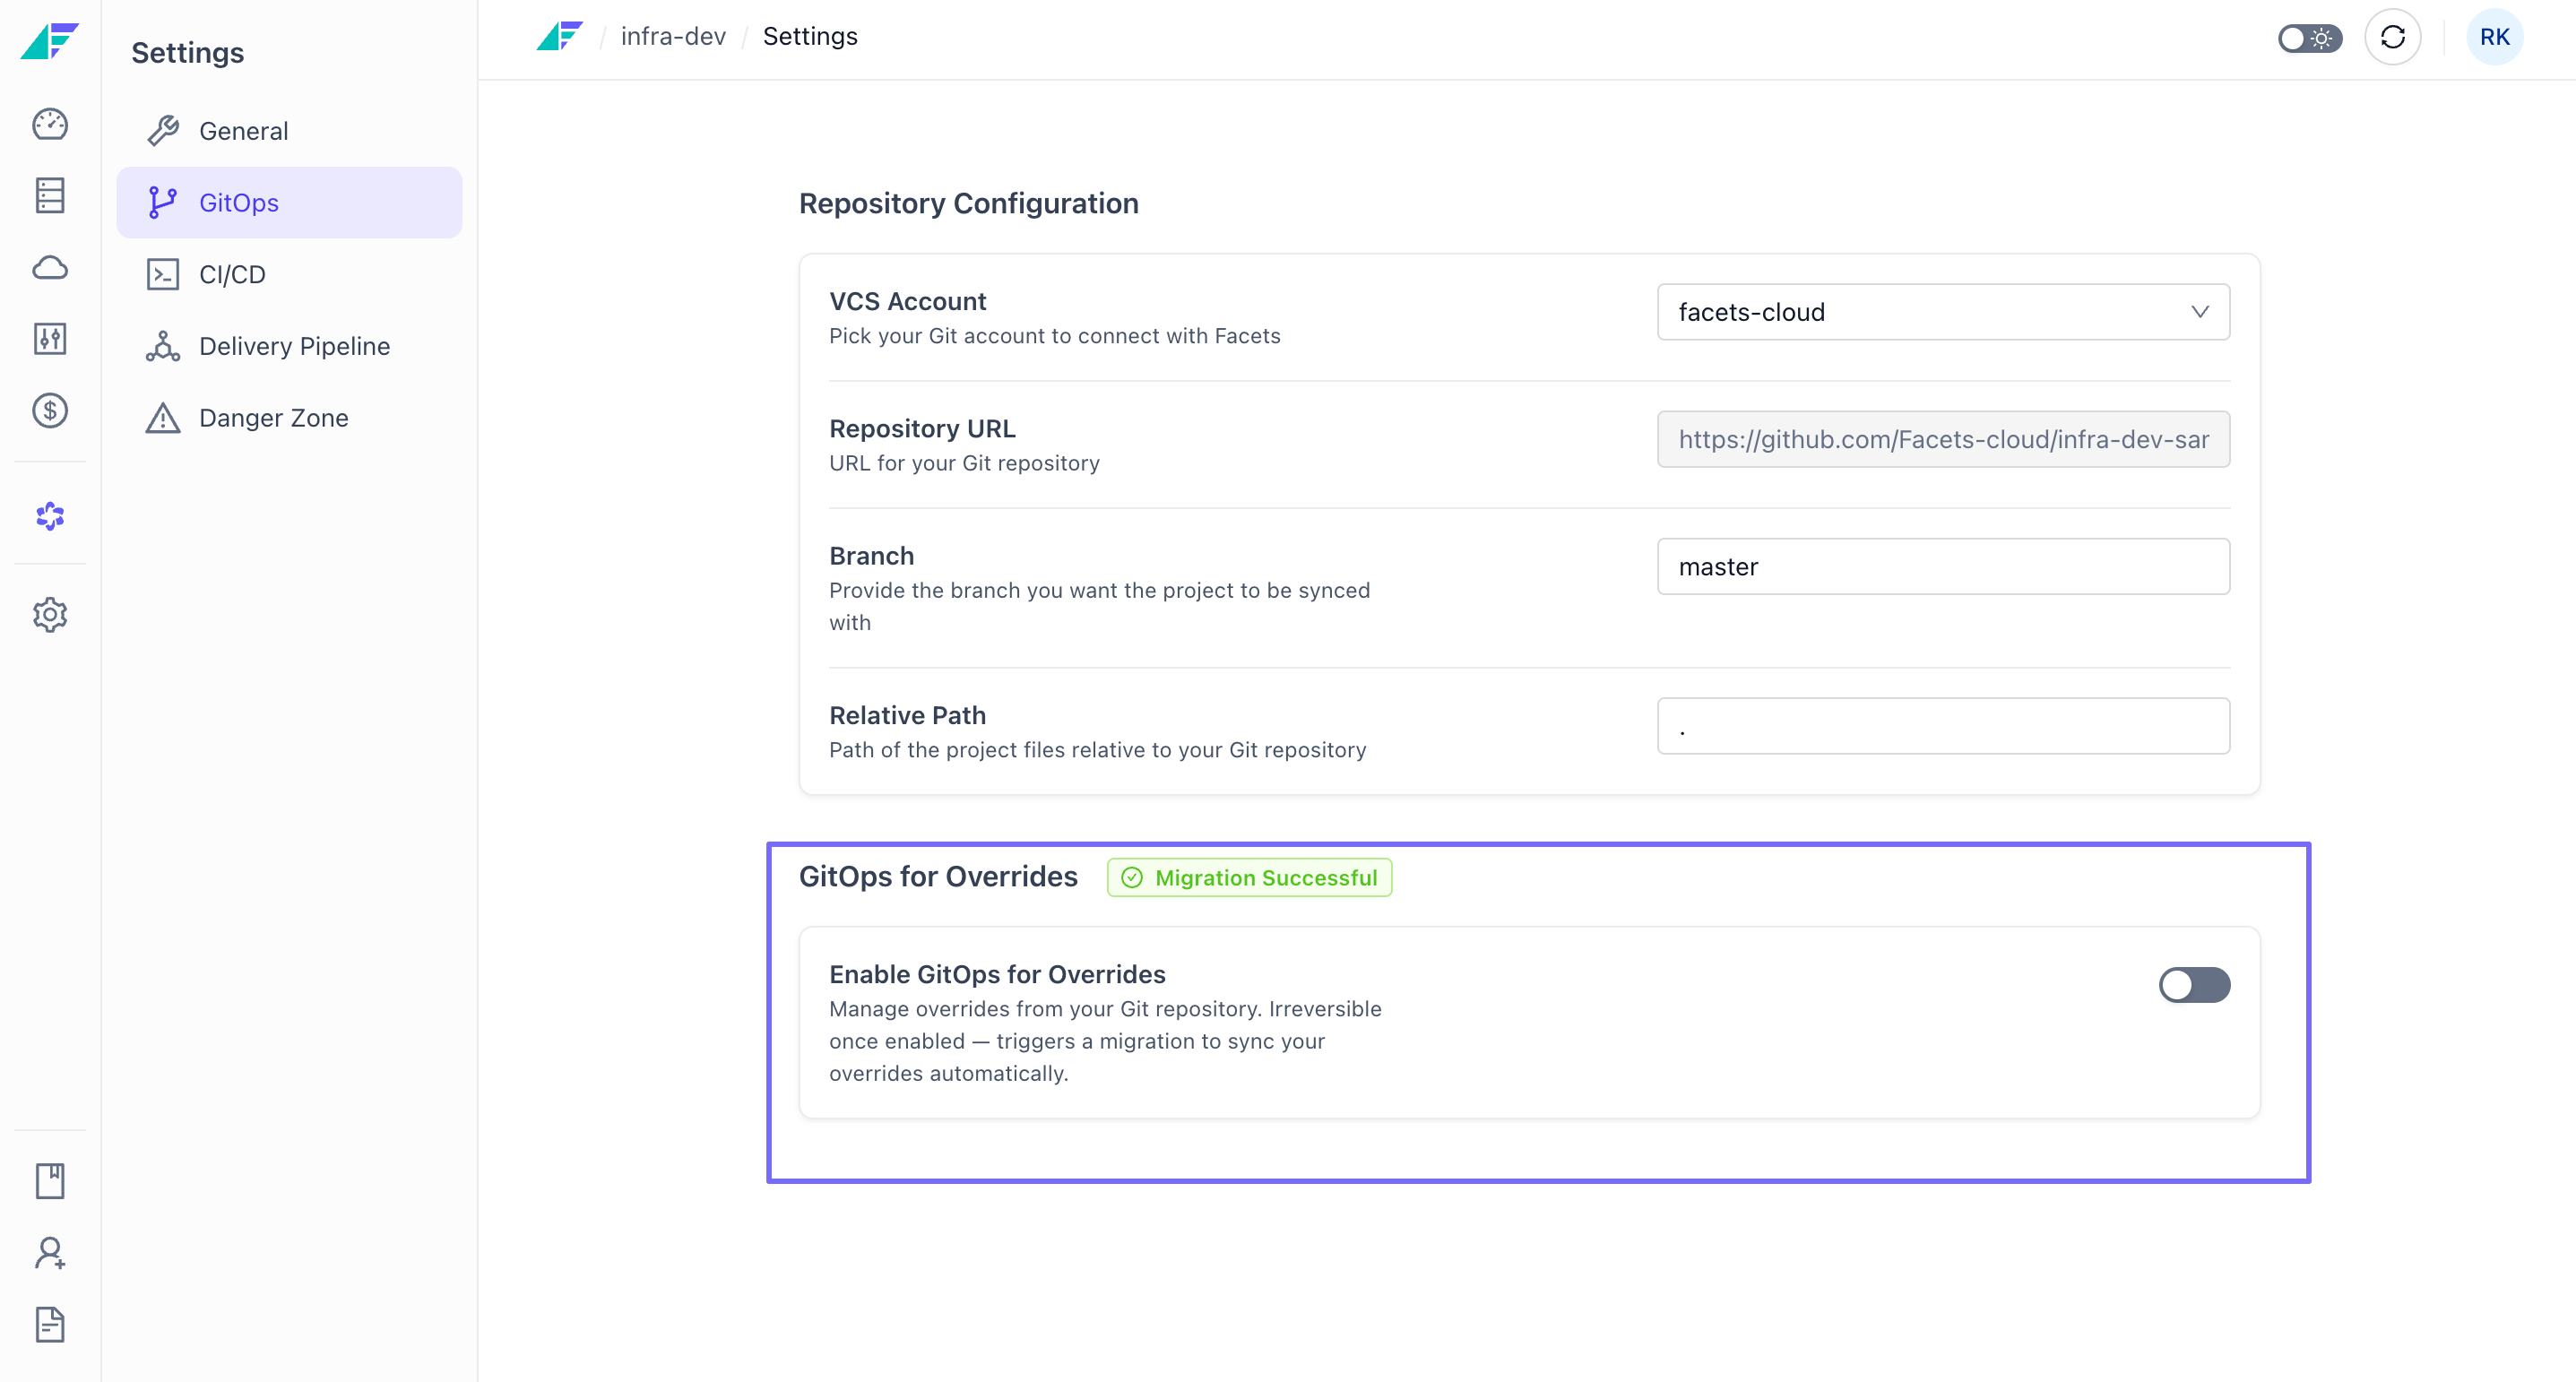
Go to the Project Settings tab and select the GitOps tab.
-
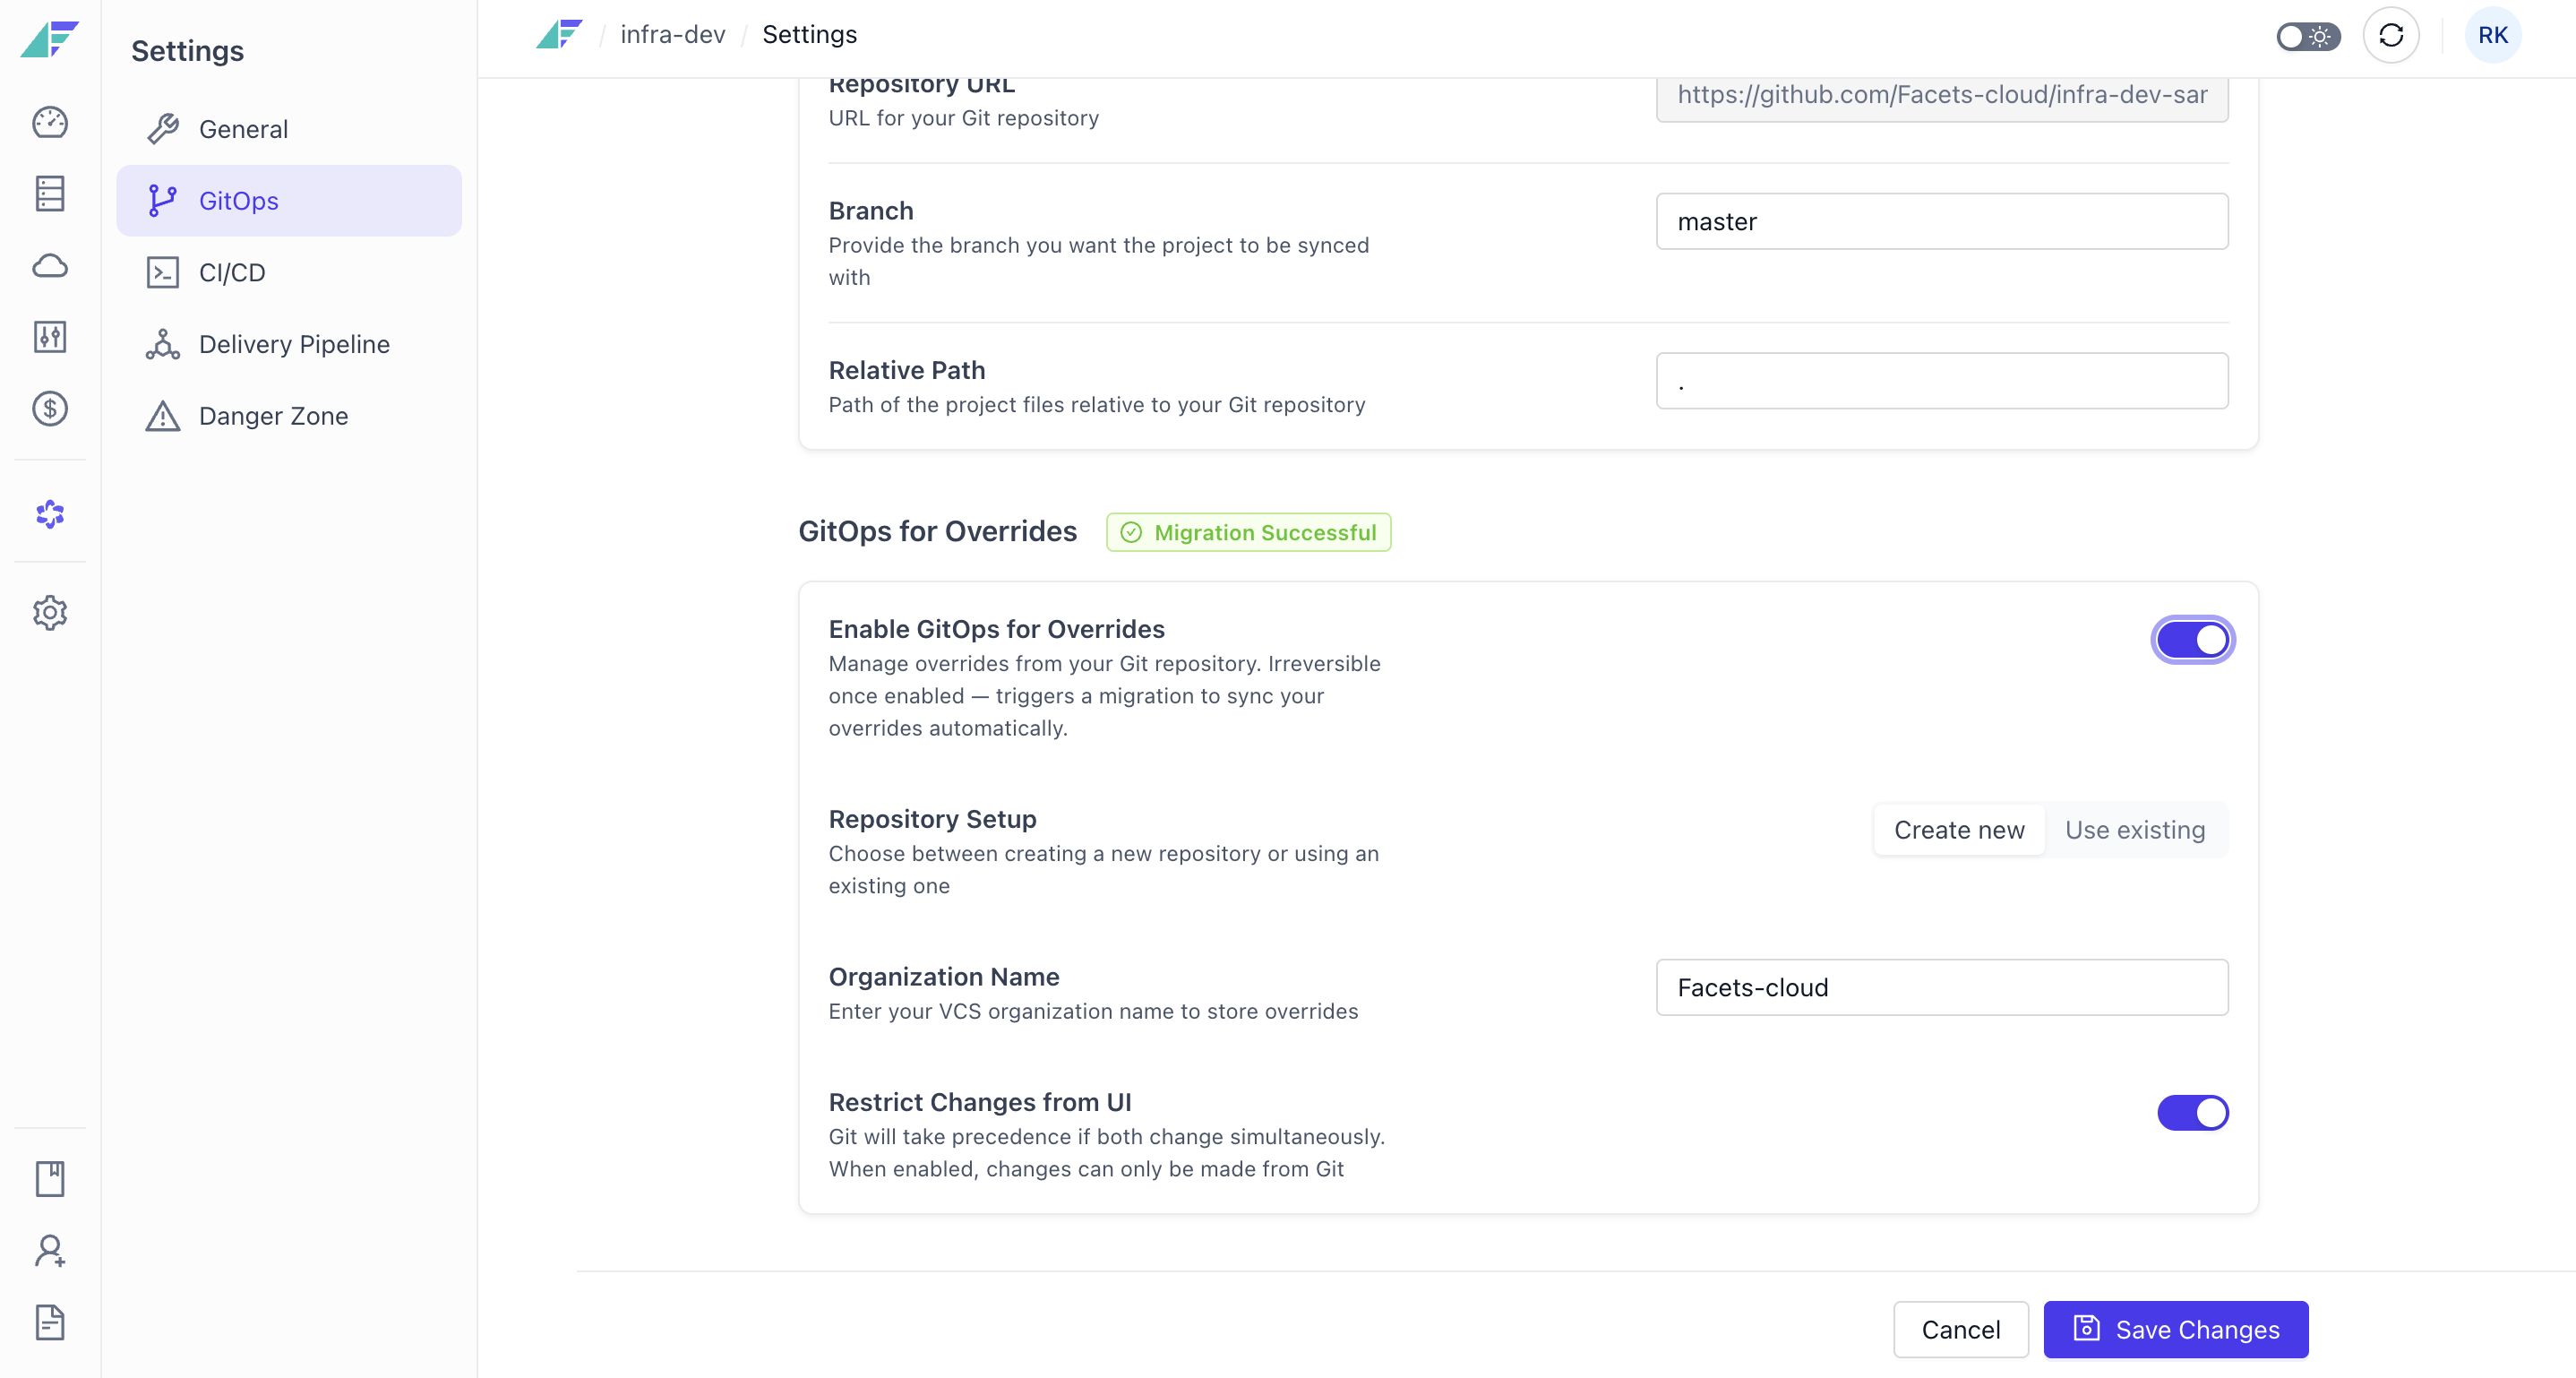
Enable the Gitops for Overrides.
-
For Repository Setup, choose between creating a new repository or using an existing one:
-
If you choose to Create a new repository, enter your VCS Organization Name.
-
If you choose to Use an existing repository, provide the Overrides Repository URL and the Overrides Branch.
-
Decide whether you want to enable Restrict Changes from UI.
-
Click Save Changes.
- Once you click Save Changes, the migration process will begin.
- The migration can take some time to complete. During this period, please refrain from making any overrides.
- You can monitor the migration status directly in the UI. If the migration fails, you will need to configure it again
You have successfully configured GitOps for Overrides. All existing override data has been migrated to your specified repository, and any future overrides will be saved there automatically.
What happens when you restrict users from making changes via the UI?
When the Restrict Changes from UI feature is enabled in Facets, it imposes limitations on user interactions within the user interface. Here’s a detailed breakdown of the implications:
-
Users will be unable to make direct modifications from the Facets UI. This includes:
- Enabling or Disabling Resources
- Overriding Resources
- Attaching Images
- Domain Mapping for Ingress resources
All related buttons and options within the UI will be disabled, preventing any direct changes.
-
Users will need to use Git to override resources. An Edit from Git button will be provided, directing users to the relevant Git repository for making updates.
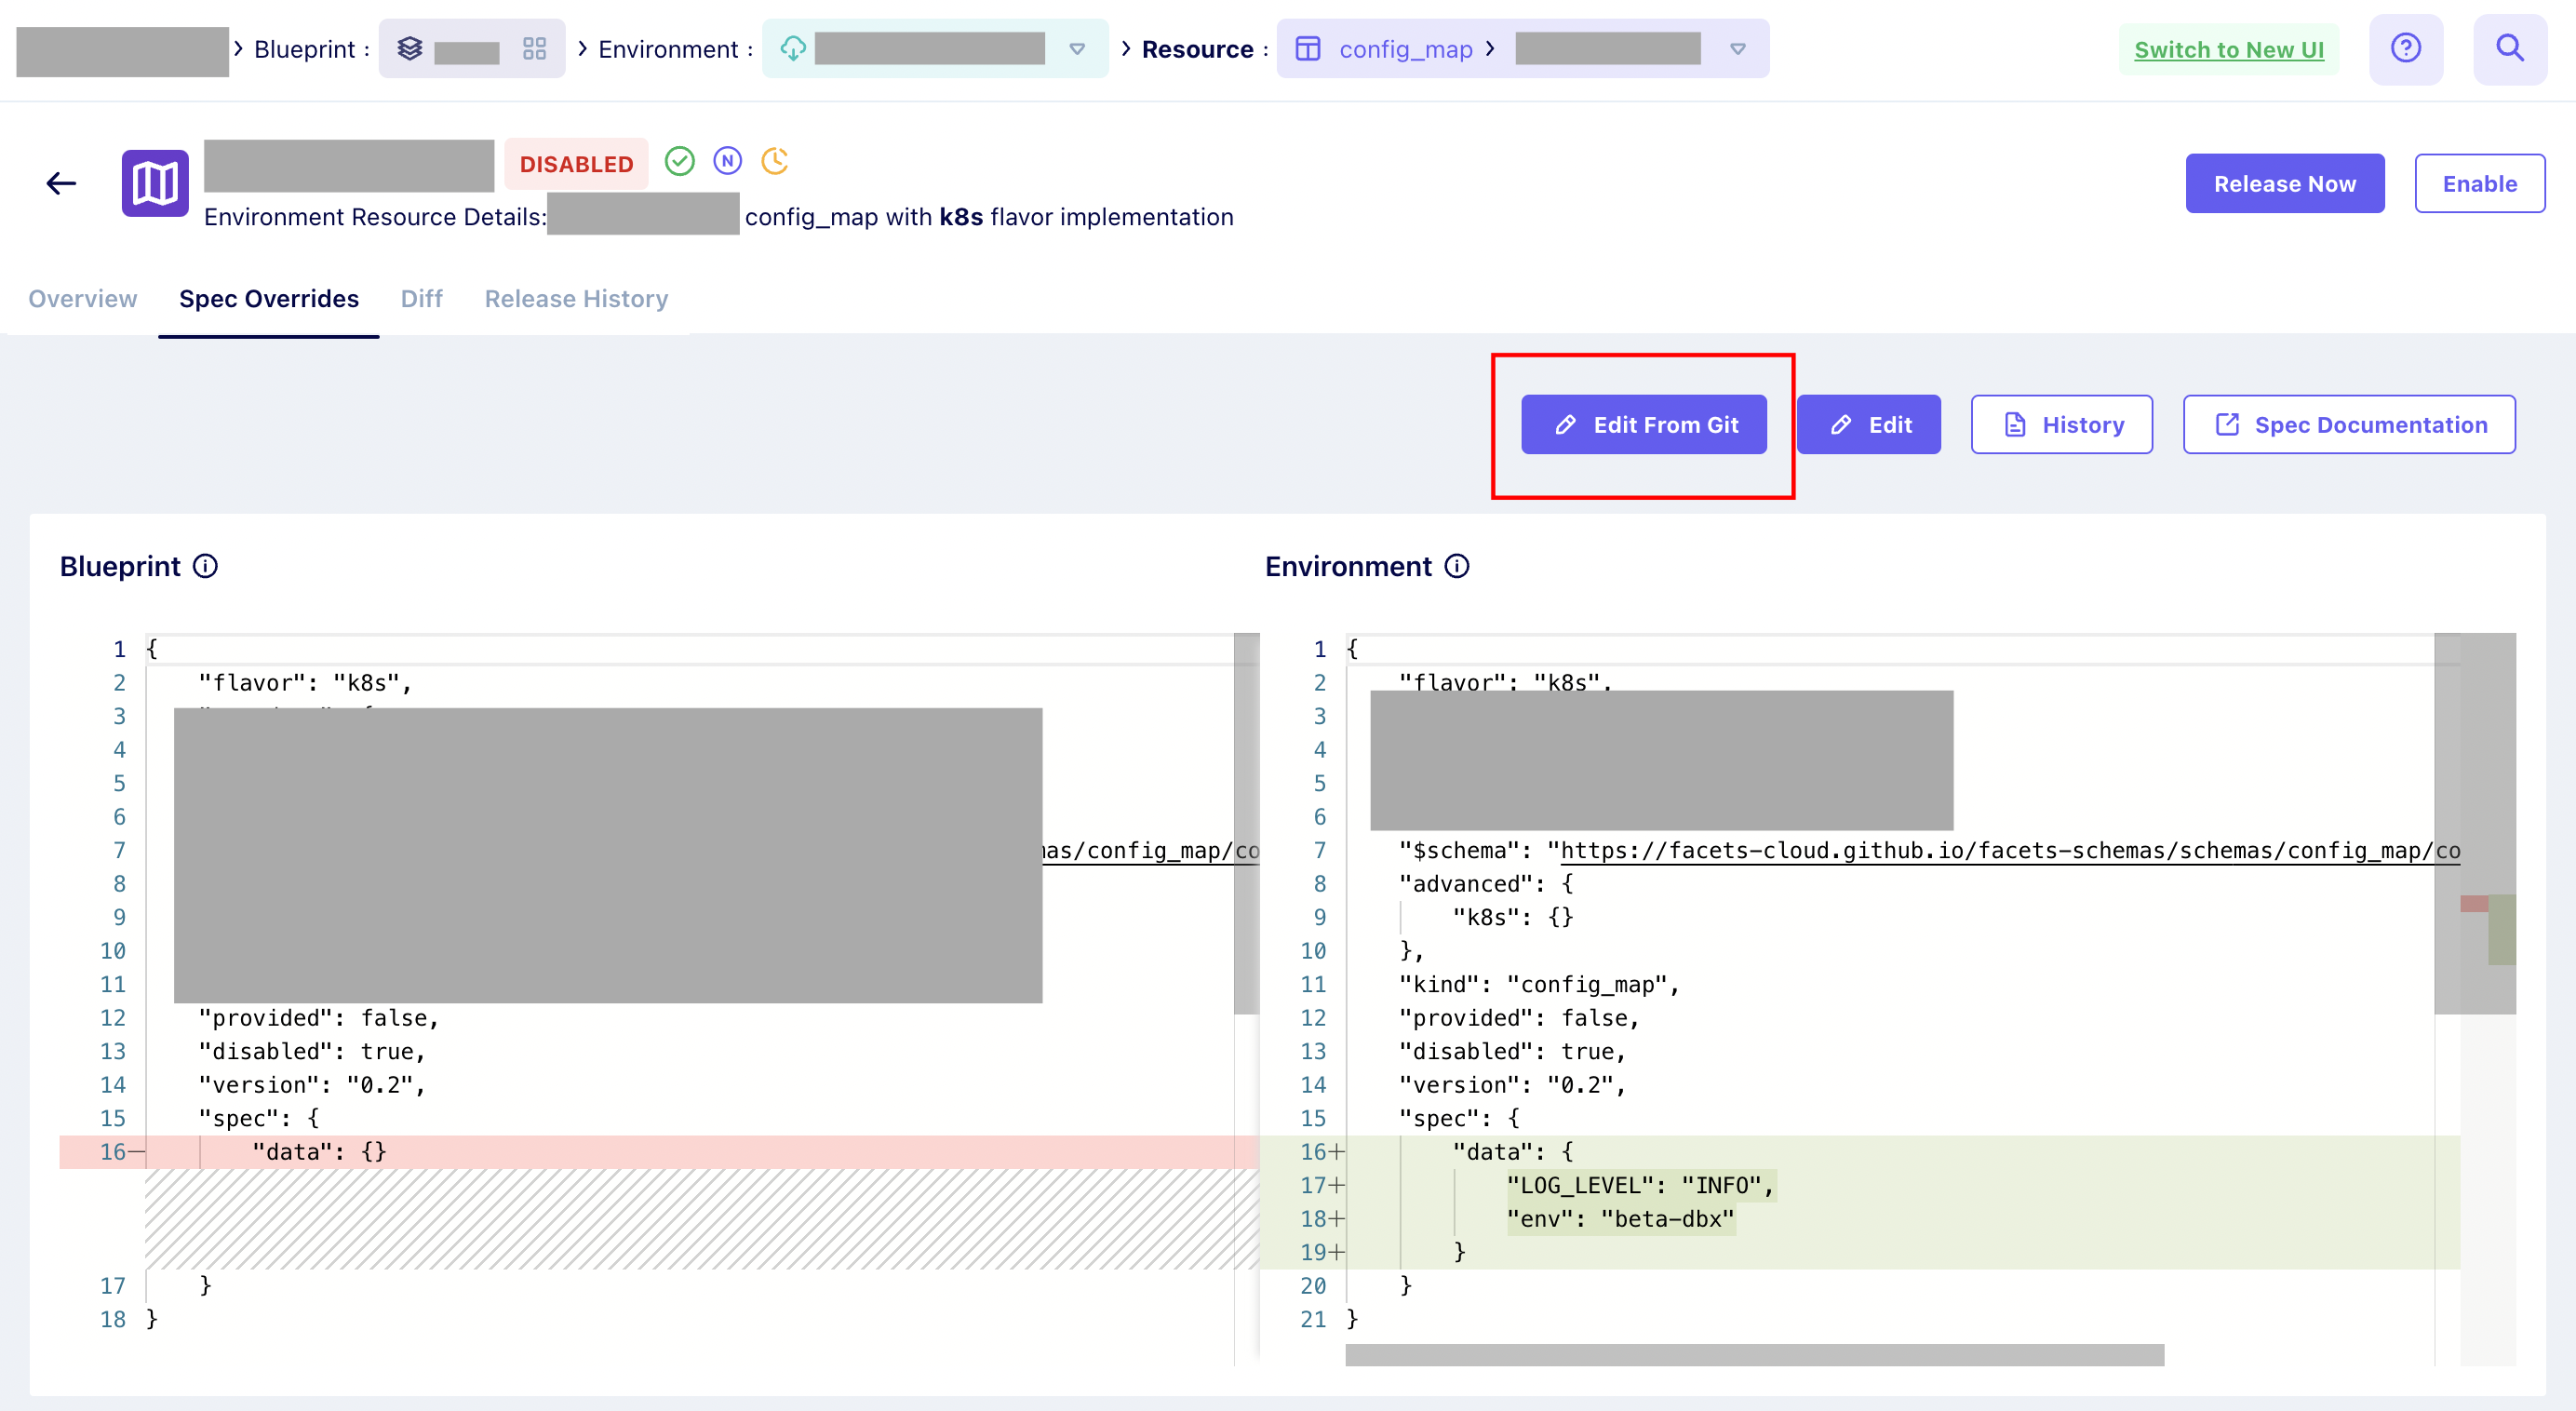
- For Previously Overridden Resources: Clicking the Edit from Git button will navigate users to the specific resource JSON file within the Git repository.
- For New Overrides: If it’s the first time an override is being made for a resource, the Edit with Git button will guide users to the repository. Here’s how to proceed:
- Create a JSON resource file named according to the resource specified in the UI, following this directory structure:
blueprint_name>/<environment_name>/<resource-type>/instances/<resource-name>.jsoninfra-dev/stage/services/instances/springboot.json
- Create a JSON resource file named according to the resource specified in the UI, following this directory structure:
- After creating the file, specify the necessary overrides within the JSON. Save the changes to Git, and they will automatically sync with the Facets UI.
-
Facets will continuously synchronize with Git, ensuring that any updates made in Git are promptly reflected in the resources in Facets.
By enabling the Restrict Changes from UI feature, you streamline and centralize resource management through Git, promoting a more controlled and auditable change process.
FAQs
1. Can I change the GitOps account after creating a project?
Answer: Yes, you can change the GitOps account in the Project Settings > GitOps section. However, ensure that the new account has access to the correct repository and branch to avoid configuration errors. Verify that permissions are properly configured to prevent deployment failures.
2. How can I ensure that overrides are properly migrated before enabling GitOps for Overrides?
Answer: Before enabling GitOps for Overrides, follow these steps to ensure a smooth migration:
- Verify that all environment-specific configuration overrides are stored in the repository at the correct path.
- Double-check that the repository permissions allow write access.
- Test the environment after migration to confirm that the applied configurations match your expected setup.
Important: Once overrides are migrated and GitOps is enabled, changes can no longer be made via the UI.
3. What are the limitations of the "Restrict UI Changes" option?
Answer: When Restrict UI Changes is enabled, all modifications must be performed through Git. This ensures configuration consistency but removes the ability to make quick changes through the Facets UI.
Consider enabling this option only if your team follows strict version control workflows and is comfortable making all changes through version control systems.
4. What’s the difference between "Single Branch Promotion" and "Branch Per Environment"?
Answer:
- Branch Per Environment: Each Git branch is mapped to a specific environment (e.g., the
devbranch for the Development environment). - Single Branch Promotion: One branch is linked to multiple environments, and changes are automatically promoted from one environment to the next (e.g., from
stagingtoproduction).
When to use:
- Choose Single Branch Promotion if you prefer a linear progression of changes through environments.
- Choose Branch Per Environment if you want parallel testing across multiple branches/environments.
Updated about 1 month ago