Okta
How to Create an Application in Okta?
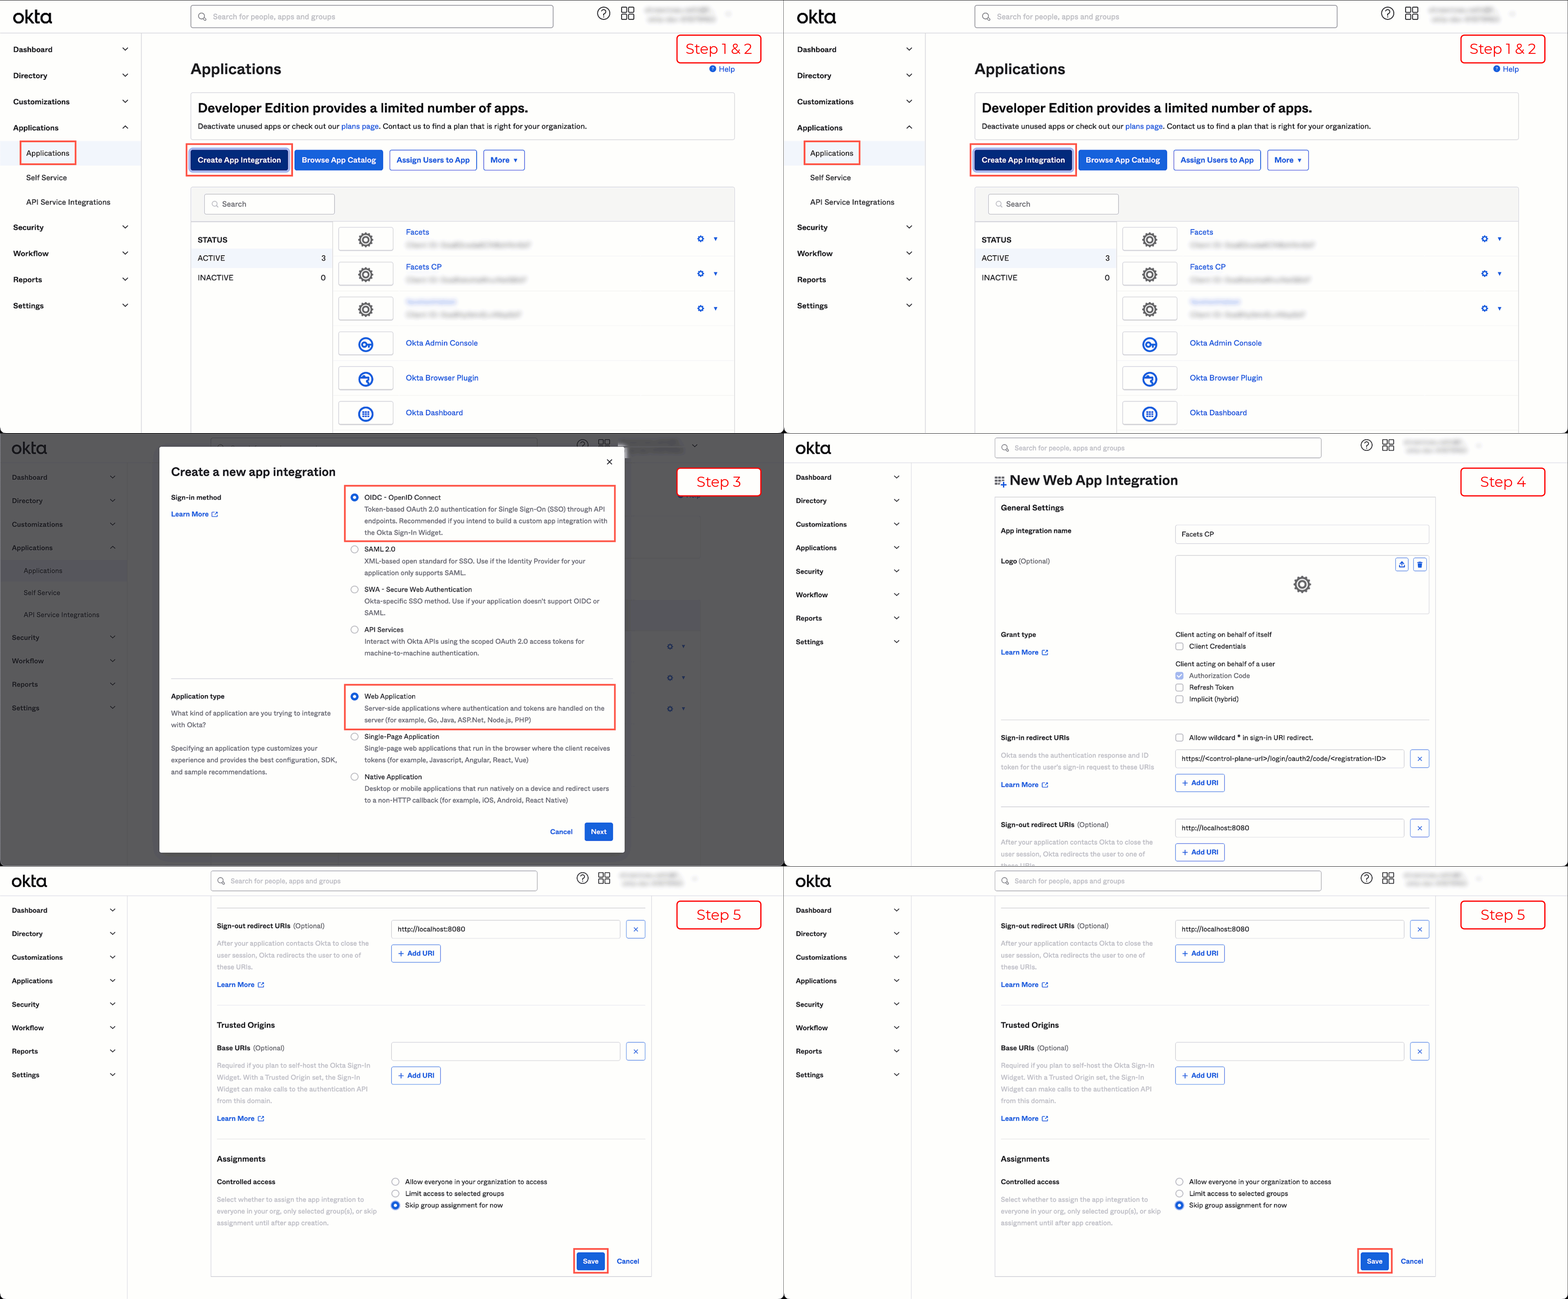
- Log in to your Okta console and navigate to Applications > Applications.
- Click Create App Integration.
- In the pop-up that appears, select OIDC - OpenID Connect as the Sign-in method and Web Application as the Application type.
- You will be redirected to a New Web App Integration window.
- Under General Settings, mention the App integration name.
- Enter the Sign-in redirect URIs.
Eg:https://<control-plane-url>/login/oauth2/code/<registration-ID>- Replace
<control-plane-url>in the above link with your organization's Control Plane URL. - Note down the
<registration-ID>, as the same value needs to be entered in your Control Plane.
- Replace
- Under Assignments, select Skip group assignment for now under Controlled access.
- Click Save.

Click on the image to expand
You have successfully created an Application in Okta.
How to Add Integration for Okta in Facets?
- Navigate to Setting > OAuth Integrations from the left pane.
This page displays all the configured OAuth Integrations in Facets. - Click Add Integrations.
- Now, select Okta as the Provider.
- Fill in the following information:
- Registration ID
- Client ID
- Client Secret
- Issuer URL
a. Log in to the Okta console and navigate to Security > API.
b. Under Authorization Servers, you will find the Issuer URI. - Login Button Text: Choose the text that will appear in the Control Plane Login screen. Facets recommends using your organization's name.
- Click Create.
You have successfully set up Okta integration in Facets.
Updated 8 months ago