Creating a CI Integration
This document provides a step-by-step guide for creating a CI Integration.
How to Create a CI Integration?
- Access the CI Integration Page: Open Blueprints and choose the Blueprint. Select the CI Integration tab. Here, you'll find all the CI Integrations associated with the Blueprint.
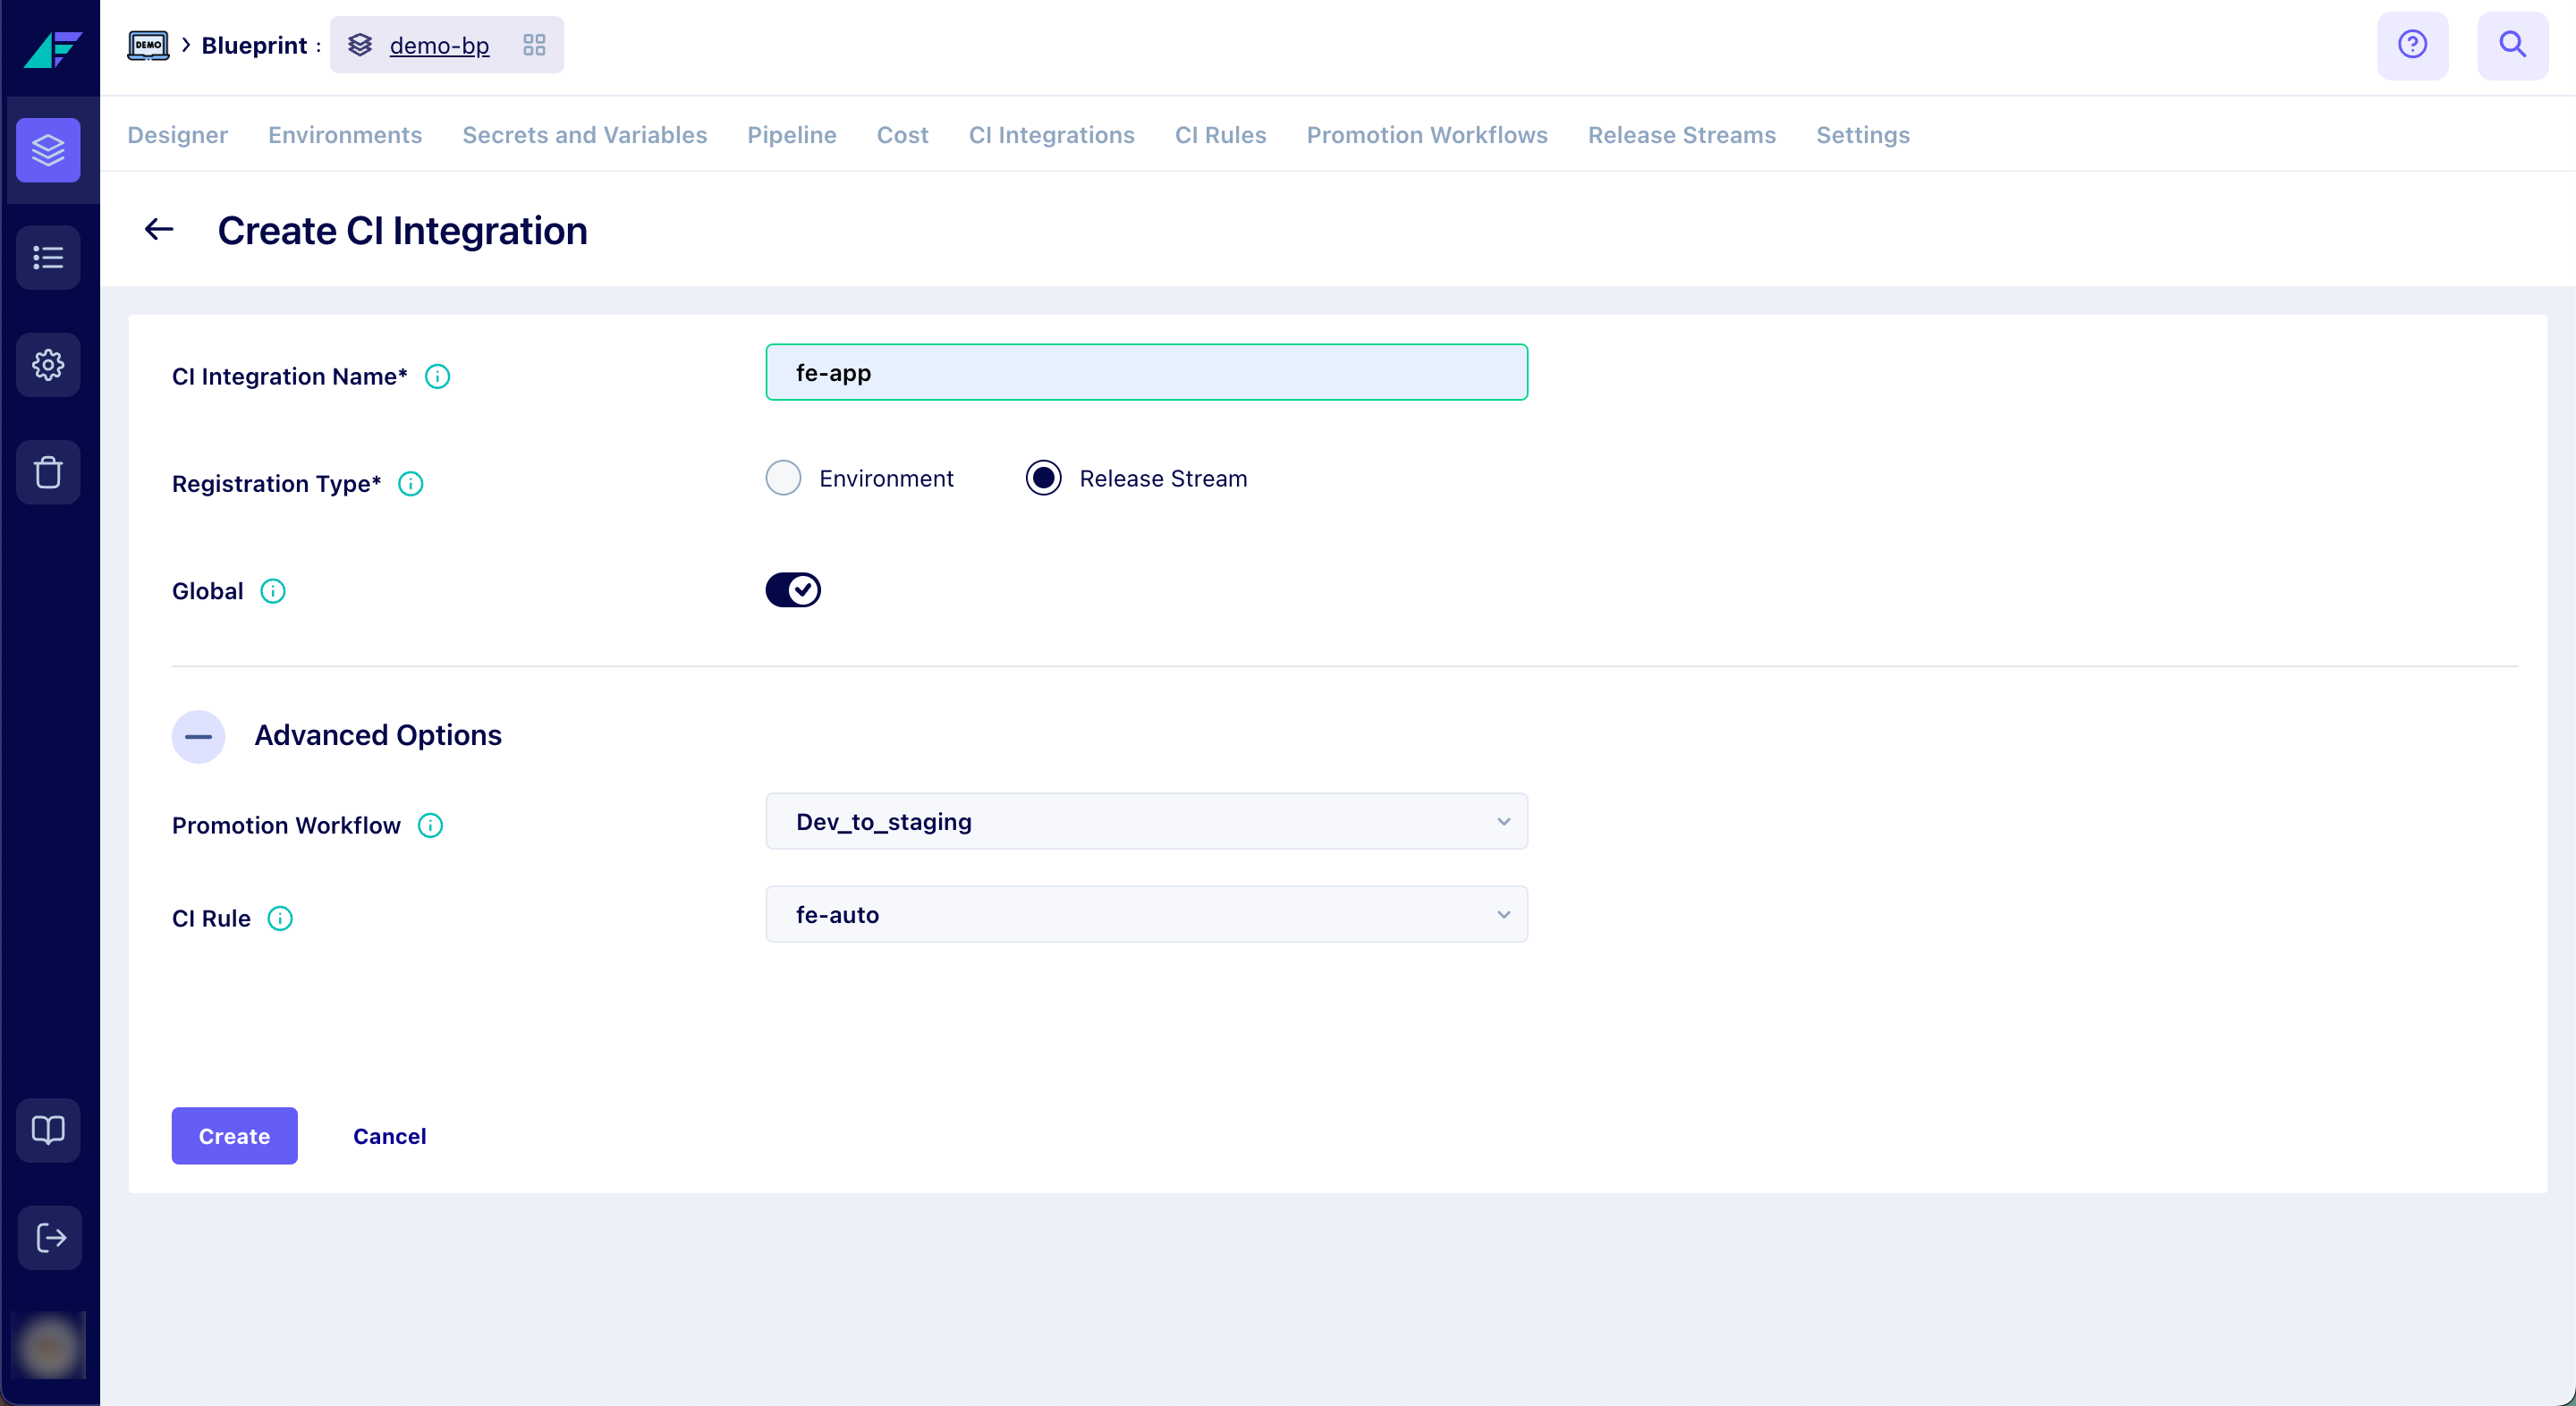
- Create a New CI Integration: Click the Create CI Integration button.
- Name Your CI Integration: Enter your desired name in the CI Integration Name field.
Note: The CI Integration name should be identical to the corresponding Artifact name for consistency. - Select Registration Type: Choose between Environment Name and Release Stream.
- Set Global Access: If you have multiple blueprints, enabling this option allows your CI Integration to be accessible across all Blueprints.
- Configure Advanced Options: Under the Advanced Options section, you can configure the promotion hierarchy by selecting the Promotion Workflow to define the desired workflow for promoting artifacts. Additionally, you can classify artifacts by choosing the appropriate CI Rule.
- Finalize Creation: Click Create to finish setting up your CI Integration.
Click on the image to expand
The new CI Integration will appear under the 'CI Integration' tab.
How to Configure Container Registry with CI Integration?
- Open Blueprints and choose the Blueprint that contains the environment.
- Select the Environments tab and select the Environment
- Select the Resource Center tab and select the required Service type resource.
- Go to the Spec tab to edit the service JSON.
- In the code snippet, under "release" > "build", specify the Container Registry Name for
artifactoryand the CI Integration Name for thename."build": { "artifactory": "<Container-Registry-Name>", "name": "<CI-Integration-Name>" }; - Click Save Changes.
How to Push an Artifact?
- Access the CI Integration Details Page: Navigate to the CI Integration page where you intend to push the artifact.
- Select the Release Stream or Environment: Locate the Release Stream or Environment where you want to push the artifact. Click the Push Artifact icon found under the Actions column.
- Push the Artifact: In the pop-up window that appears, the Facetsctl command required to push your artifact will be displayed.
When pushing an artifact, make sure to use the name you provided while creating the Container Registry for theartifactoryparameter in thefacetsctl pushcommand.facetsctl push -i <image_name_here> -a fe-app --registration-type RELEASE_STREAM --registration-value QA -e <external_id_here> -d <your_build_description> --artifactory <Container-Registry-Name> - For a comprehensive understanding and proper usage of the push command, make sure to refer to the Facets CLI documentation.

Click on the image to expand
You have successfully pushed an artifact.
How to Promote an Artifact?
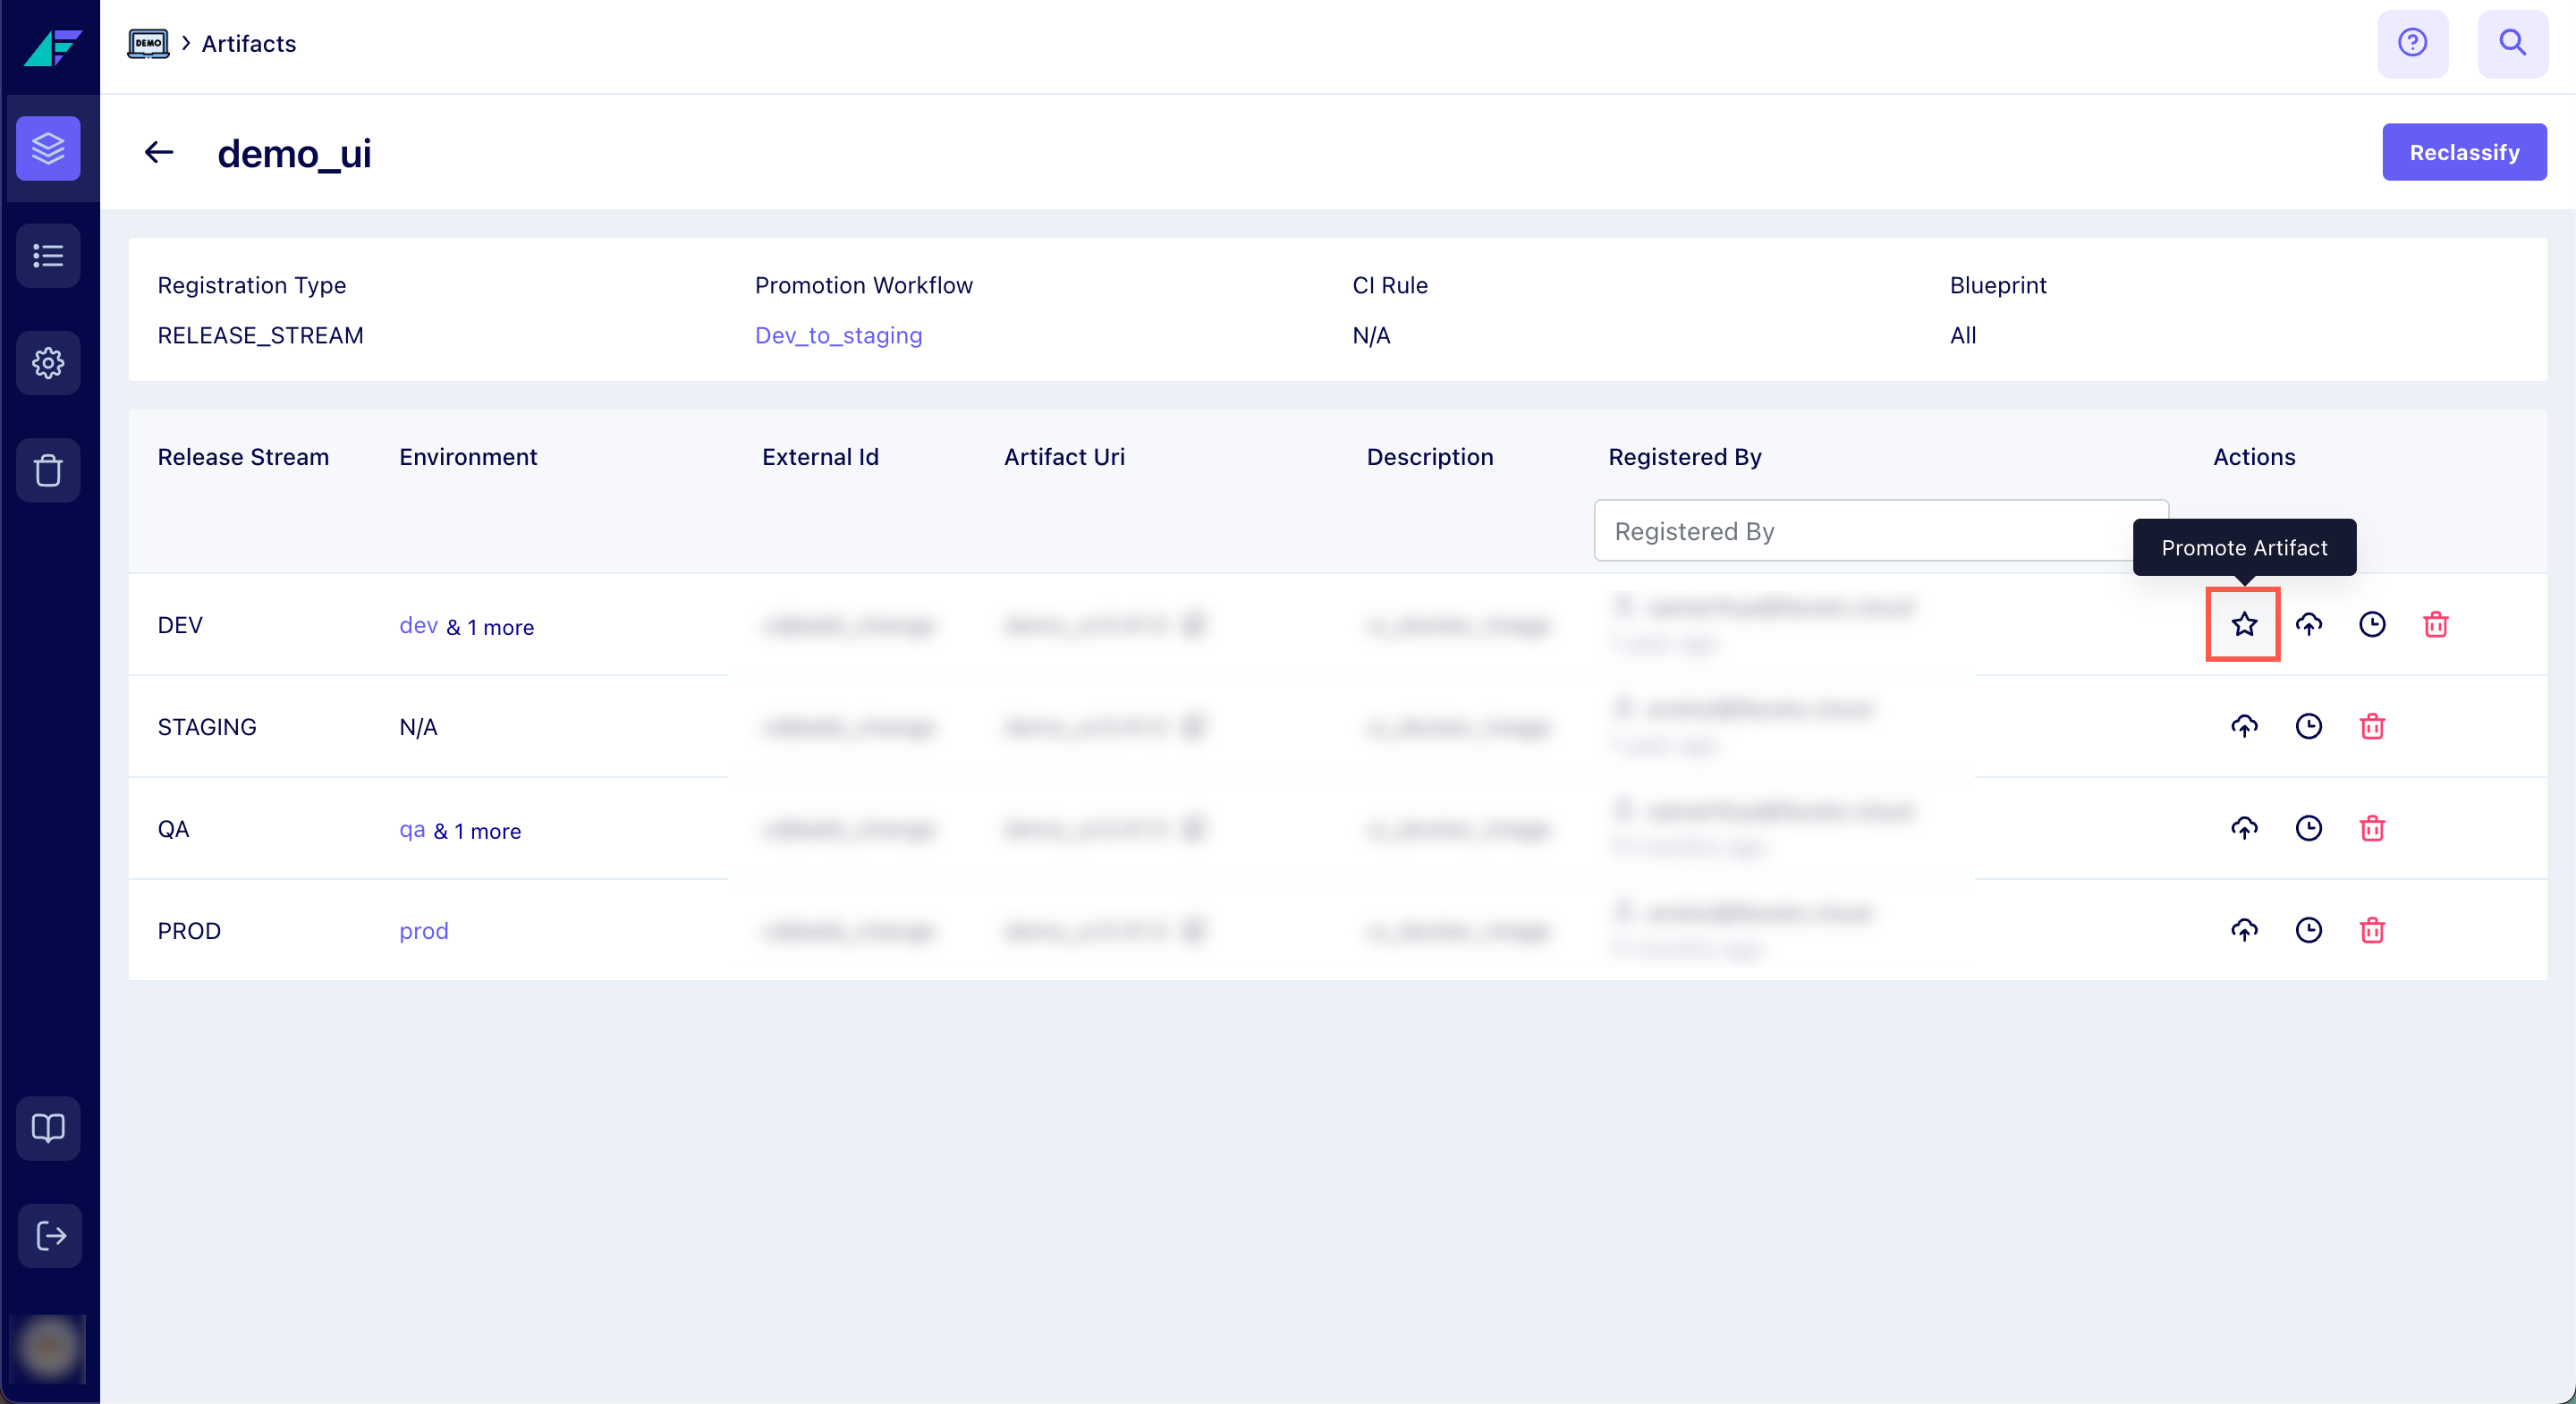
- Choose the Artifact: Locate the Environment or Release Stream containing the artifact you wish to promote, then click the Promote Artifact icon in the Actions column.
- Promote the Artifact: In the pop-up window that appears, click Promote.
Click on the image to expand
You have successfully promoted the artifact. To learn about creating a promotion workflow, refer to the Creating a Promotion Workflow documentation.
Related Guide
Updated 11 months ago