Creating a Promotion Workflow
A Promotion Workflow allows you to promote changes through different environments/release streams, ensuring a streamlined and controlled process for software deployment. This document provides a step-by-step guide for creating a promotion workflow.
How to Create a Promotional Workflow?
- Open Blueprints and choose the Blueprint. Select the Promotion Workflow tab.
You will find all the Promotion Workflows related to this Blueprint on this page. - Click Create Promotion Workflow and mention the Workflow Name.
Registration Type
Select the Registration Type as Environment or Release Stream.
Environment Name
- If you choose the Registration Type as Environment, all the Available Environments will be displayed under Promotional Hierarchy.
- You can also click the + icon beside the environment or drag the environments from the Available Environments to the Environments Hierarchy column to create the Promotion Hierarchy.
- Click Create.
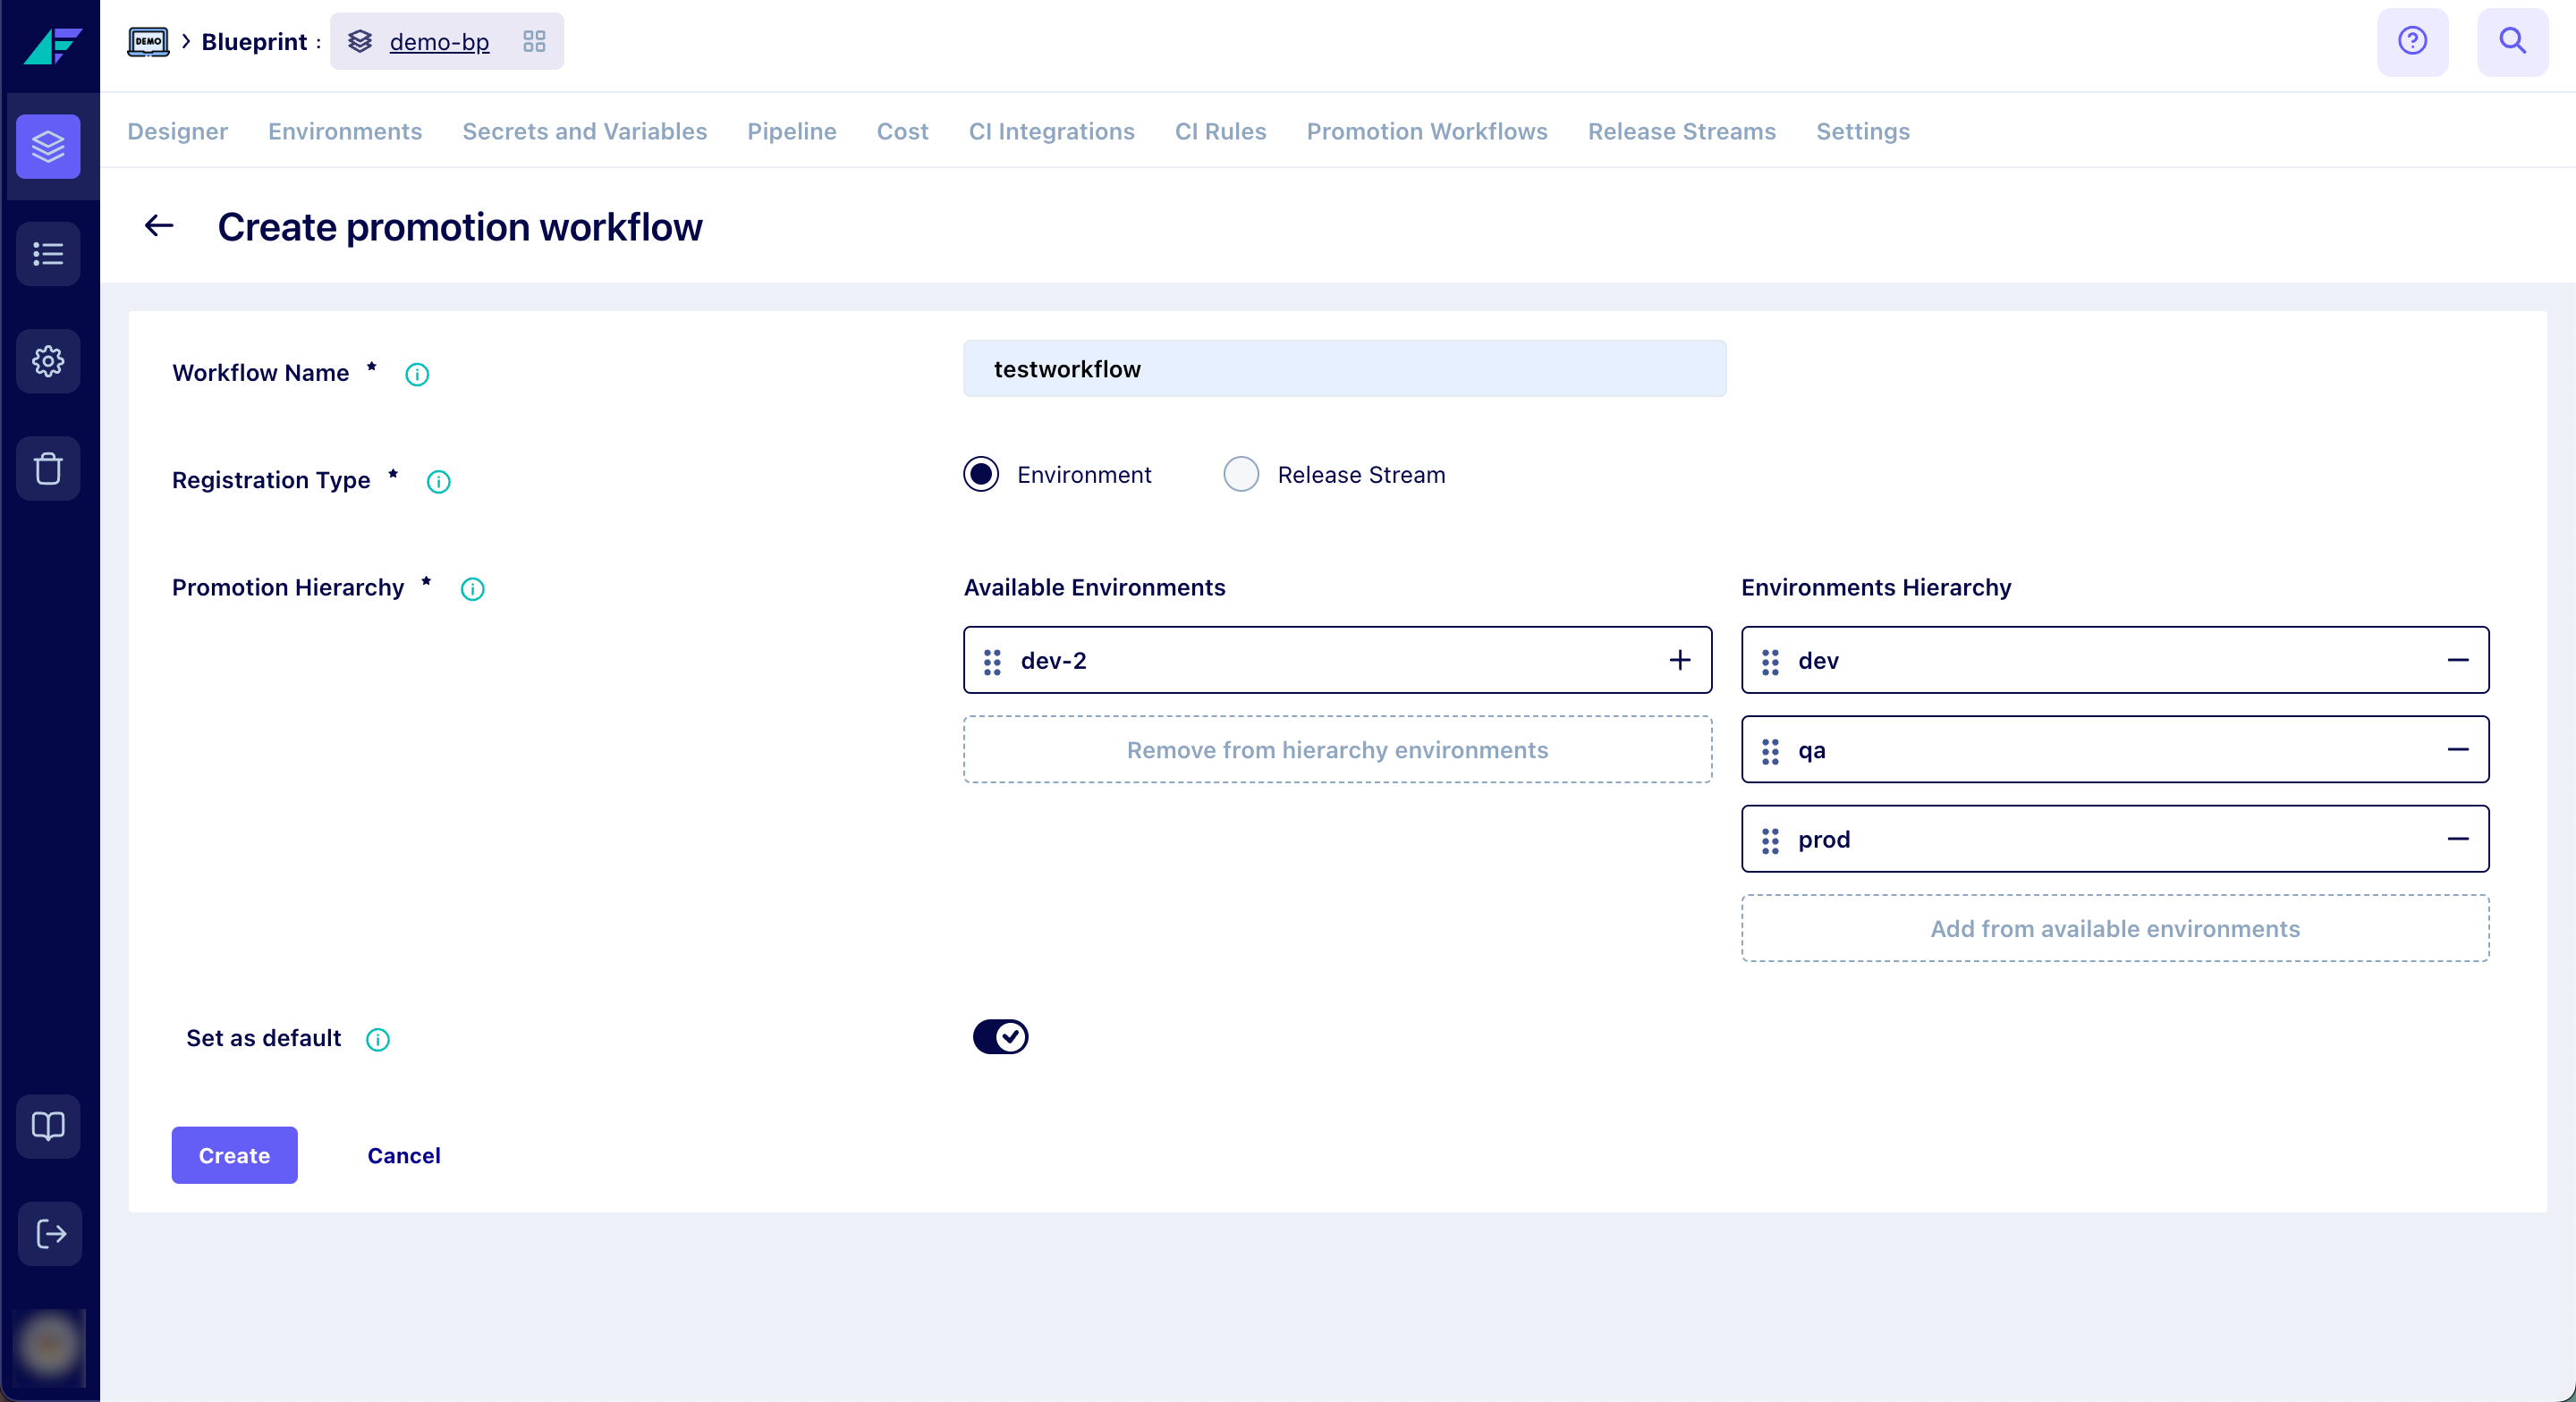
Click on the image to expand
Release Stream
- If you choose the Registration Type as Release Stream, all the Available Release Streams will be displayed under Promotional Hierarchy.
- You can also click the + icon beside the release stream or drag the release stream from the Available Release Streams to the Release Streams Hierarchy column to create the Promotion Hierarchy.
- Global: Enabling this toggle will make this workflow available to all the blueprints.
- Click Create.
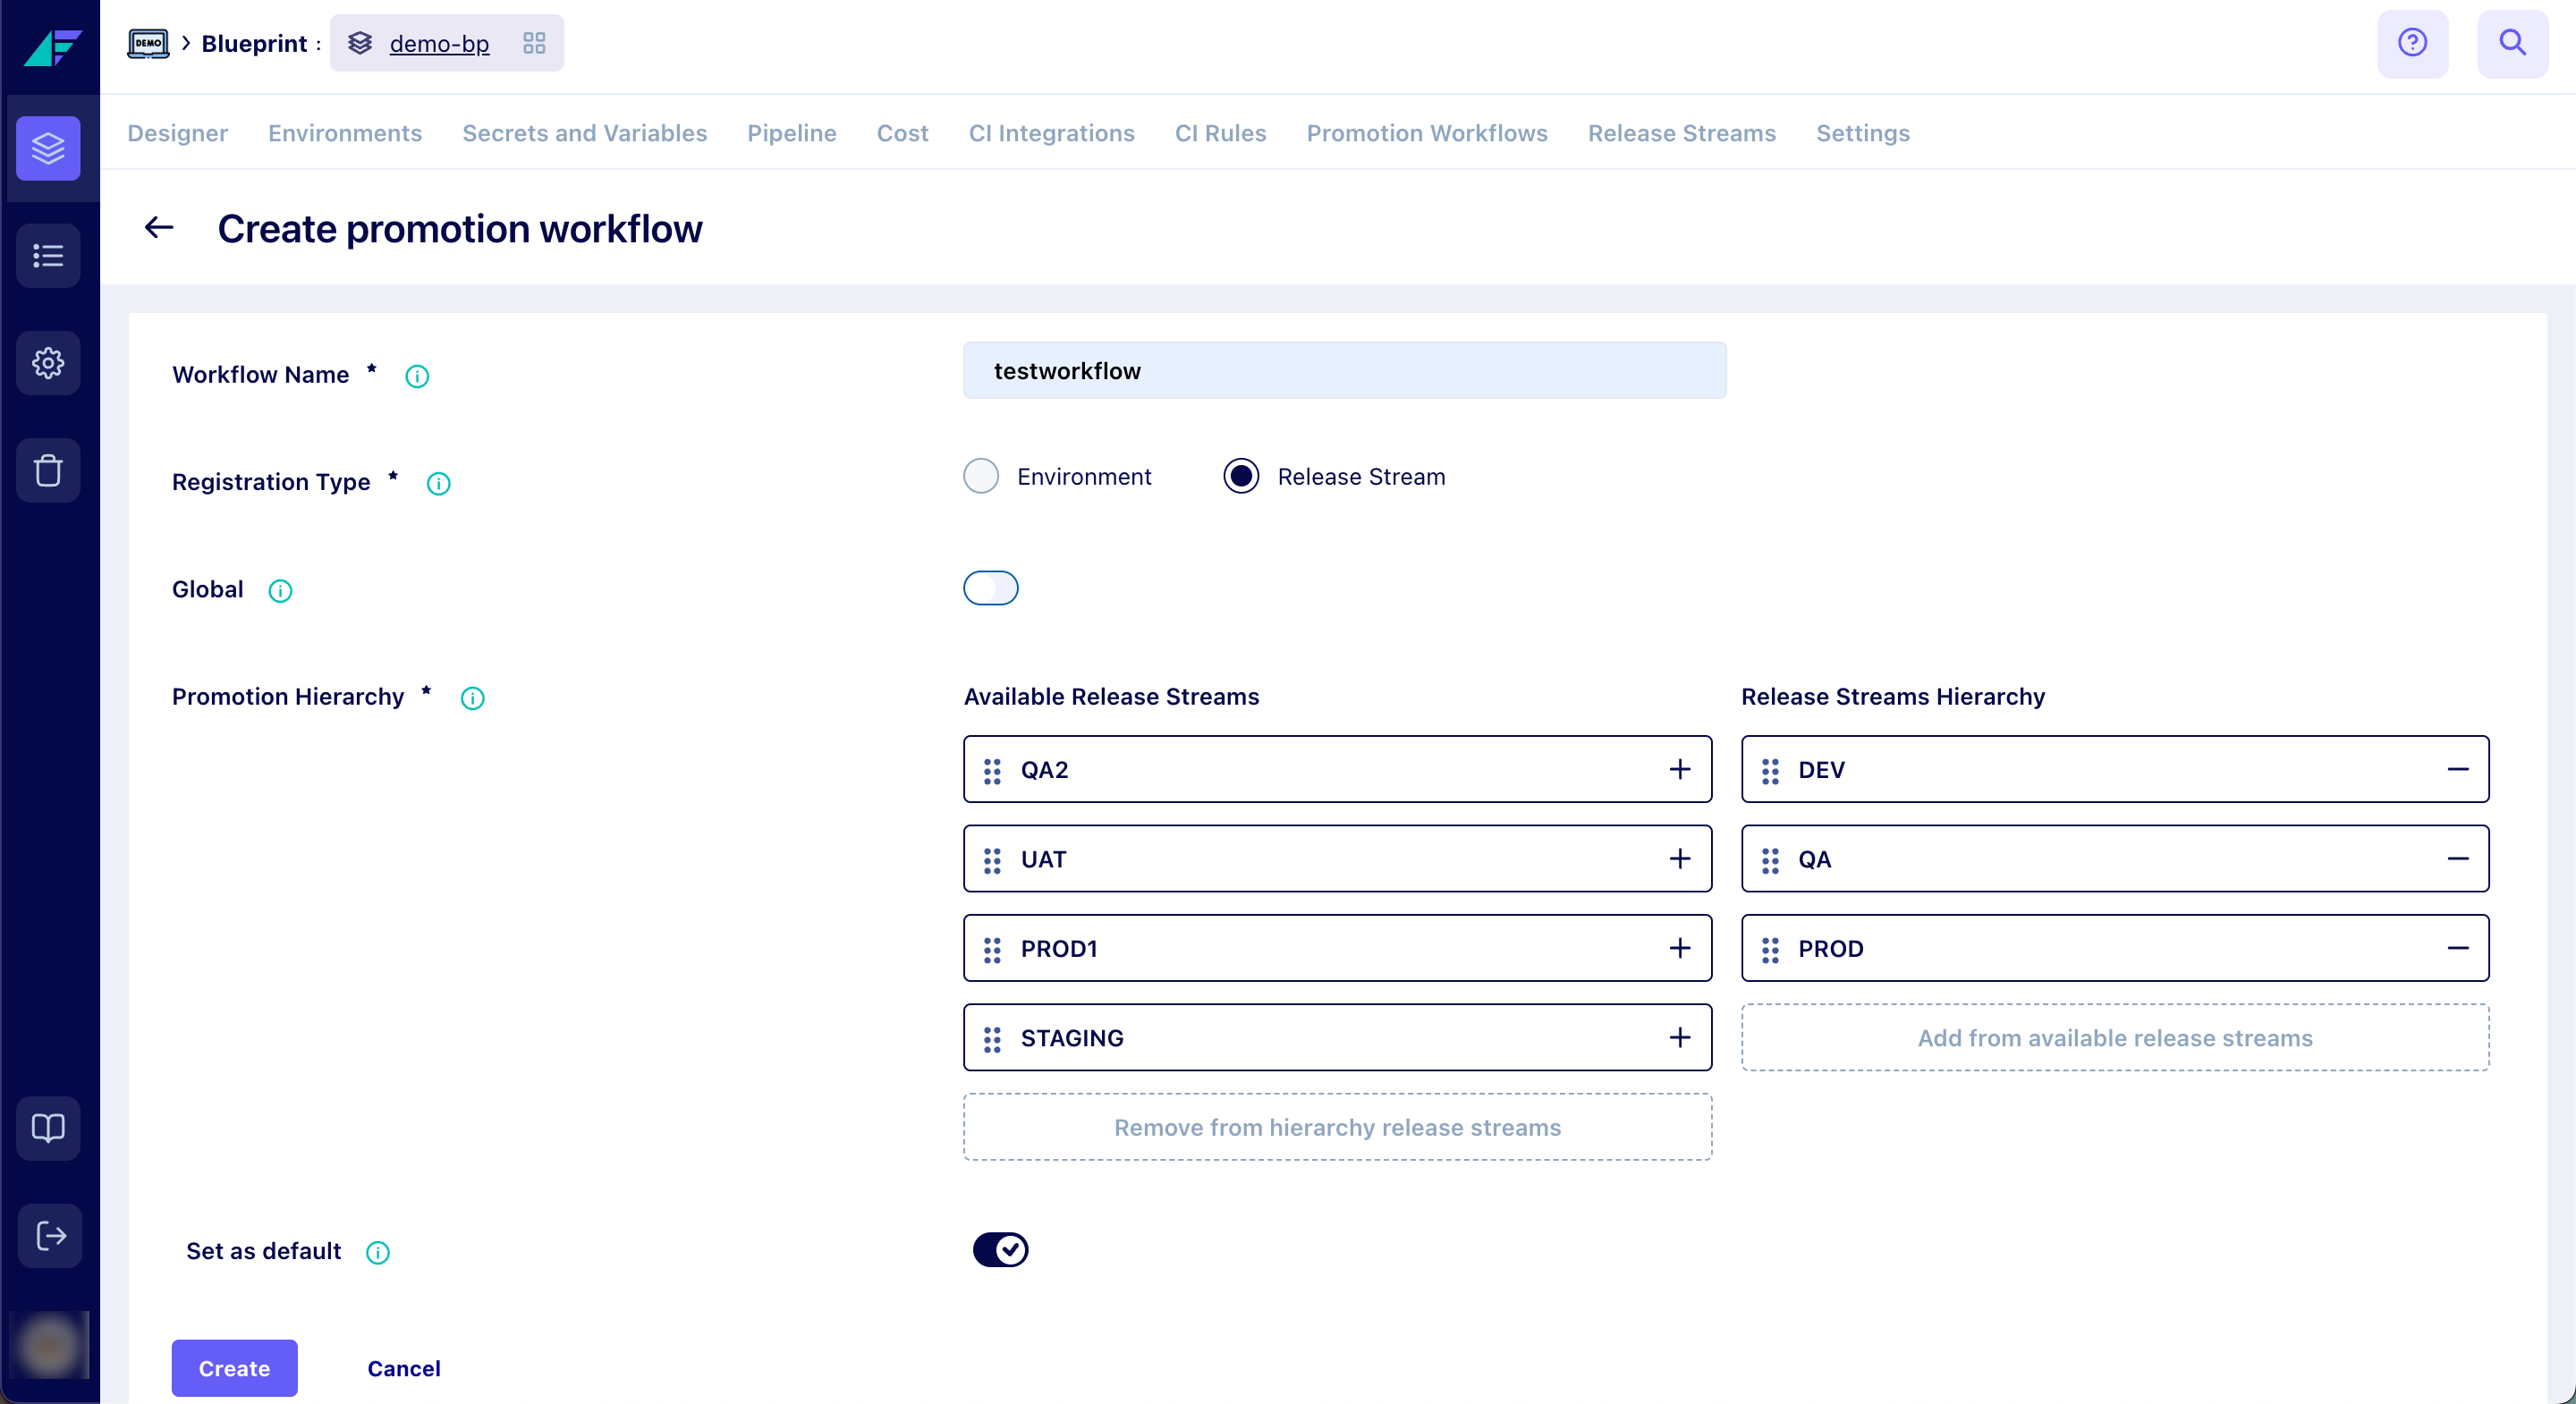
Click on the image to expand
You have successfully created a Promotion Workflow in the Facets Control Plane.
Related guides
Updated 11 months ago