Quick Start: Create a custom module in Facets
Get started with custom modules in Facets by creating and testing a simple S3 bucket module.
Prerequisites
- Access to a Facets Control Plane with necessary permissions
- Terraform CLI installed (for
terraform init,plan,apply) - Basic Terraform knowledge
Phase 1: Create and Test Your Module
1. Set Up Module Structure
First, create your module directory and the necessary files:
# Create module directory
mkdir custom_s3_module
cd custom_s3_module

# Create required files
mkdir test
touch main.tf variables.tf outputs.tf facets.yaml
touch test/test.tf test/test.json
2. Add Module Code
Copy the following Terraform configuration into your main.tf This defines the core S3 bucket resource:
locals {
  spec = lookup(var.instance, "spec", {})
}

module "s3_bucket" {
  source      = "./terraform-s3-bucket"
  bucket_name = var.instance_name
  cluster_name = var.cluster.name
  namespace    = var.environment.namespace
  extra_tag    = lookup(local.spec, "extra_tag", "null")
}
Add these standard Facets variables to yourvariables.tf:
variable "cluster" {
  type = any
}

variable "instance" {
  type = any
}

variable "instance_name" {
  type    = string
}

variable "environment" {
  type = any
}
Set up your outputs in outputs.tf. These values will be available for reference after deployment:
locals {
  output_attributes = {
    Bucket_ID = module.s3_bucket.bucket_id
    Bucket_ARN = module.s3_bucket.bucket_arn
  }
  output_interfaces = {}
}
Configure your module metadata in facets.yaml. This tells Facets how to present and use your module:
intent: storage
flavor: aws_s3_bucket
version: 1.0
clouds:
  - aws
spec:
  properties:
    bucket_name:
      type: string
      description: "Name of the S3 bucket"
    acl:
      type: string
      description: "Access control list"
      default: "private"
    environment:
      type: string
      description: "Deployment environment"
sample:
  kind: storage
  flavor: aws_s3_bucket
  metadata: {}
  disabled: true
  version: "1.0"
  spec:
    bucket_name: "example-bucket"
    acl: "private"
    environment: "prod"
3. Add Test Files
Create a sample configuration in test/test.json for local testing:
{
  "bucket_name": "example-bucket",
  "acl": "private",
  "environment": "prod"
}
Create test/test.tf to validate your module works correctly:
module "test_s3" {
  source      = "../"
  bucket_name = jsondecode(file("test.json")).bucket_name
  acl         = jsondecode(file("test.json")).acl
  environment = jsondecode(file("test.json")).environment
}

output "test_bucket_arn" {
  value = module.test_s3.bucket_arn
}
4. Test Locally
cd test
terraform init
terraform plan
terraform apply
Verify the outputs match your expectations before proceeding.
5. Register Module
You'll need three things to register your module:
- Control Plane URL: The URL you use to access Facets (e.g.
https://<your-company>.console.facets.cloud) - Email: Your registered email on Facets
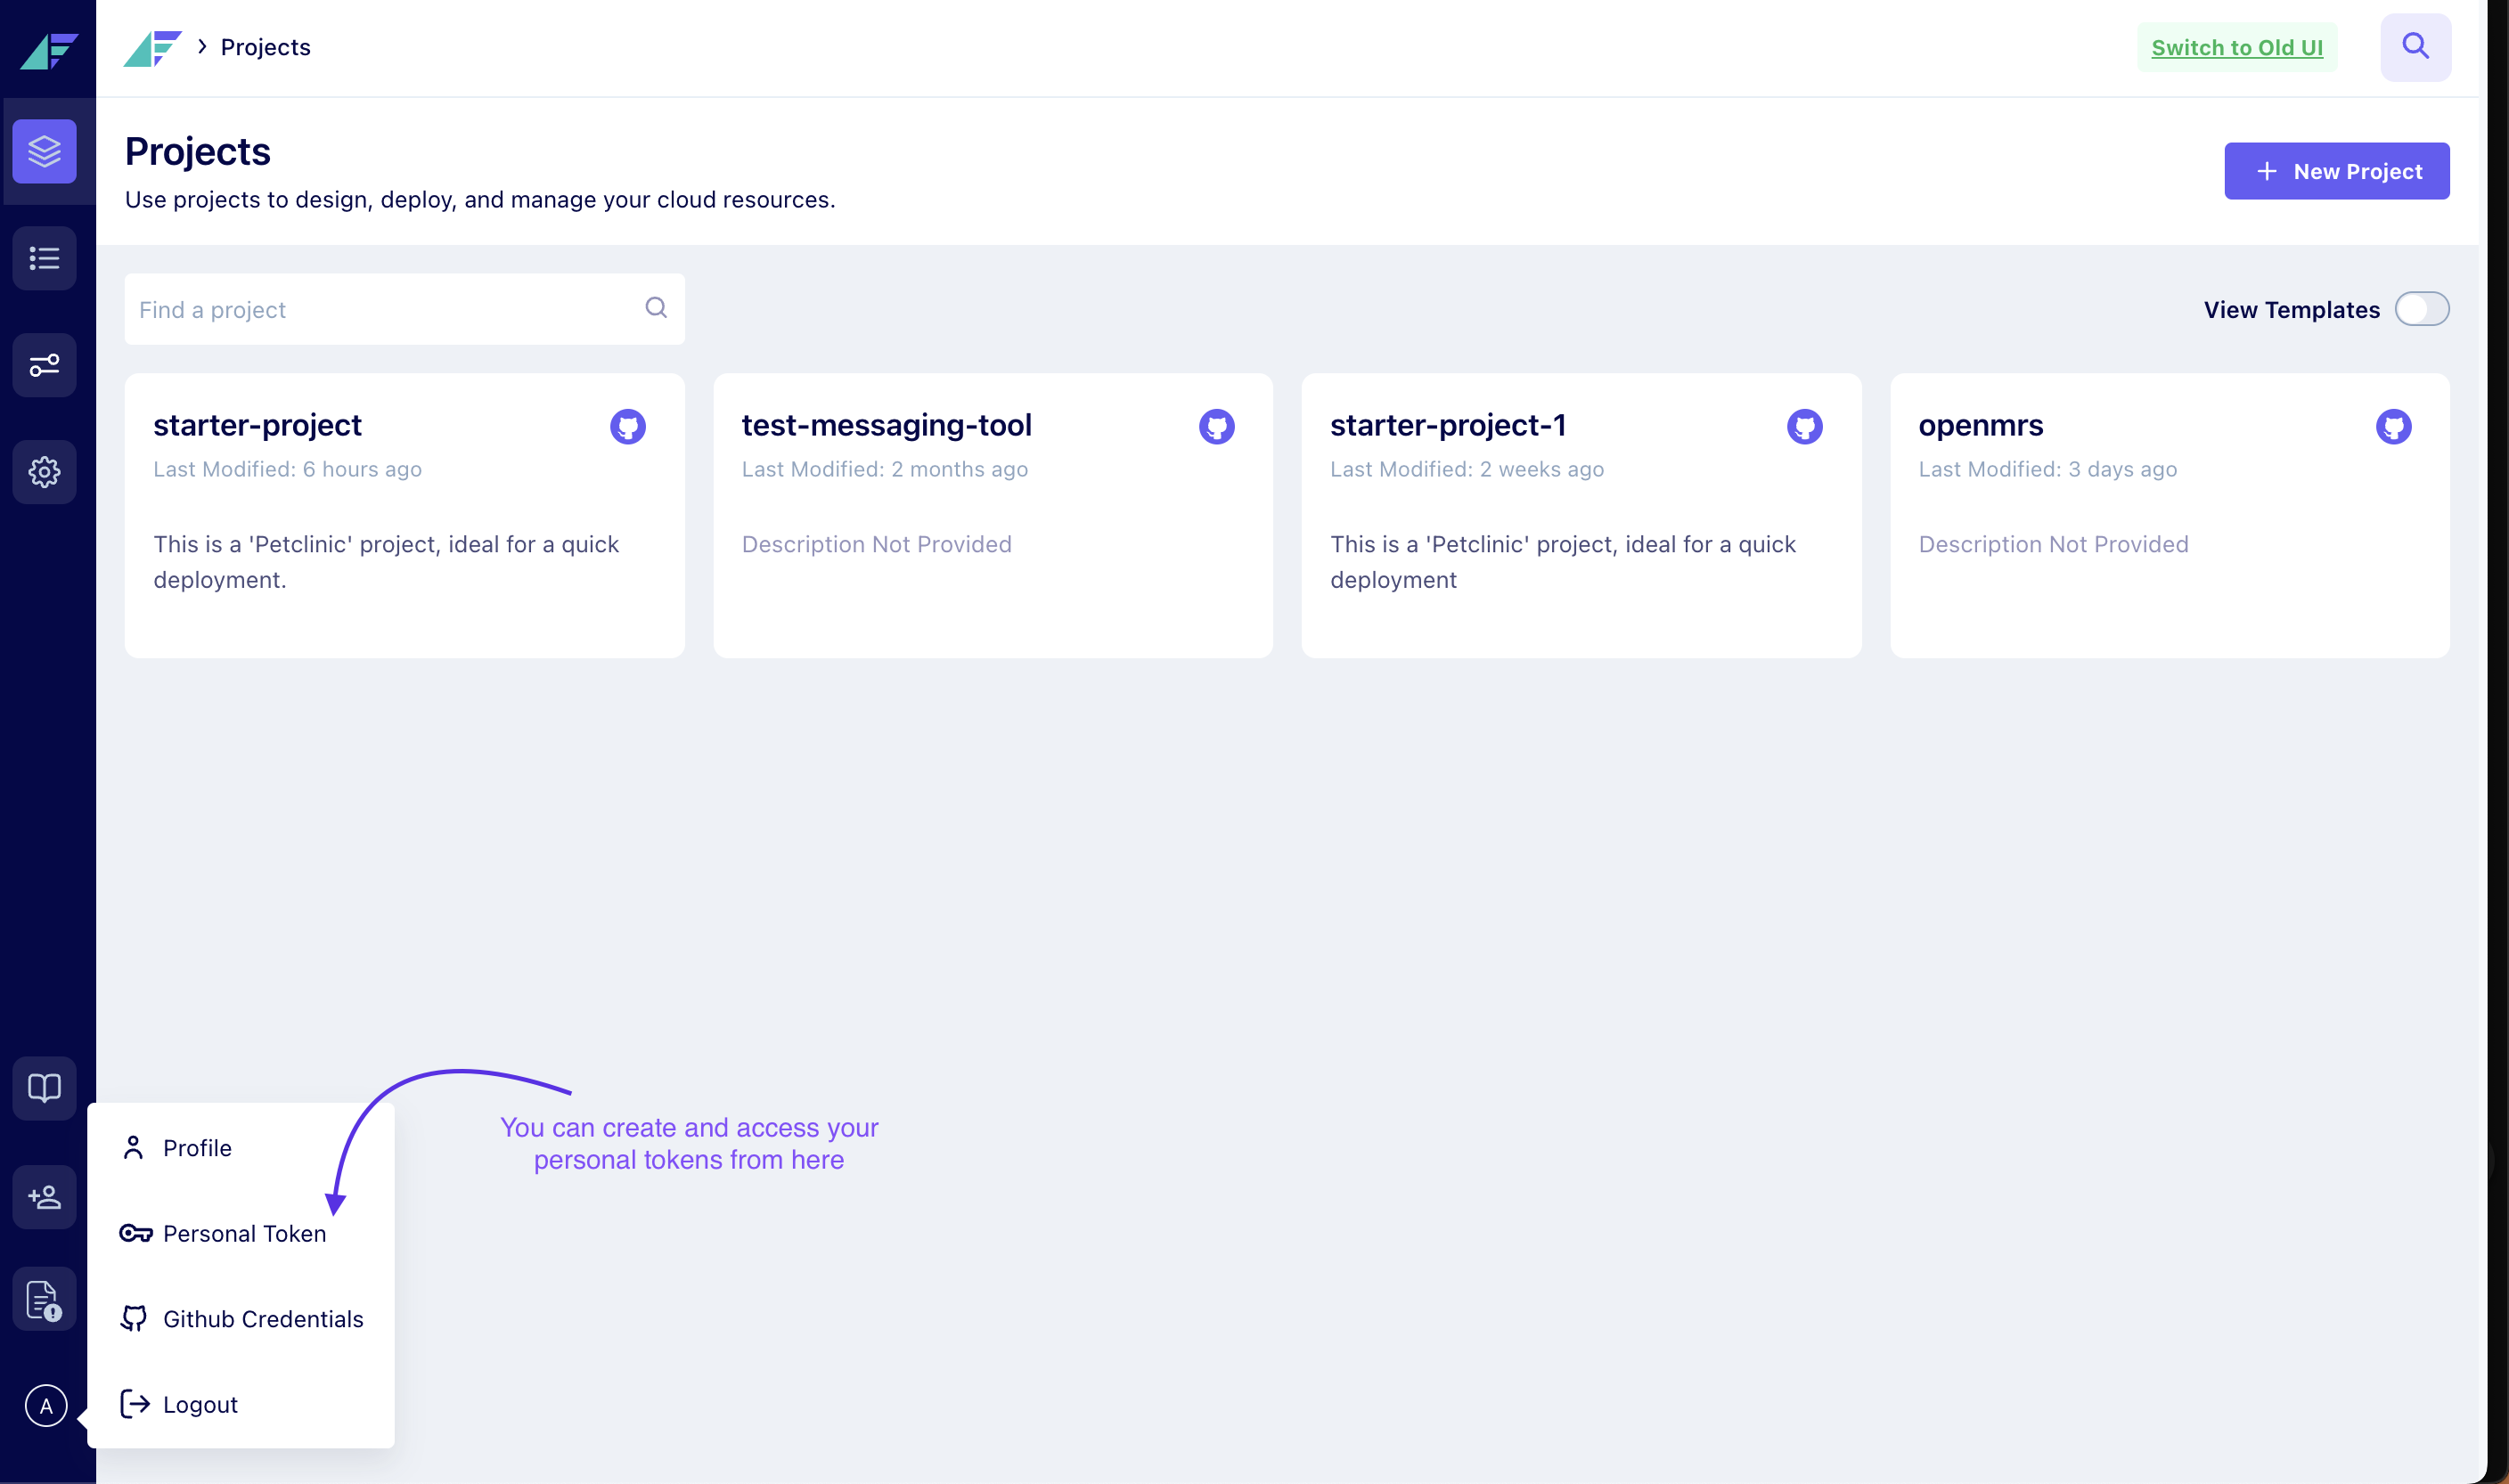
- Personal Token: Find this in Settings → Profile section
Your Personal Token can be found in the User menu. Click your profile icon in the bottom left, then select 'Personal Token' as shown below:
# From your module root directory
curl -s https://facets-cloud.github.io/facets-schemas/scripts/module_register.sh | bash -s -- \
  -c <control-plane-url> \
  -u <your-email> \
  -t <your-token>
6. Enable Preview Project
After registration, your module will only be available in Preview projects. This lets you safely test the module before making it available across all projects.
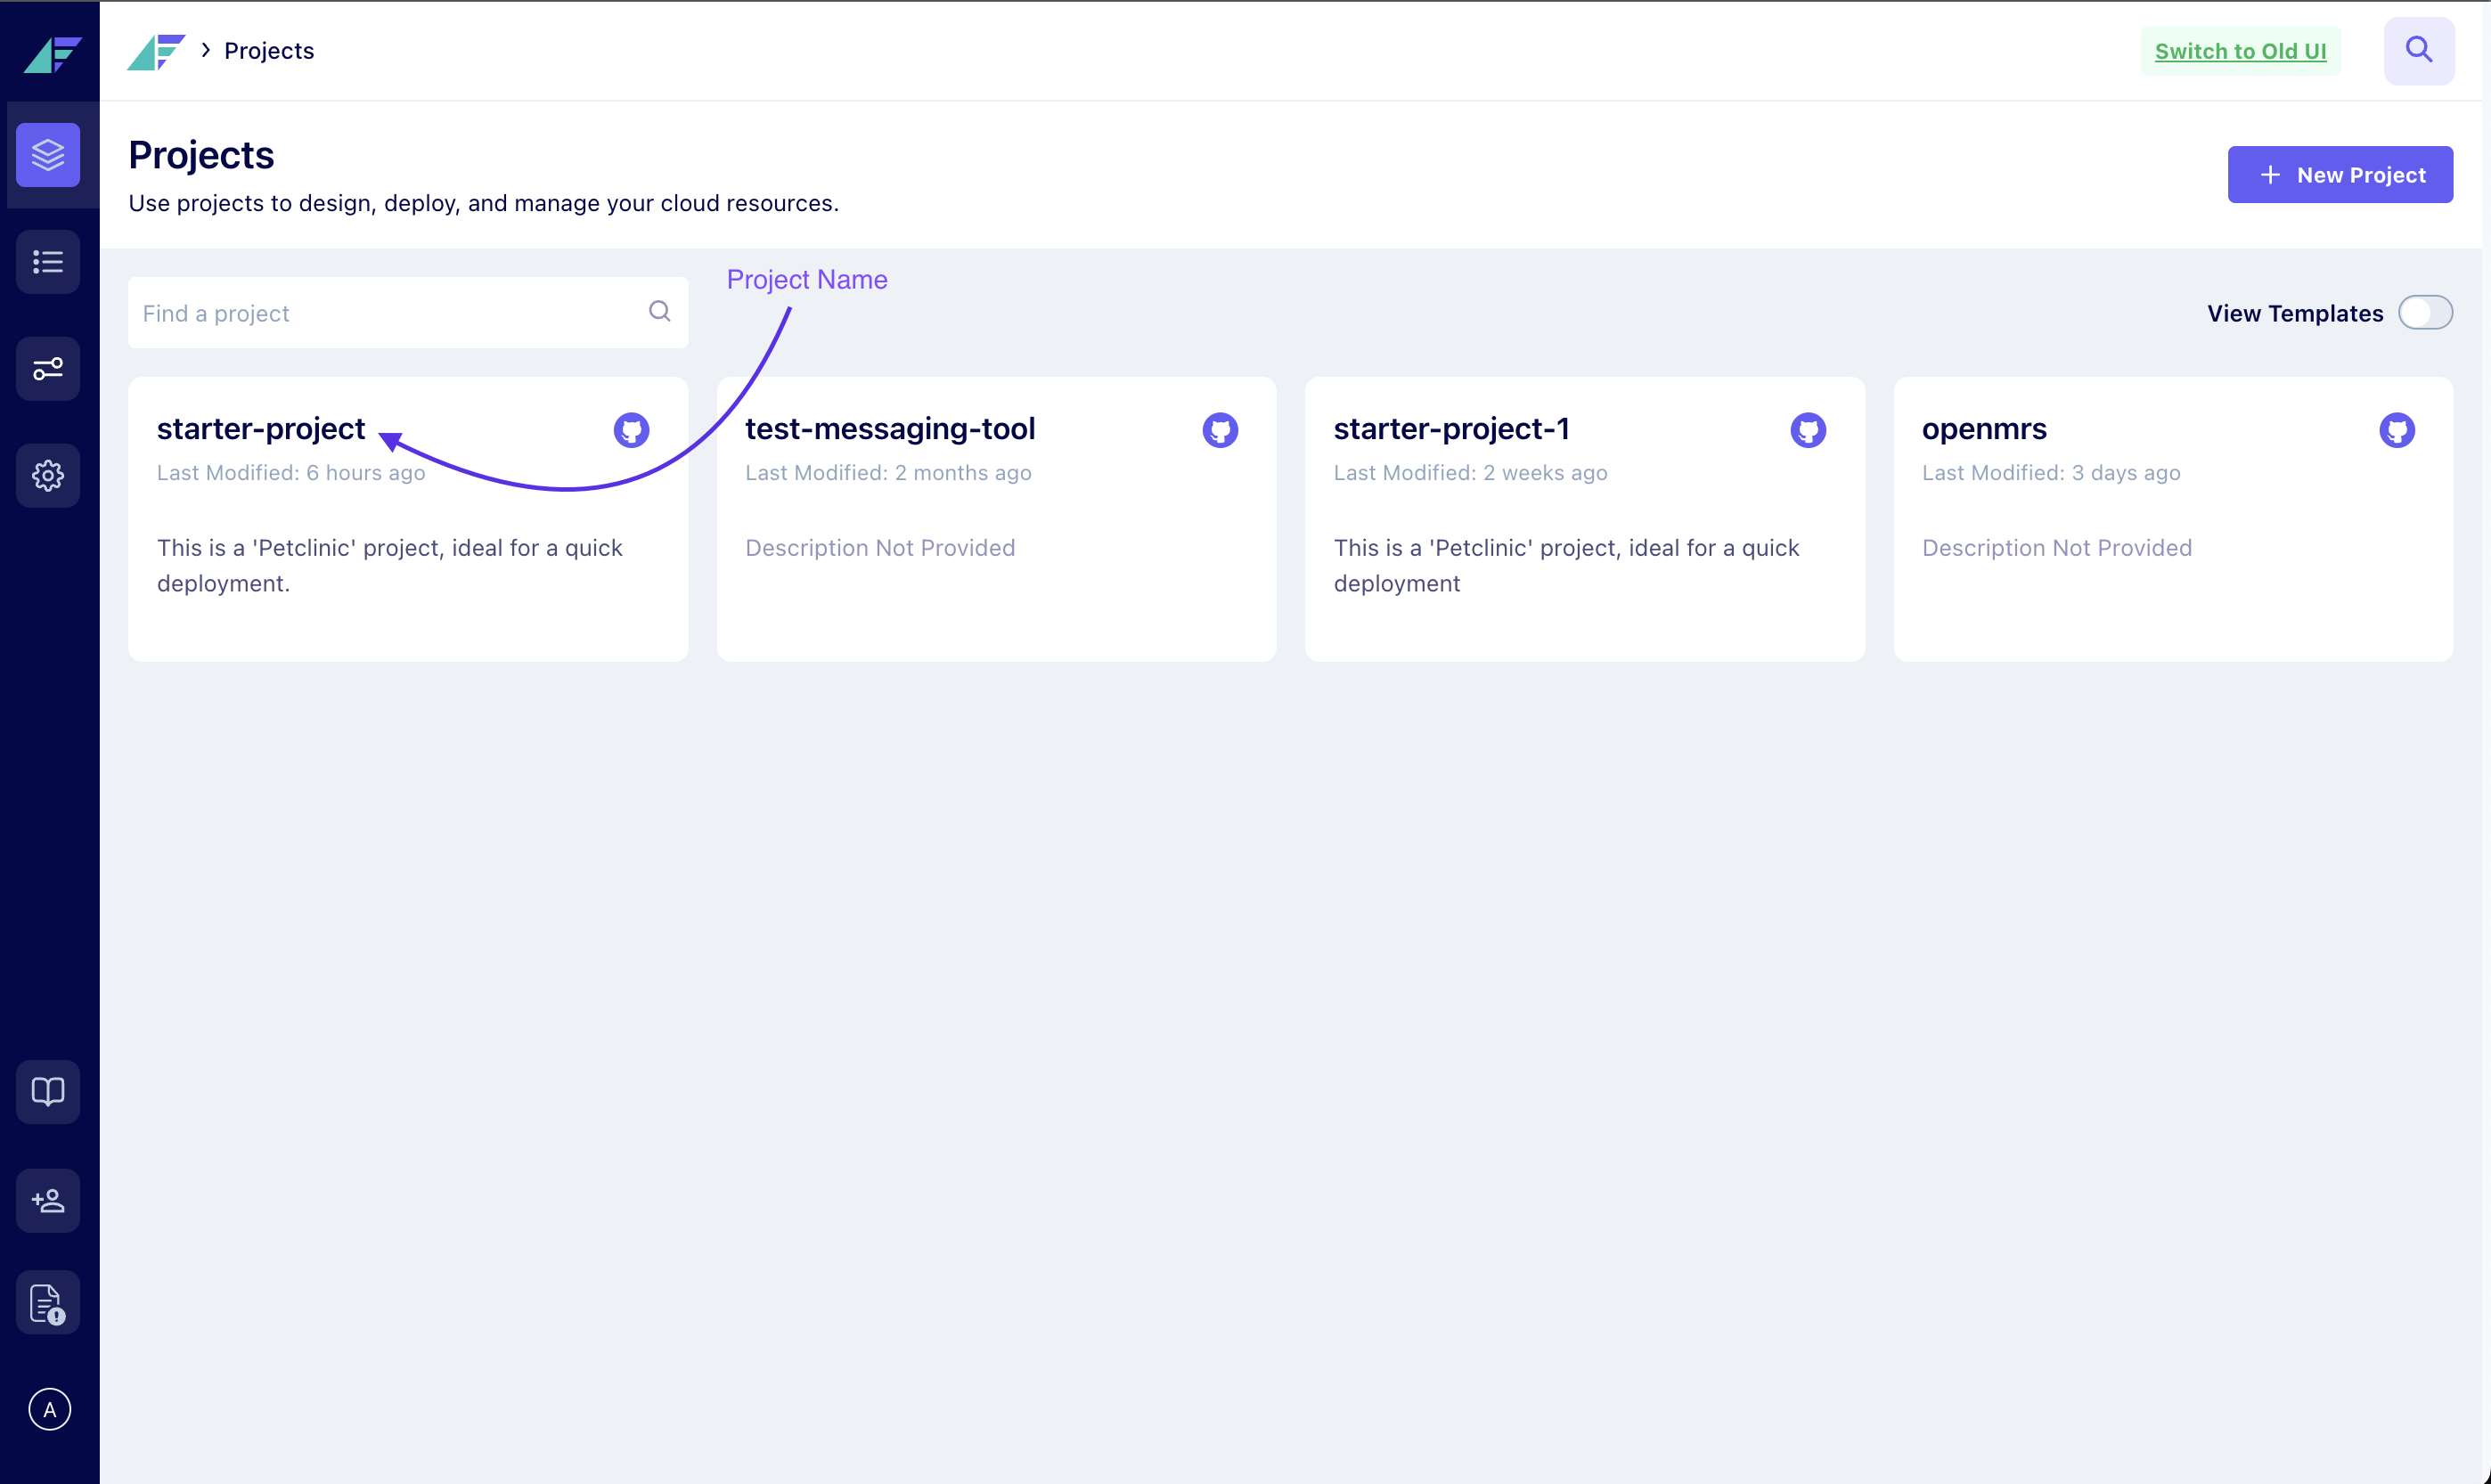
Your project name can be found in the Projects page of your Facets Control Plane UI, as shown below:
Run this command to enable preview mode for your project:
curl -s https://facets-cloud.github.io/facets-schemas/scripts/allow_preview_modules.sh | bash -s -- \
  -c <control-plane-url> \
  -u <your-email> \
  -t <your-token> \
  -p <project-name> \
  -a true
Troubleshooting & FAQ
Updated about 6 hours ago
Next: Publishing Your Module