Version-Controlled Blueprint Customization
Manage and track changes to your Blueprints using your version control systems. By creating a separate branch through the Facets Control Plane, you can make modifications and subsequently merge them back into the master branch via a pull request, thereby updating the Blueprint with the changes.
Note: This feature is available upon request. Contact Facets Support to enable this feature in your control plane.
How to create a branch in the Git repository from the Facets Control Plane?
- Open Blueprints and select the required Blueprint.
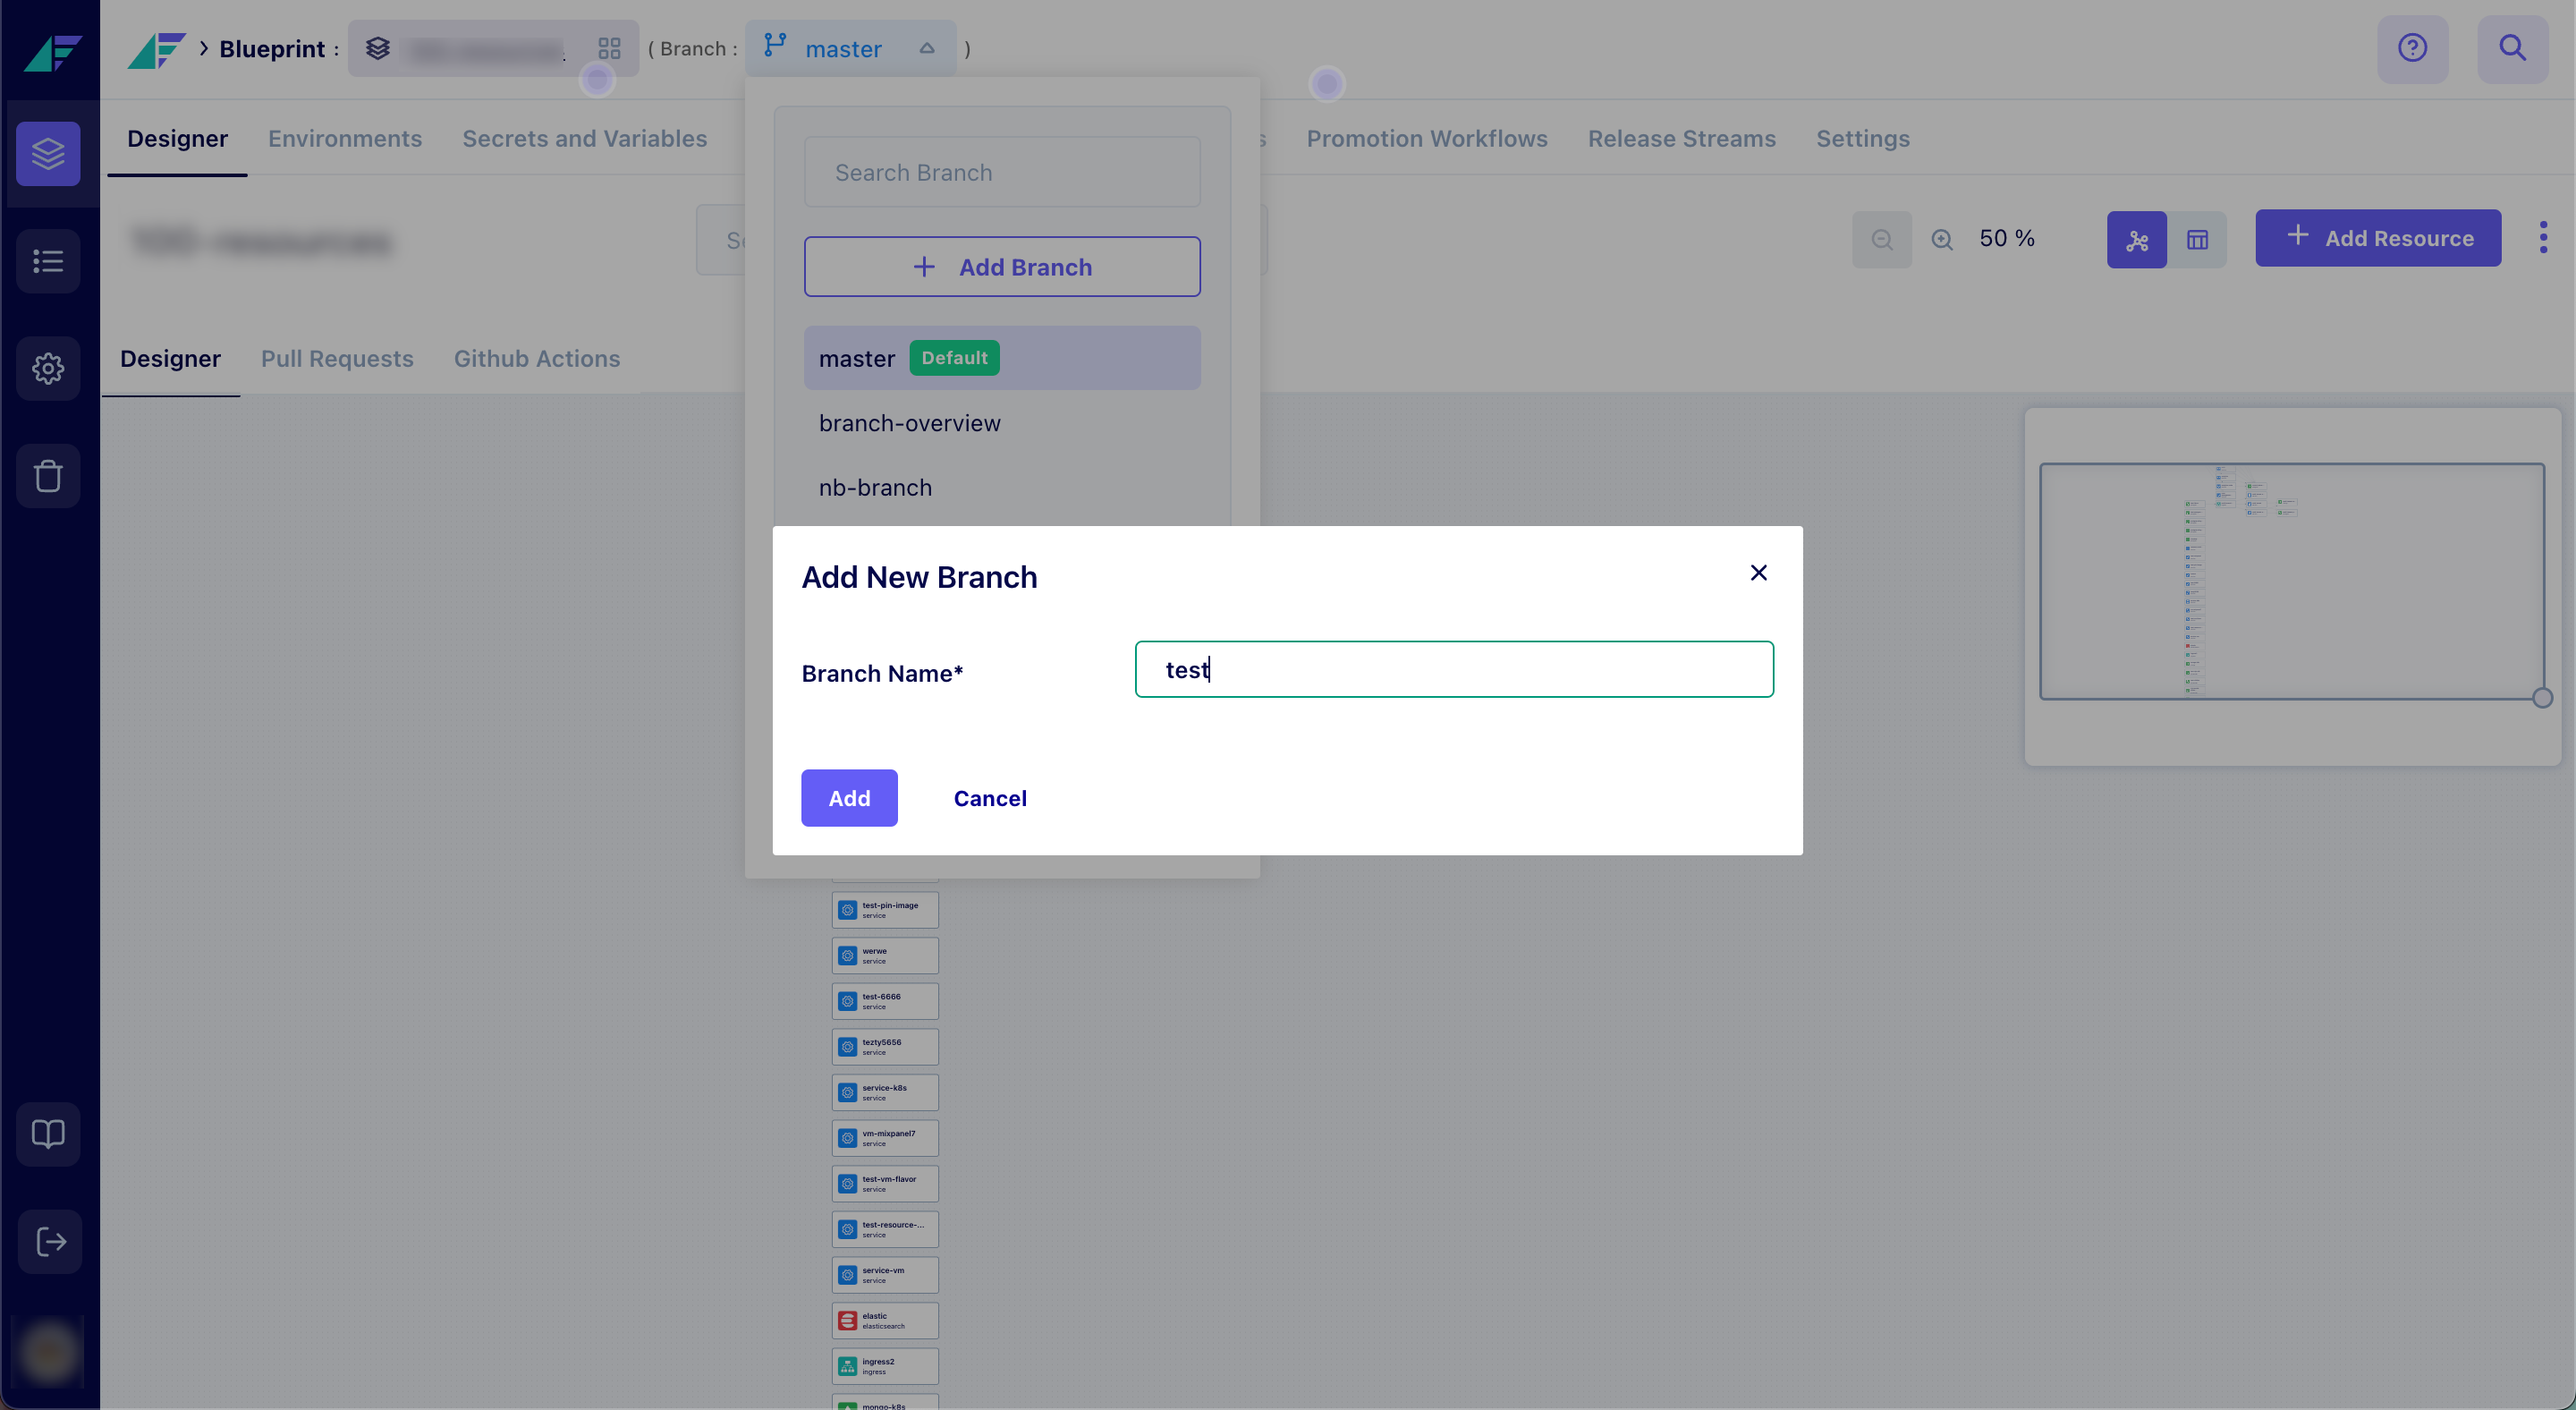
- In the Designer tab, you'll see the Blueprint's Branches in the breadcrumb at the top of the screen.
- Clicking on it will reveal a dropdown containing a list of the branches.
- To create a new branch in the repository, click on Add branch.
- In the pop-up, mention the Branch Name and click Add.
Click on the image to expand
You have successfully added a new branch to the Repository.
Note: You can Sync with Git to force synchronization between your Git repository and the Control Plane.
How to select an existing branch?
- In the Designer tab, click on the Blueprint's Branches in the breadcrumb at the top of the screen.
- This will reveal a dropdown containing a list of the branches.
- Search for the desired branch in the dropdown and select the branch.
- Click Apply.
You have successfully selected a branch.
FAQ
1. Why should I use the Version-Controlled Blueprint Customization feature?
Using this feature enhances accountability in managing Blueprint changes. It allows you to keep track of all changes made, ensuring your Blueprint is always up-to-date.
2. How can I access the Git branches in Facets?
The Git branches can be accessed from the breadcrumb in the Designer tab in Facets.
3. How do I merge my changes into the master branch?
After making changes in your separate branch, you can raise a pull request to merge these changes into the master branch.
Updated 6 months ago