Dynamic Launch (Preferred)
Before an environment can serve traffic or run workloads, it must be launched — the process of provisioning cloud infrastructure defined by your project blueprint. Launching creates the actual compute, networking, storage, and services in your target cloud account.
This guide covers the Launch Wizard for projects on the v1 project type, which uses a step-by-step guided experience tailored to your blueprint's actual resource requirements.
Launching an Environment
You can open the Launch Wizard from two places:
- Project Overview → Environment Actions → Select an Environment → Launch
- Environment Overview page → Click Launch in the header action buttons
The Launch button appears when the environment is in Stopped or Launch Failed state Environments list → Click the Launch option next to an environment that has not yet been launched.
Launch Wizard — Step by Step
The wizard adapts to your project's blueprint. The number of steps and the resources you configure depend on what is enabled in your environment. You can move between steps using the Back and Next buttons, or by clicking a step in the sidebar. You can only move forward to a step once the current step is valid.
Step 1: Choose Your Infrastructure
This is where you decide how and where your environment will run. It is the foundation for every subsequent step. There are 2 options in this:
| Options | Description |
|---|---|
| Create new infrastructure | You want Facets to provision fresh cloud resources (VPC, clusters, nodes) for this environment |
| Use existing infrastructure | You want to run this environment inside infrastructure that already exists in facets — such as a shared VPC or an existing Kubernetes cluste |
Step 2: Review Enabled Resources
This step shows you every resource defined in your project blueprint and lets you control which ones will be provisioned in this environment. Only the resources that are enabled will be provisioned in this environment.
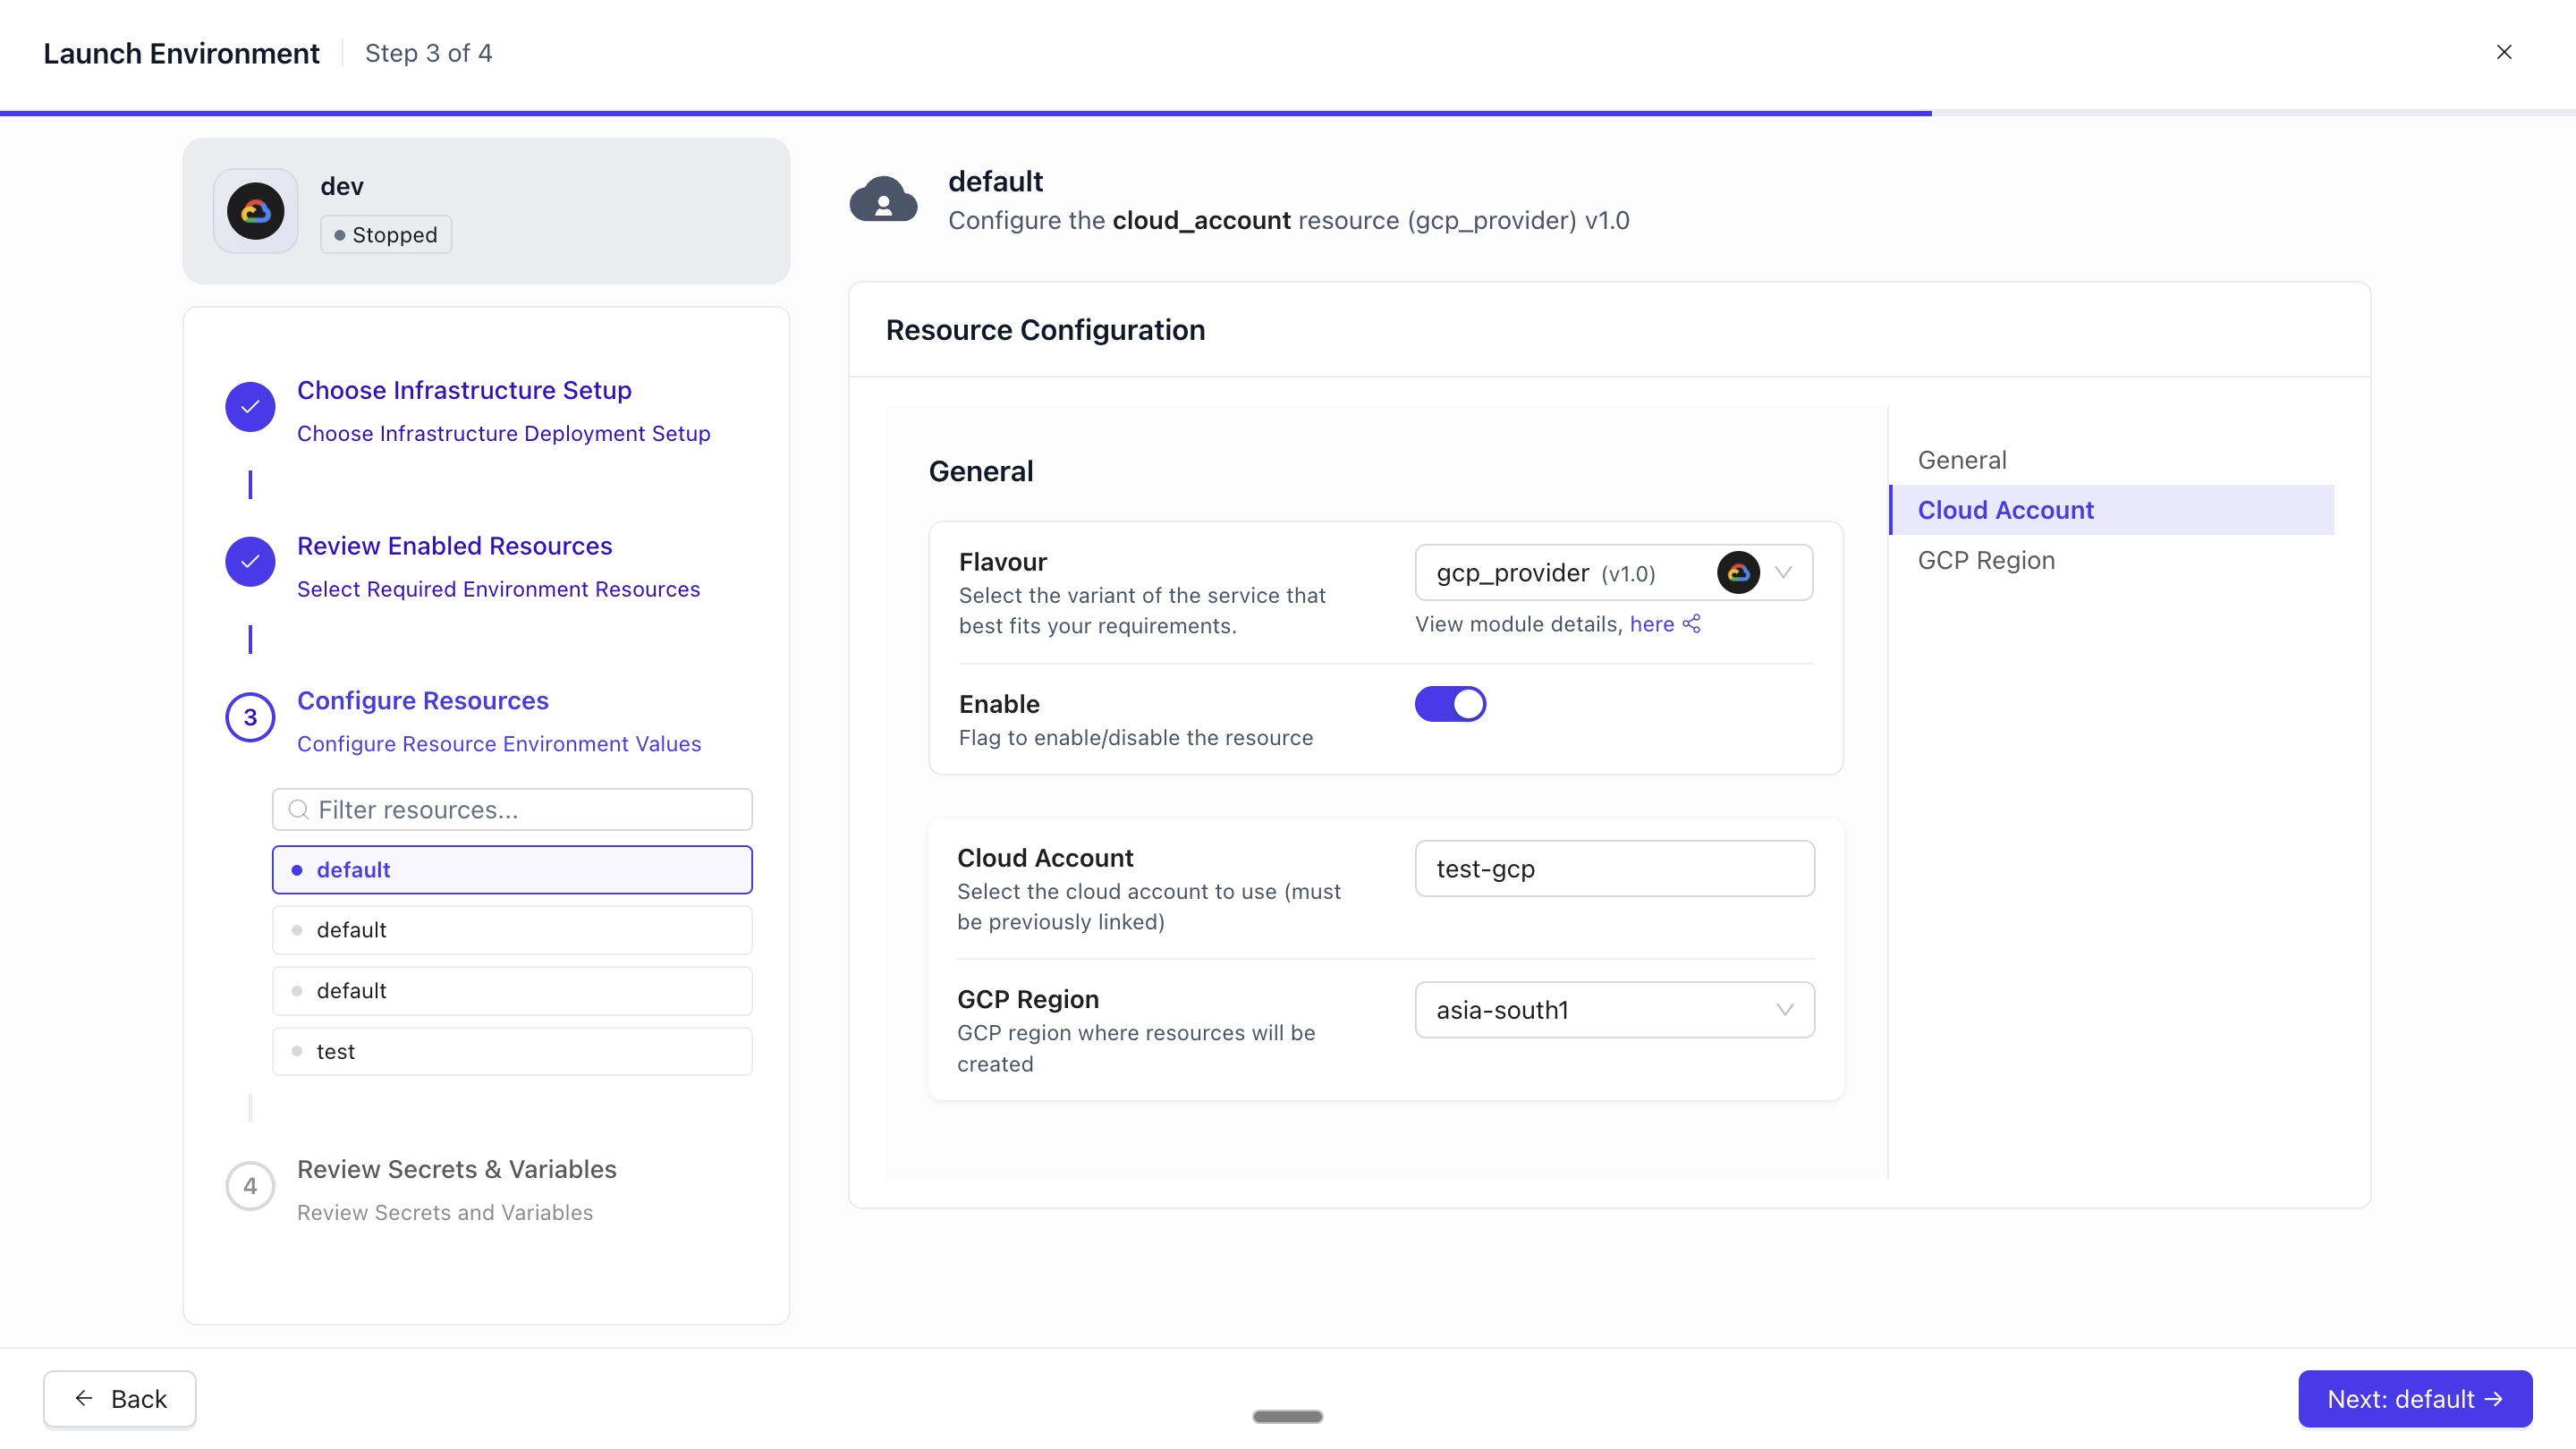
Step 3: Configure Resources
Based on the resources you enabled in the previous step, Facets automatically determines which resources need environment-specific configuration and presents a dedicated form for each one.
How It Works
Each resource that requires configuration for launching an environment appears as a sub-step in the sidebar. You work through them one at a time — filling in the fields for each resource before moving to the next. If a resource has no required configuration, it may not appear in this list.
Step 4: Review Secrets & Variables
Before launch, review and set values for all environment-specific variables and secrets defined in your project. Review and set values for secrets and variables that needs to be set for this environment.
Final Step: Launch Your Environment
Once all steps are complete, the Launch Environment button becomes active at the bottom of the wizard.
What Happens When You Click Launch
Facets runs the following in sequence:
- Configures your cloud infrastructure — Sends the cluster configuration (cloud account, region, instance types, settings) to your cloud provider
- Saves environment settings — Persists any settings configured in the Kubernetes setup step
- Triggers the launch release — Initiates a Terraform-based deployment that provisions all enabled resources
The wizard closes and you are returned to the Environment Overview page. The environment status changes to Launching.
After Launch Starts
- The Environment Overview will show the Launching status tag while provisioning is in progress.
- Navigate to the Releases tab to follow the deployment in real time — you can see each resource being provisioned and any errors that occur.
- Launch typically takes several minutes depending on the number and type of resources. You do not need to keep the page open. The launch runs on the platform and continues even if you navigate away or close your browser.
Launch Failed? Here's What to Do
If the launch encounters an error, the environment status changes to Launch Failed.
The Launch button reappears in the Environment Overview header. The first steps of the wizard (infrastructure configuration) are shown as read-only: they are locked because your cloud configuration was already partially applied.
How to Recover
- Open the Releases tab to read the error log and understand what failed
- Fix the root cause — this might mean correcting a resource configuration, adjusting a variable value, or resolving a cloud account permission issue
- Return to the Environment Overview and click Launch again to re-run the wizard
- On re-open, the wizard picks up where configuration left off — you can update resources and secrets without re-entering cloud details
If you need to start over completely, use the Destroy option (described below) to remove any partial infrastructure, then re-launch from scratch.
Destroying an Environment
Destroying an environment tears down all cloud infrastructure associated with it. This is a permanent, irreversible action — all provisioned resources (compute, storage, networking) will be deleted.
When to Destroy: The environment is no longer needed and you want to stop incurring cloud costs. A launch failed and you want to start provisioning fresh, without partial infrastructure.
How to Destroy: The Destroy action appears in the Environment Overview header only when the environment is in Launch Failed or Destroy Failed state.
Note: You cannot destroy a running environment directly. To decommission a running environment, first Scale Down (which suspends compute), and then work with your platform team to trigger a full destroy if needed.
Updated 9 days ago